Setting up your TV
CAUTION
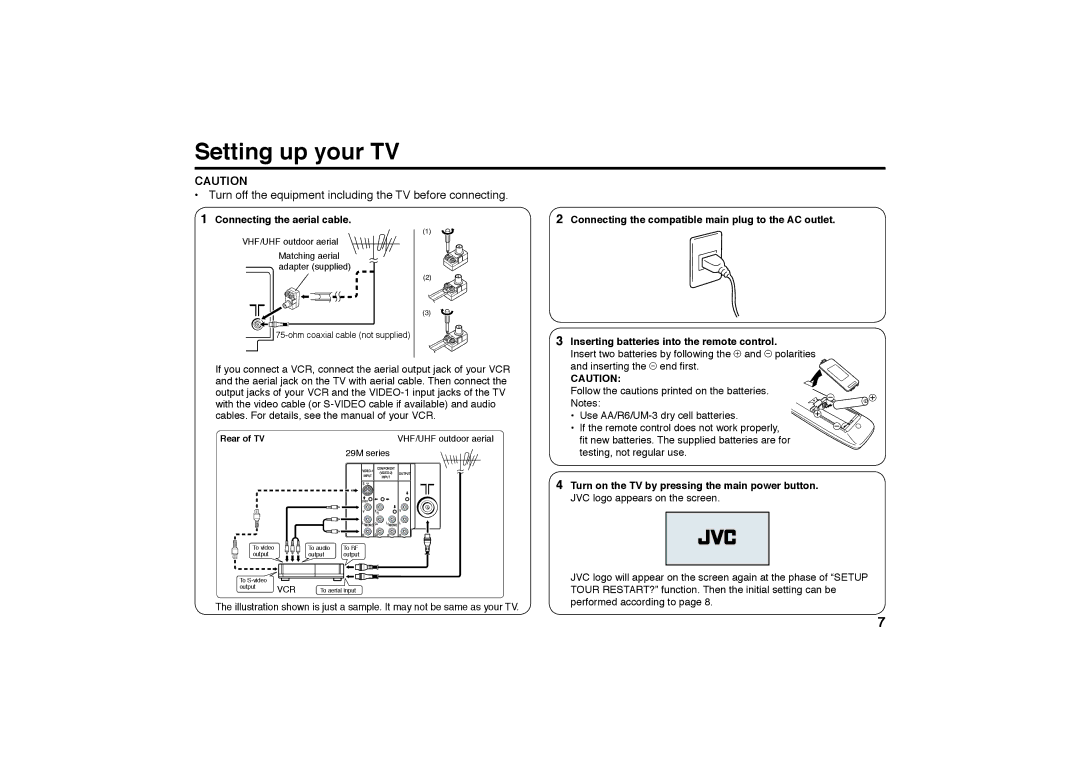
•Turn off the equipment including the TV before connecting.
1Connecting the aerial cable.
(1)![]()
VHF/UHF outdoor aerial
Matching aerial adapter (supplied)
(2)
(3)
If you connect a VCR, connect the aerial output jack of your VCR and the aerial jack on the TV with aerial cable. Then connect the output jacks of your VCR and the
2Connecting the compatible main plug to the AC outlet.
3Inserting batteries into the remote control.
Insert two batteries by following the + and - polarities
and inserting the - end first.
CAUTION:
Follow the cautions printed on the batteries. Notes:
• Use
Rear of TV
To video output
VHF/UHF outdoor aerial
29M series
COMPONENT |
| ||
| OUTPUT | ||
INPUT |
| ||
| INPUT |
| |
S |
|
|
|
OVER |
|
|
|
V | Y/V |
| V |
L/MONO CB | L/MONO | L | |
R | CR | R | R |
To audio | To RF |
output | output |
• If the remote control does not work properly, fit new batteries. The supplied batteries are for testing, not regular use.
4 Turn on the TV by pressing the main power button. |
JVC logo appears on the screen. |
To |
|
|
output | VCR | To aerial input |
|
The illustration shown is just a sample. It may not be same as your TV.
JVC logo will appear on the screen again at the phase of “SETUP |
TOUR RESTART?” function. Then the initial setting can be |
performed according to page 8. |
7