PRESENTATION (BASIC)
Printed material and 3-dimensional objects
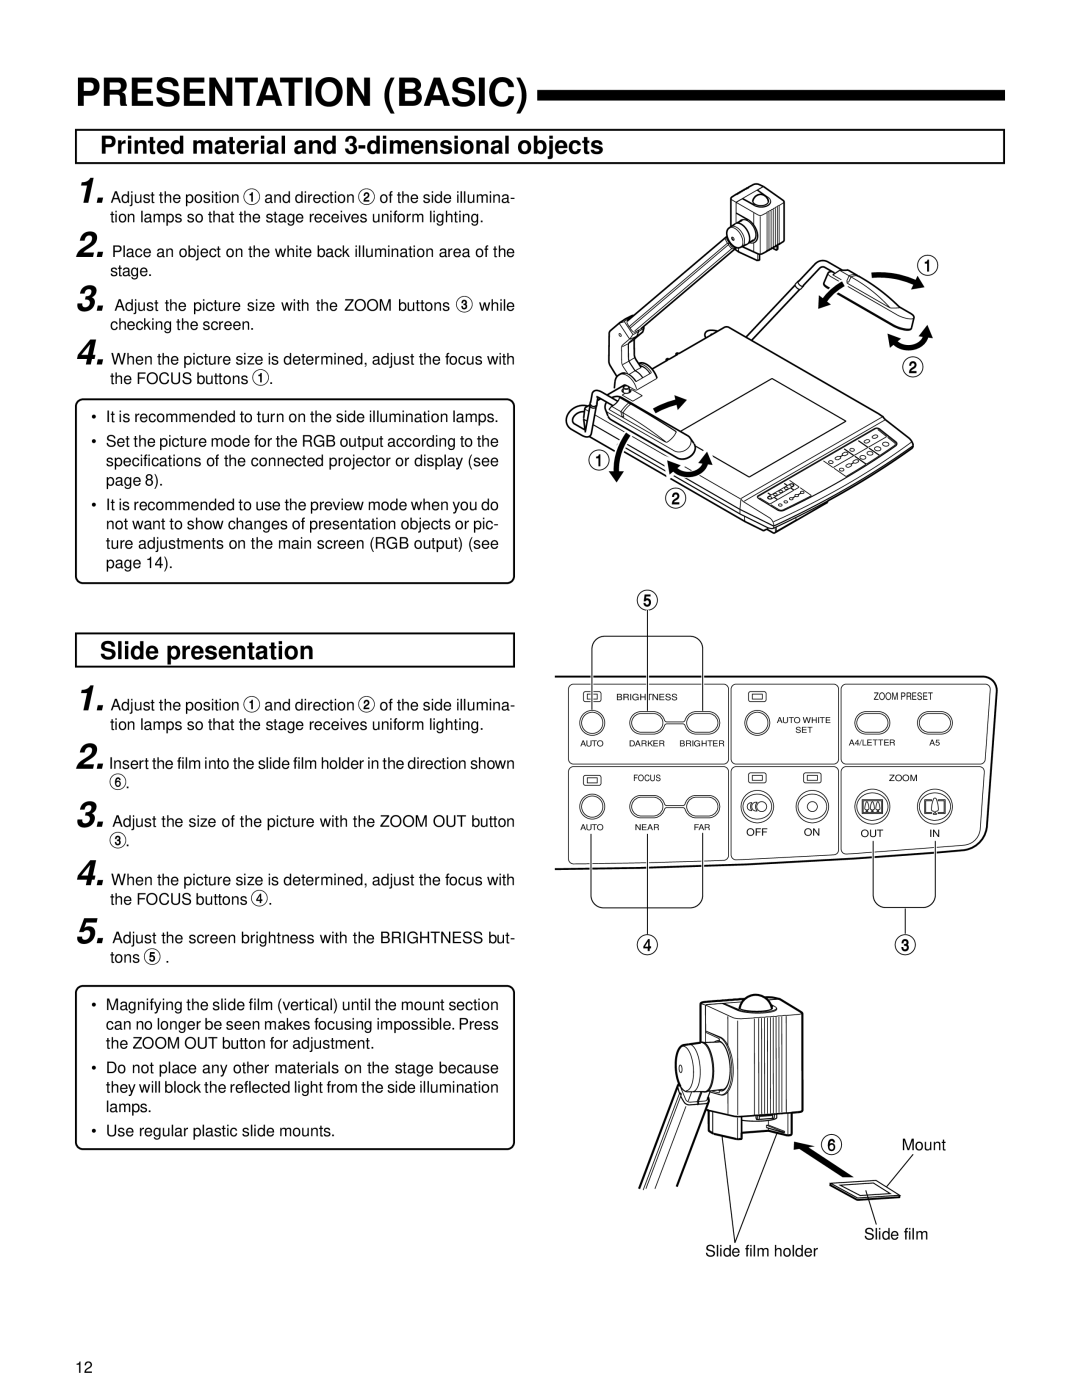
1. Adjust the position 1 and direction 2 of the side illumina- tion lamps so that the stage receives uniform lighting.
2. Place an object on the white back illumination area of the stage.
3. Adjust the picture size with the ZOOM buttons 3 while checking the screen.
4. When the picture size is determined, adjust the focus with
| the FOCUS buttons 1. |
|
• | It is recommended to turn on the side illumination lamps. |
|
• | Set the picture mode for the RGB output according to the | 1 |
| specifications of the connected projector or display (see |
page 8).
• It is recommended to use the preview mode when you do | 2 |
| |
not want to show changes of presentation objects or pic- |
|
ture adjustments on the main screen (RGB output) (see |
|
page 14). |
|
1
2
Slide presentation
1. Adjust the position 1 and direction 2 of the side illumina- tion lamps so that the stage receives uniform lighting.
2. Insert the film into the slide film holder in the direction shown 6.
3. Adjust the size of the picture with the ZOOM OUT button
3.
4. When the picture size is determined, adjust the focus with the FOCUS buttons 4.
5. Adjust the screen brightness with the BRIGHTNESS but- tons 5 .
•Magnifying the slide film (vertical) until the mount section can no longer be seen makes focusing impossible. Press the ZOOM OUT button for adjustment.
•Do not place any other materials on the stage because they will block the reflected light from the side illumination lamps.
•Use regular plastic slide mounts.
5
| BRIGHTNESS |
|
|
| ZOOM PRESET | |
|
|
|
| AUTO WHITE |
|
|
|
|
|
| SET |
|
|
AUTO | DARKER | BRIGHTER |
|
| A4/LETTER | A5 |
| FOCUS |
|
|
| ZOOM |
|
AUTO | NEAR | FAR | OFF | ON | OUT | IN |
|
|
| ||||
43
6 Mount
Slide film
Slide film holder
12