Quick Setup | Connections |
|
|
Connecting to JVC AV Compu Link
JVC’s AV compu link feature makes playing video tapes or DVDs totally automatic. Simply insert a
•The AV compu link cable may be included with the JVC AV compu link unit you wish to connect. If it is not, contact JVC Parts Department at
•AV Compu Link can only be used with JVC brand products.
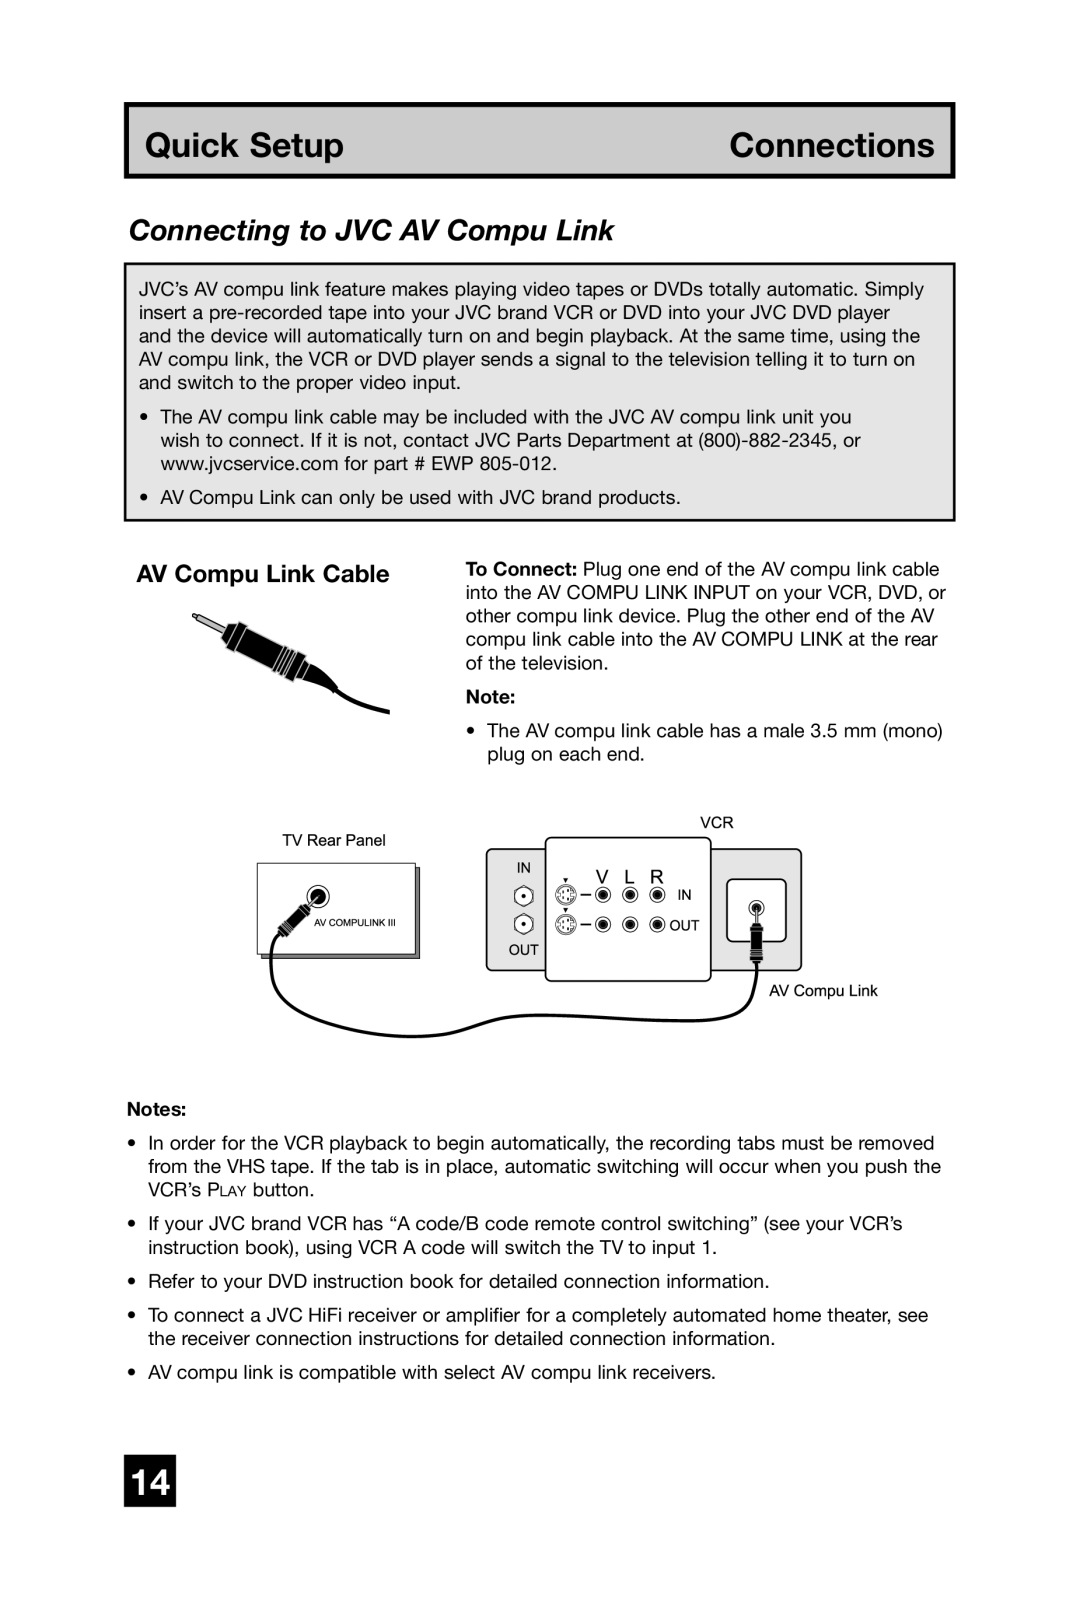
AV Compu Link Cable
Notes:
To Connect: Plug one end of the AV compu link cable into the AV COMPU LINK INPUT on your VCR, DVD, or other compu link device. Plug the other end of the AV compu link cable into the AV COMPU LINK at the rear of the television.
Note:
•The AV compu link cable has a male 3.5 mm (mono) plug on each end.
•In order for the VCR playback to begin automatically, the recording tabs must be removed from the VHS tape. If the tab is in place, automatic switching will occur when you push the VCR’s PLAY button.
•If your JVC brand VCR has “A code/B code remote control switching” (see your VCR’s instruction book), using VCR A code will switch the TV to input 1.
•Refer to your DVD instruction book for detailed connection information.
•To connect a JVC HiFi receiver or amplifier for a completely automated home theater, see the receiver connection instructions for detailed connection information.
•AV compu link is compatible with select AV compu link receivers.
14