Copying to DVD
3 Copy Options
o Copying All Files to the DVD | P. 9 |
o Copying by Date | P. 10 |
o Copying by Event | P. 12 |
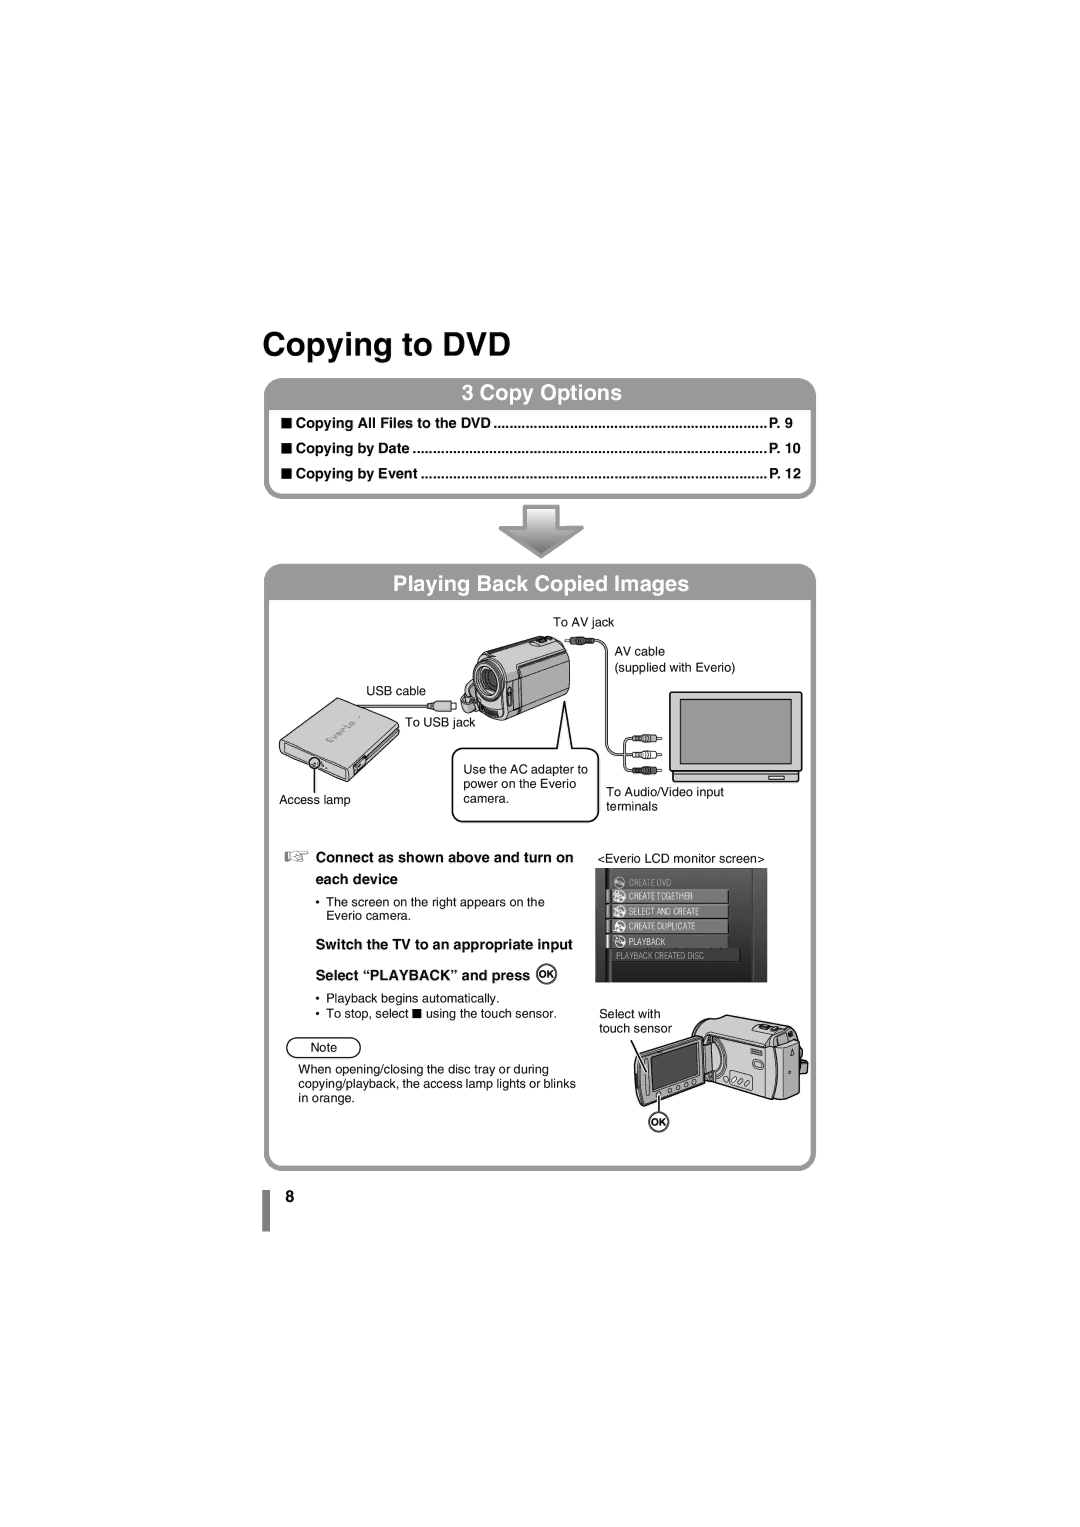
Playing Back Copied Images
| To AV jack | ||
|
| AV cable | |
|
| (supplied with Everio) | |
| USB cable |
| |
| To USB jack |
| |
| Use the AC adapter to |
| |
| power on the Everio | To Audio/Video input | |
Access lamp | camera. | ||
terminals | |||
|
| ||
A Connect as shown above and turn on each device
•The screen on the right appears on the Everio camera.
B Switch the TV to an appropriate input C Select “PLAYBACK” and press ![]()
•Playback begins automatically.
•To stop, select o using the touch sensor.
Note
zWhen opening/closing the disc tray or during copying/playback, the access lamp lights or blinks in orange.
<Everio LCD monitor screen>
CREATE DVD
CREATE TOGETHER
SELECT AND CREATE
CREATE DUPLICATE
PLAYBACK
PLAYBACK CREATED DISC
Select with touch sensor
8