2 


 Preparation
Selecting Connecting Devices
●Do not turn on the power until connection is complete.
●The connection procedures differ according to the device used. For details, refer to the instruction manual of the device to be connected.
●For audio output, connect the device to an amplifier.
●The images may not be displayed depending on the devices and cables to be connected.
Use an HDMI compliant cable (sold separately) with the HDMI logo.
●It may not be possible to connect to this unit depending on the dimension of the connector cover of the cables to be connected.
|
|
|
| DVD Recorder |
| DVD Player | ||||||||
|
|
|
|
|
|
|
|
|
|
|
|
|
|
|
|
|
|
|
|
|
|
|
|
|
|
|
|
|
|
|
|
|
|
|
|
|
|
|
|
|
|
|
|
|
|
|
|
|
|
|
|
|
|
|
|
|
|
|
|
|
|
|
|
|
|
|
|
|
|
|
|
|
|
|
|
|
|
|
|
|
|
|
|
|
|
|
|
|
|
|
|
|
|
|
|
|
|
|
|
|
|
|
|
|
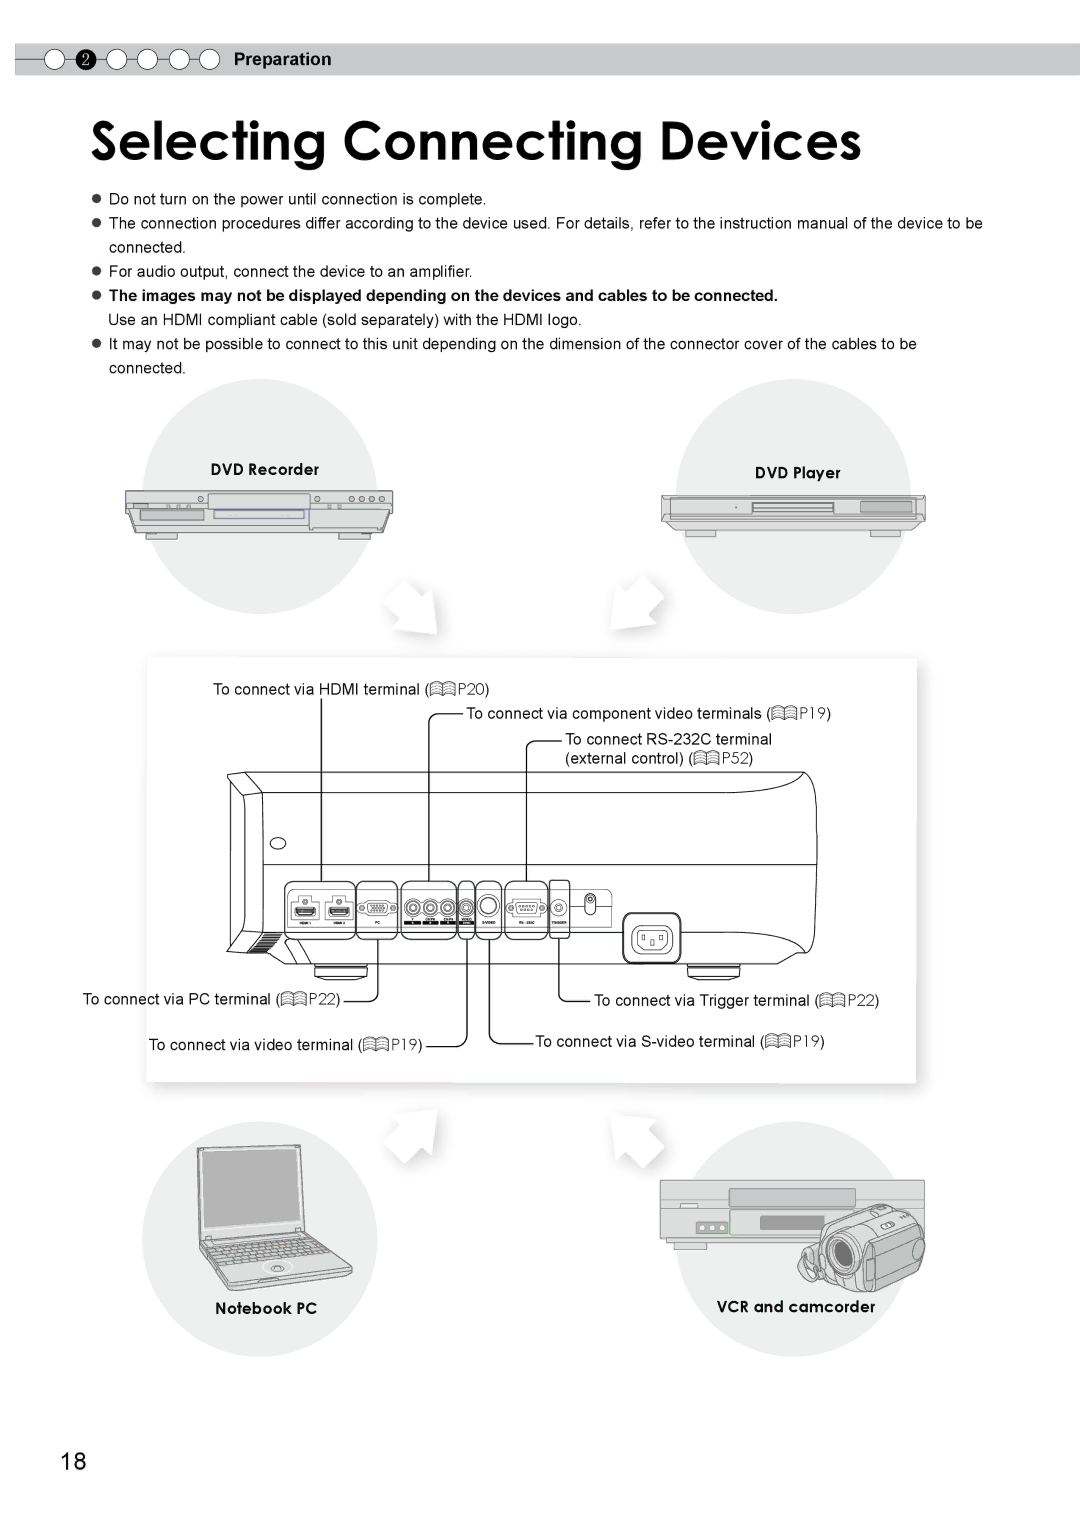
To connect via HDMI terminal ( | P20) |
|
|
| To connect via component video terminals ( | P19) | |
| To connect |
| |
| (external control) ( | P52) |
|
To connect via PC terminal ( | P22) |
| To connect via Trigger terminal ( | P22) | |
To connect via video terminal ( | P19) | To connect via | P19) |
| |
Notebook PC | VCR and camcorder |
18