During charging or discharging, the camcorder cannot be operated.

Charging and discharging is not possible if the wrong type of battery is used.

When charging the battery pack for the first time or after a long storage period, the CHARGE lamp % may not light. Remove the battery pack from the camcorder, then try charging again.

If a fully-charged battery’s operation time remains extremely short, the battery is worn out. Please purchase a new one.

Perform charging where the temperature is between 10°C and 35°C (50°F and 95°F). 20°C to 25°C (68°F to 77°F) is the ideal temperature range for charging. If the environment is too cold, charging may be incomplete.

Charging time varies according to the ambient temperature and the status of the battery pack.

Since the AC Adapter processes electricity internally, it becomes warm during use. Be sure to use it only in well-ventilated areas.

The following operation stops charging or discharging:

• Set the Power Switch 0 to “ ”, “ ” or “ ”.

• Disconnect the AC Adapter from the camcorder.

• Unplug the AC Adapter from the AC outlet.

• Detach the battery from the camcorder.

Using the optional AA-V15 AC Power Adapter/ Charger, you can charge the BN-V11U/V12U/ V20U/V400U battery pack without the camcorder. However, it cannot be used as an AC adapter.

To avoid interference with reception, do not use the AC Adapter near a radio.

Recording time is reduced significantly when Zoom or Record-Standby mode is engaged repeatedly.

Before extended use, it is recommended that you prepare enough battery packs to cover 3 times the planned shooting time.

Date/Time Settings

1)Set the Power Switch 0 to “ ”.

2)Press the MENU Wheel 1 in. The Menu Screen appears.

3)Rotate the MENU Wheel 1 to select

4TO SYSTEM MENU” and press it to display SYSTEM MENU. Rotate the MENU Wheel 1 to select “4NEXT” and press it to display the next page.

4)Rotate the MENU Wheel 1 to select “DATE/ TIME” and press it. The DATE/TIME Menu appears.

5)To set “YEAR”, “MONTH”, “DAY” or “TIME” (hour/minute), rotate the MENU Wheel 1 to select the desired item, and press it. When the setting begins blinking, rotate the MENU Wheel 1 until the correct setting appears and then press it. The setting stops blinking.

6)When none of these settings (“YEAR”,

“MONTH”, “DAY”, “TIME”) blinks, rotate the MENU Wheel 1 to select “EXIT”, and press it. The Menu Screen reappears with the highlight bar on “4RETURN”.

7)Press the MENU Wheel 1 in to close the Menu Screen.

To display the date and time in the camcorder’s

display and on a connected TV, see DATE/TIME DISP. ( pg. 19) in CAMERA MENU.

The date/time cannot be stored in memory if the built-in clock battery runs out. Consult an authorized JVC dealer for replacement, or set the date/time as necessary before you start shooting.

1


0


DAT E / T I ME


YEAR

2

0 0 2


MONTH


JUN


DAY


2 8


12-hour indication

T I ME

PM 8

: 2 0


with AM or PM

EX I T

7

Page 7
Image 7
JVC GR-AX770 manual Date/Time Settings, With AM or PM

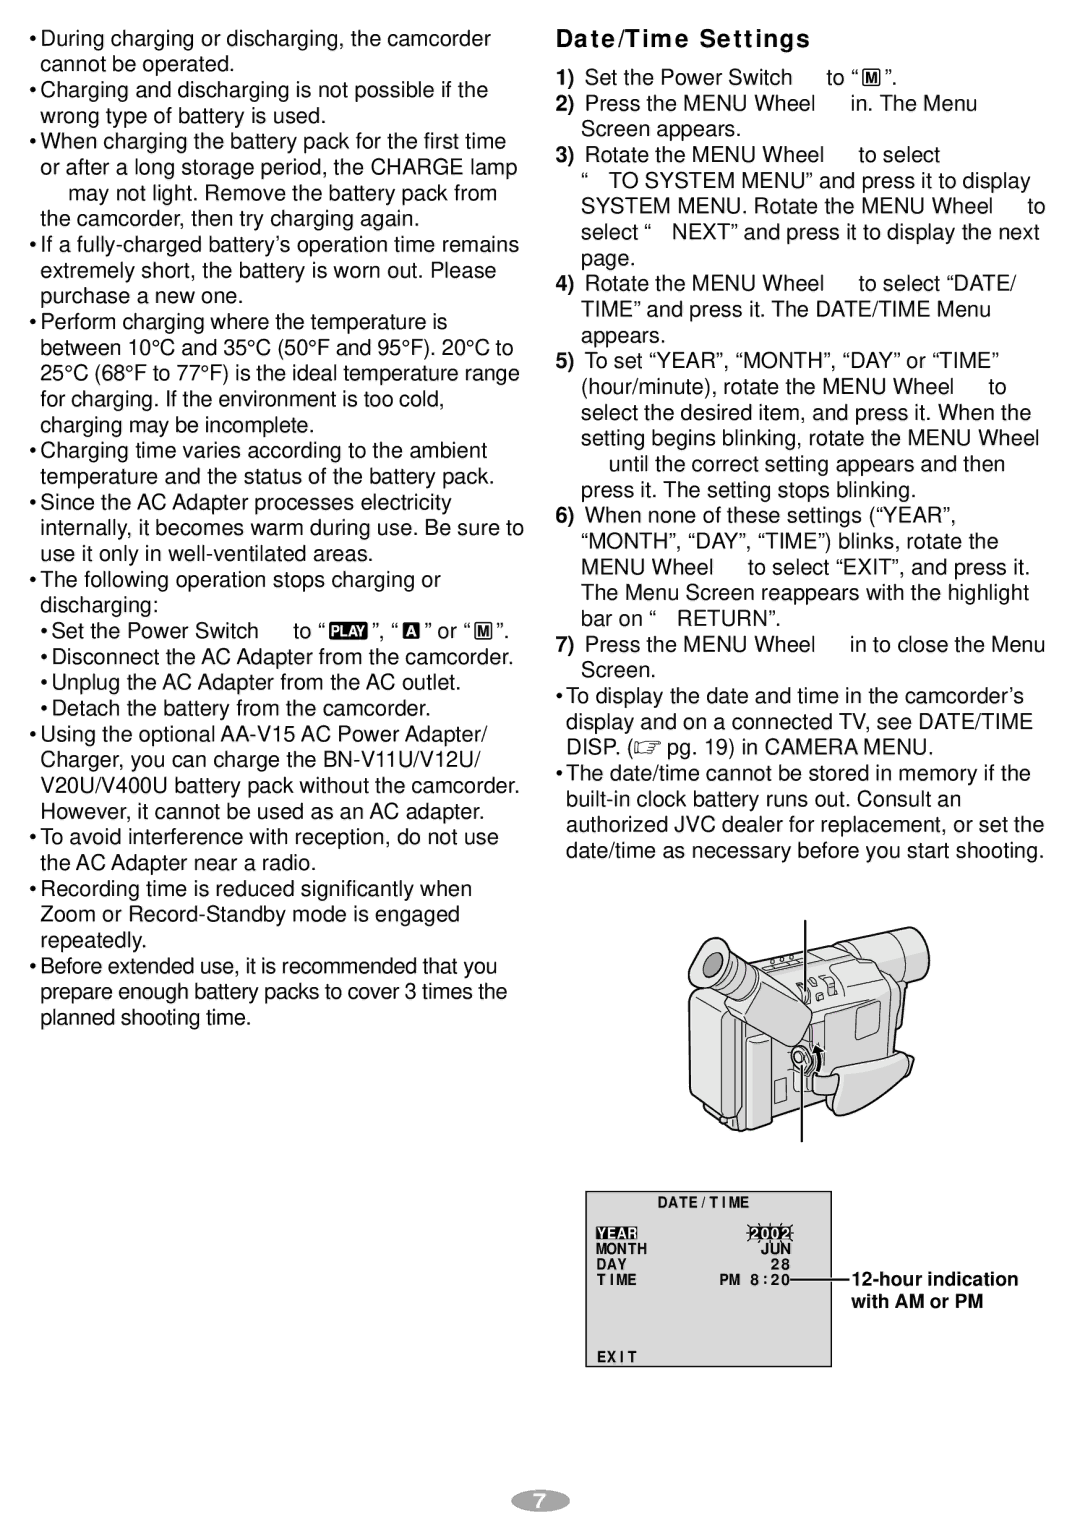
GR-AX770 specifications

The JVC GR-AX770 is a camcorder that emerged in the late '90s, notable for its compact design, versatility, and array of features tailored for both amateur videographers and professionals. This model is part of JVC's renowned line of compact camcorders that aimed to deliver high-quality video while maintaining ease of use.

One of the defining characteristics of the JVC GR-AX770 is its lightweight design, making it highly portable. Weighing in at around 1.5 kilograms, it is designed for users who want to capture memories on the go without the burden of heavy equipment. The camcorder features a sleek, user-friendly interface that allows for effortless operation, ensuring that even those new to videography can easily capture stunning footage.

The GR-AX770 boasts a powerful 700x digital zoom and a 34x optical zoom, providing flexibility for capturing distant subjects without sacrificing image quality. With its 3CCD imaging system, this camcorder captures vibrant colors and sharp details, significantly improving overall video quality compared to traditional single-chip systems. The advanced image stabilization technology also helps reduce shaky footage, an essential feature for handheld shooting.

Another key feature of the GR-AX770 is its ability to record in Super VHS format, which offers enhanced resolution and dynamic range compared to standard VHS. This allows users to achieve professional-grade results in their recordings. Additionally, the camcorder supports analog output, enabling seamless connectivity to television sets and other playback devices, allowing for easy viewing of your creations.

The GR-AX770 includes built-in effects and transitions, which enhance creative possibilities for videographers. With a selection of digital effects, users can experiment with unique looks that add flair and personalization to their videos. The camcorder also supports various lighting conditions, thanks to its built-in flash and low-light capabilities, allowing for quality recordings in challenging environments.

In summary, the JVC GR-AX770 encapsulates the innovation of its era, marrying portability with advanced technology. Its combination of features such as optical and digital zoom, 3CCD imaging, Super VHS recording, and creative effects make it a noteworthy choice for anyone looking to delve into the world of video recording. Whether capturing family events, travel memories, or creative projects, the GR-AX770 remains a beloved piece of equipment for many enthusiasts.