
GR-AXM270 specifications
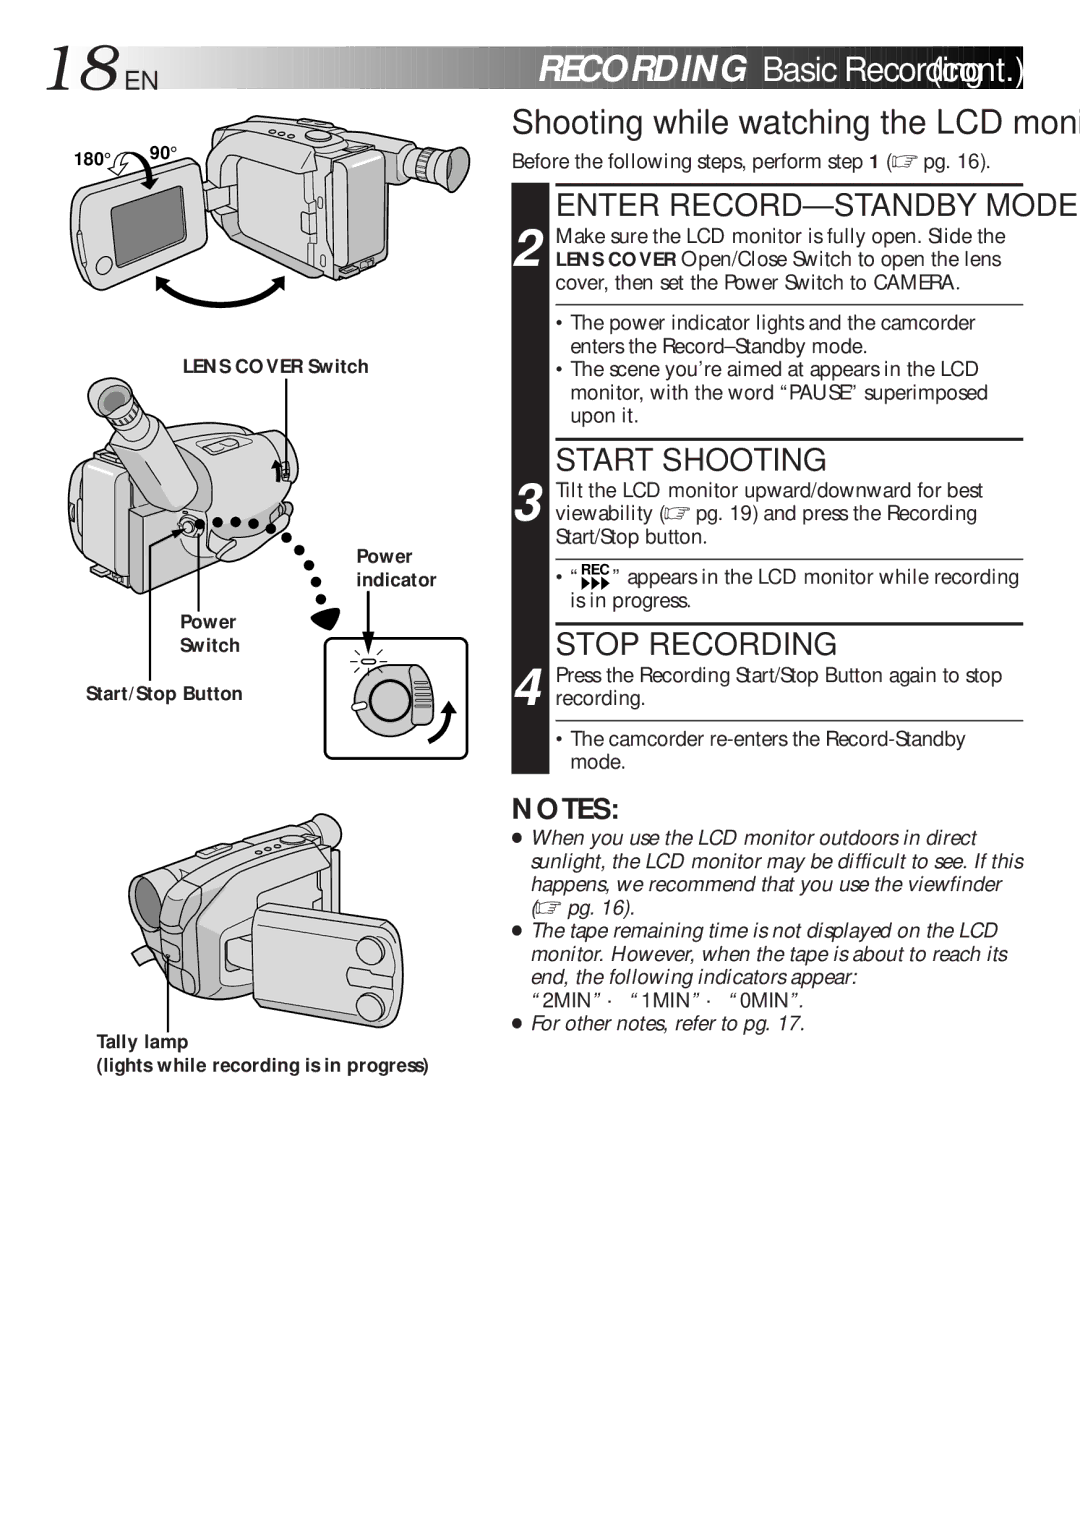
The JVC GR-AXM270 camcorder, introduced in the mid-1990s, is a remarkable example of compact video recording technology from that era. Designed with the consumer market in mind, the GR-AXM270 stands out for its ease of use, portability, and solid performance, making it a favorite for family events, vacations, and personal projects.One of the key features of the JVC GR-AXM270 is its compact design, which allows for easy handling and storage. Weighing in at just under two pounds, it is lightweight enough for extended use without causing fatigue. The camcorder is equipped with a 16x optical zoom lens, which enables users to capture detailed close-ups while still maintaining clarity in longer shots. This flexibility is supported by JVC’s advanced image stabilization technology, which reduces shaky footage, ensuring that videos are smooth and professional-looking.
The GR-AXM270 utilizes Super VHS technology, which provides enhanced video quality compared to standard VHS formats. This allows users to record and playback with greater clarity and color accuracy. It also features a built-in stereo microphone, delivering quality audio that complements the high-resolution video capturing capabilities. Furthermore, the camcorder supports a range of recording speeds, offering flexibility for different situations, from extended recordings to higher-quality footage.
Another highlight of the GR-AXM270 is its user-friendly interface, characterized by a clear LCD viewfinder. This feature assists in framing shots accurately and reviewing recorded footage easily. The camcorder also includes various shooting modes, allowing users to adapt to different environments and lighting conditions with ease.
For convenience, the JVC GR-AXM270 provides various connection options, including the ability to connect to a television for instant playback. This versatility makes it simple for users to show their footage to family and friends right after capturing special moments.
In summary, the JVC GR-AXM270 is a well-rounded camcorder that combines innovative technology with ease of use. Its combination of lightweight design, high-quality optics, and practical features make it a notable choice for individuals seeking to document their lives with a reliable and user-friendly video recording device.