
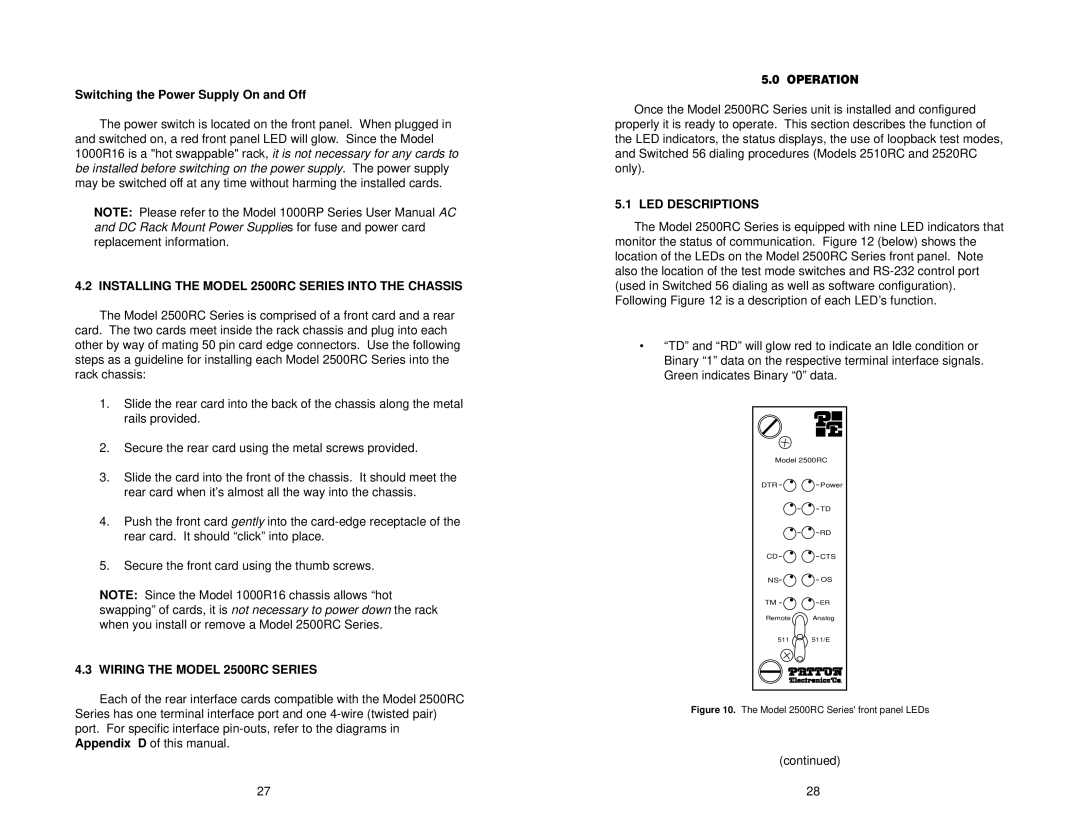
2510RC, 2500RC, 2520RC specifications
The Patton Electronics 2520RC, 2510RC, and 2500RC are versatile remote access devices designed to facilitate secure and efficient communication for various applications. These models are recognized for their robust performance, scalability, and advanced technology, making them ideal for industries such as telecommunications, information technology, and remote monitoring.The Patton 2520RC is renowned for its dual Ethernet port functionality, supporting both LAN and WAN connections. This feature ensures seamless data transfer and allows for the integration of multiple devices within a network. The device supports a range of protocols including TCP/IP, allowing for compatibility with various network environments. Robust security features, including VPN options, ensure that data transmissions remain secure and protected against unauthorized access. Additionally, the 2520RC is equipped with advanced monitoring and management capabilities that enable network administrators to keep track of performance metrics in real-time.
Moving to the 2510RC, this device is particularly well-suited for applications requiring voice over IP (VoIP) functionality. It supports a variety of codecs, enabling high-quality voice communication over data networks. The 2510RC also includes features for echo cancellation and noise reduction, ensuring clarity during VoIP calls. Its integration capabilities allow it to work seamlessly with existing telephony systems and provides flexible connectivity options to adapt to different business needs.
The 2500RC is the entry-level model of this series, designed with simplicity and effectiveness in mind. It features one Ethernet port and is particularly suitable for smaller networks or remote locations. Although it has fewer advanced features compared to its siblings, the 2500RC maintains reliability and functionality crucial for basic communication needs. Its compact design makes it easy to deploy in tight spaces, and its ease of installation means that users can be up and running quickly without extensive configuration.
All three models incorporate Patton’s commitment to high-quality manufacturing and customer support. They are built to withstand harsh conditions, ensuring durability for long-term use. Featuring power over Ethernet (PoE) support, these devices can simplify installation by reducing the need for additional power sources.
In summary, the Patton Electronics 2520RC, 2510RC, and 2500RC offer a range of features and technologies designed to meet various remote access and communication needs. Their versatility, combined with robust security measures and easy management tools, make them top choices for businesses looking to enhance their connectivity solutions.