GR-AXM917UM English
For clock operation and remote control unit
Dear Customer
It is recommended that you
This unit is produced to comply with Standard IEC Publ
Power Sources
Power Cord Protection
Power Lines
Overloading
Accessories
Cleaning
Damage Requiring Service
Replacement Parts
Zoom Zoom out
Cassettes marked can be used with this camcorder
Using the battery pack
To remove the battery pack
Slide Battery Release and pull out the battery pack
Image you shoot is recorded onto a video tape
Open/Close Ring Set to Auto or PRO
Quick Operation Guide D.S.C. EN7
Snapshot Button
Contents
Cassette Adapter
Software programs
Using the Battery Pack
Power
Charging the Battery Pack
Using AC Power
Using a CAR Battery
Charge Marker
Choose which one means charged and which means discharged
Clock Lithium Battery Insertion/Removal
Getting Started
Date/Time Settings
Recording Mode Setting
Tape Length Setting
EN Getting Started
Cont
Loading/Unloading a Cassette
Open LCD Monitor
Open Cassette Holder
Close Cassette Holder
Grip Adjustment
Viewfinder Adjustment
Adjust Length
Shoulder Strap Attachment
Tripod Mounting
Attach Strap
Power Switch Position
Basic Recording
Load a Cassette
Start Shooting
Tape remaining time indicator
LCD Monitor/Viewfinder Indications
Stop Recording
Press Display Button
Before the following steps, perform pg
Power Switch Recording Start/Stop Button
Power lamp Tally lamp Lights while recording is in progress
Brightness Control
Journalistic Shooting
Interface Shooting
Still Image Storage
Mode Selection
Basic Shooting
Remaining number of shots 30 29
Snapshot mode with no frame
Motor Drive mode
Feature Picture Mode Setting
Snapshot Button System Select Switch Menu Button
Picture mode display
Normal Screen
EN25
Snapshot
Recording Basic Features
Snapshot Mode Selection
Display ex. Pin-Up
If you press during Record-Standby mode
Snapshot Recording
Zoom
Basic Features
Push the Power Zoom Lever towards T
Feature Quick Review
Feature Picture Stabilizer
To check the end of the last recording
To re-record certain segments
Light OFF/AUTO/ON Switch
Feature Video Light
To brighten the scene when natural lighting is too dim
Modeengage FADE- or WIPE-STANDBY
Advanced Features
Select Mode
Program AE With Special Effects
Press P.AE to cycle through the modes as shown on the left
Sepia
Sports
Twilight
ND Effect
Recording Advanced Features
Date/Time Insert
Monitor, as well as to record them manually or
Automatically
Access Title Menu
System Select Switch Select Dial Display
Power Switch Menu Screen Title Menu
Instant Titles
Using Menu For Detailed Adjustment
Make Setting
END Setting
System Select Switch Select Dial Menu Button
Menu Screen Explanations
Menu Screen Available Using The Select Dial
Menu Screen Available Using The Menu Button
Maximum telephoto setting. When set to ON, you can shoot a
Displayed with the System Select Switch set to either Video
Displayed only with the System Select Switch set to D.S.C
Tally lamp comes on to signal the start of recording
To darken the image
Access Exposure Menu
Exposure Control
Focusing
Recording
Auto Focus
Patterns that are regularly repeated
Access Focus Menu
Access Manual Focus
END Adjustment of Focus
Manual Focus
White Balance Adjustment
Access White Balance Adjustment
SET Function Parameters
To Return To Automatic White Balance
Enter Setting
Manual White Balance Operation
Press the Select Dial again to close the Menu Screen
To Change The Tint For Recording
Self-Timer
Access INT. Time Menu
Start Delayed Recording
If you set the System Select Switch to Video
Animation
Time-Lapse
Video Playback Basic Playback
Rewind or Fast-Forward the tape
Play Back
Stop Playback
Video Playback Features EN47
Speaker Volume Control
Adjust Volume
Tracking
EN Video Playback Features
Feature Still Playback
Feature Shuttle Search
Feature Counter Memory Function
Video Playback Using The Cassette Adapter EN49
Insert Battery
Recording safety hole
Cassette Adapter VHS Playpak
When connecting the cables, open this cover
Basic Connections And Tape Dubbing
Basic Connections
Connection For Tape Dubbing
Tape Dubbing
To move Back
C. Playback Basic Playback
Becomes blue
Connection EN53
Connection to a Windows PC
Connect to Personal Computer
END Transferring
C. Playback Advanced Features
Protect pg , Delete pg , 59 and do each procedure from step
Slide-show will start pg
If you select any other functions
Menu Screen Explanations
Mode Effect
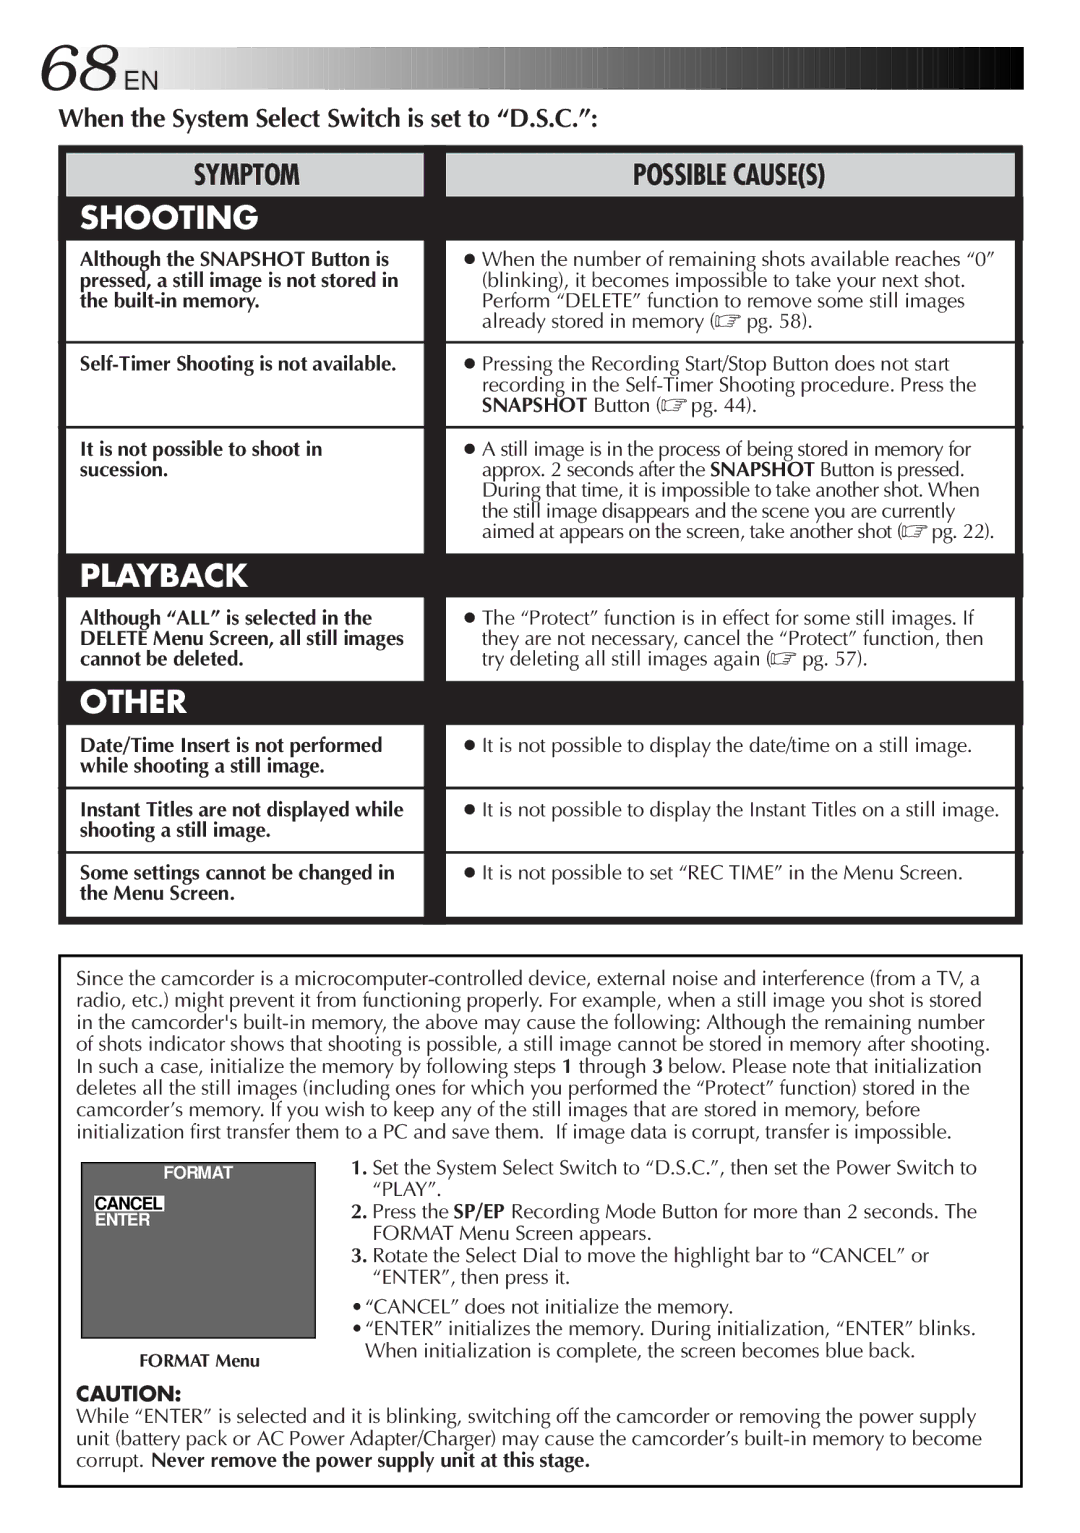
Never remove the power supply unit at this stage
Access Index Menu
Index
View Index Images
Playback Screen
Access Protect Menu
Protect
SET Protect
Way To complete Protect, go to step
Access Delete Menu
Select Delete Mode
To quit the Delete Mode
Delete
Access Delete Execute Menu
X T Delete
Installing The Battery
Pull OUT Battery Holder
Remote control uses one lithium battery CR2025
Functions
Feature Self-Timer, Animation and Time-Lapse
Self-Timer
Animation
Time-Lapse
EN Using the Remote Control Unit
Insert Editing Video
Built-in Memory Onto a Tape
Select Still Image
To insert still images in sequential order onto the tape
Press REW 2/PAGE- or FF 3/PAGE+ to move the page forward
Audio Dubbing
Begin Audio Dubbing
END Audio Dubbing
Remote sensor Microphone Set to Video
Cleaning The Camcorder
After Use
No power is supplied
Some functions are not available
During recording, the indications do
Not appear
Troubleshooting
When the System Select Switch is set to Video
When the System Select Switch is set to D.S.C
Index Controls, Connectors And Indicators
Video Light Switch
System Select Switch
MENU/DISPLAY Button Counter Reset/Memory Button
Recording Mode Button SP/EP
Index Indications EN71
Index Terms
Digital Still Camera
Shooting
Pg , 57
To prevent damage and prolong service life
To avoid hazard
Do not burn
Plug adapter
For safety, do not
Avoid using the unit
During use
Store cassettes
To prolong service life
To prevent damage to the LCD monitor, do not
About moisture condensation
Serious malfunctioning
General
Connectors
Provided Accessories Optional Accessories
Memo
Memo
GR-AXM917UM