Rotate MENU/BRIGHT to move the highlight bar to “W.BALANCE”, then press it.

28ENRECORDING

AdvancedFeatures(cont.)

White Balance Adjustment

A term that refers to the correctness of colour reproduction under various lighting. If the white balance is correct, all other colours will be accu- rately reproduced.

The white balance is usually adjusted automatically. However, more advanced camcorder operators control this function manually to achieve a more professional colour/tint reproduction.

1 Set the Power Switch to “ ”.

2 Press MENU/BRIGHT. The Recording Menu appears.

3

4 The Recording Menu disappears. “W.BAL.” appears in the upper left corner and the currently selected mode indication is also displayed.

5 Rotate MENU/BRIGHT to display the desired setting.

AUTO” – White balance is adjusted automati- cally (factory preset).

” – White balance is set manually. “” – Outdoors on a sunny day.

” – Outdoors on a cloudy day.

” – A video light or similar type of lighting is used.

6 Press MENU/BRIGHT again. Selection is complete. The indication “W.BAL.” changes to “MANUAL”.

To Return To Automatic White Balance . . .

.... select “AUTO” in step 5. Or, set the Power

Switch to “”.

NOTE:

White balance cannot be used when Sepia or Monotone (pg. 24) is activated.

Manual White Balance Operation

Perform Manual White Balance when shooting under various types of lighting.

1 Follow steps 1 through 5 of the white balance adjustment, and select “ MAN.”.

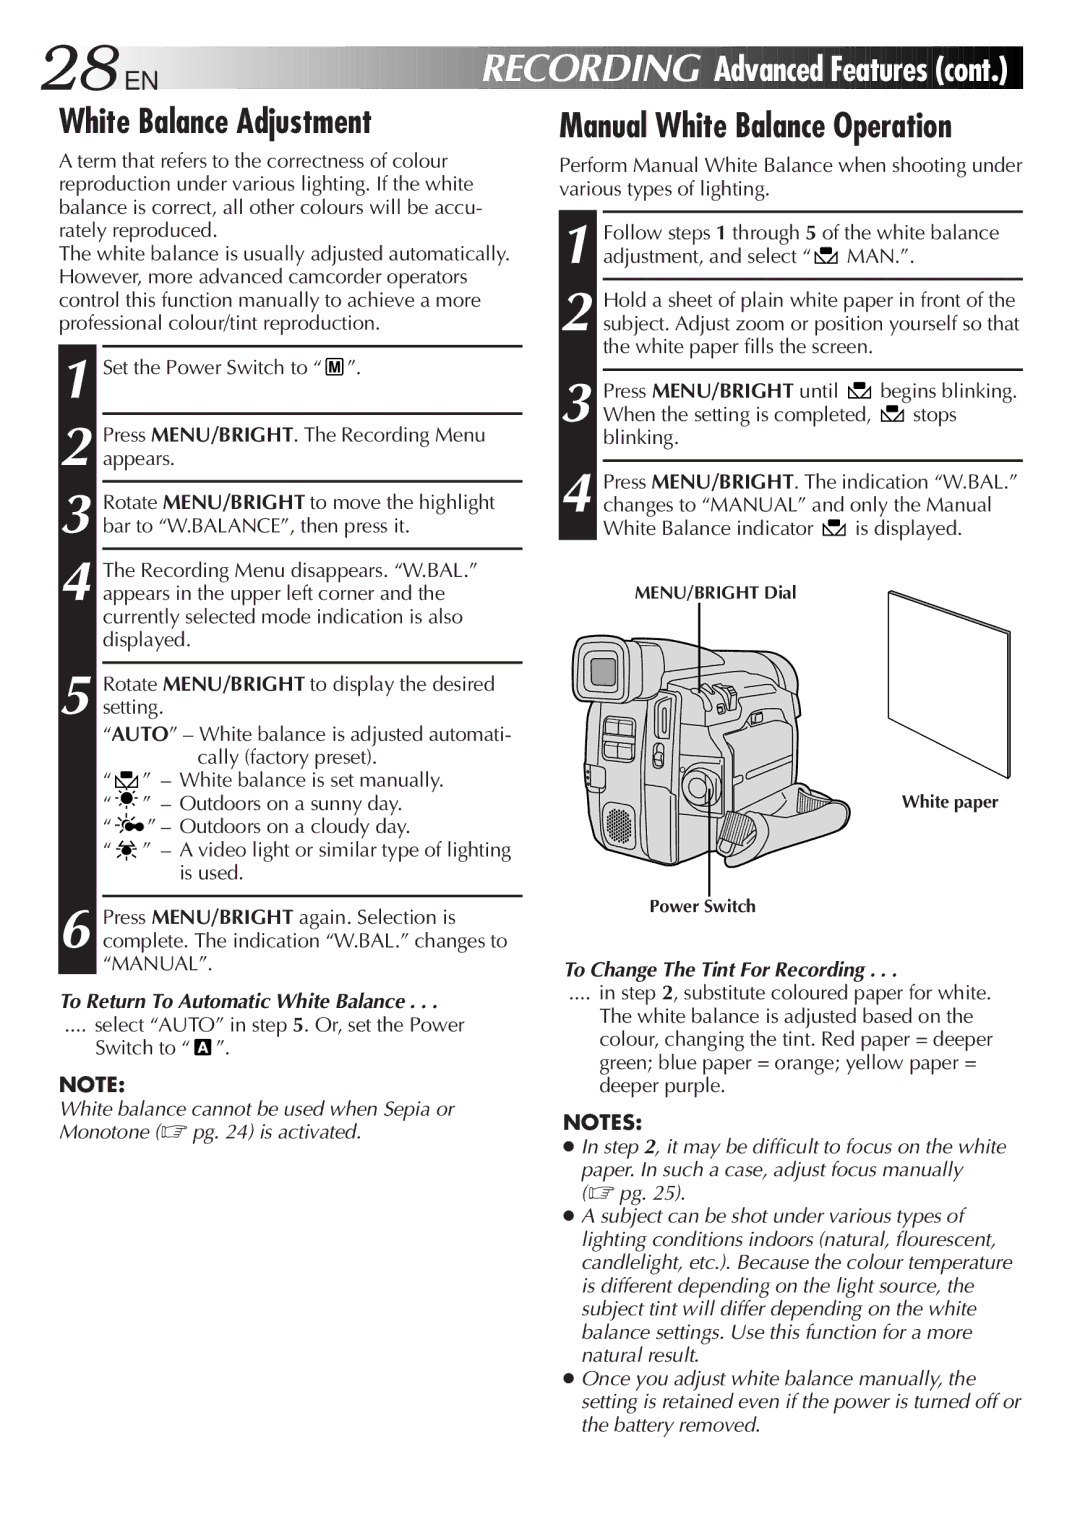
2 Hold a sheet of plain white paper in front of the subject. Adjust zoom or position yourself so that the white paper fills the screen.

3 Press MENU/BRIGHT until begins blinking.

When the setting is completed, stops blinking.

4 Press MENU/BRIGHT. The indication “W.BAL.” changes to “MANUAL” and only the Manual

White Balance indicator is displayed.

MENU/BRIGHT Dial

White paper

Power Switch

To Change The Tint For Recording . . .

.... in step 2, substitute coloured paper for white.

The white balance is adjusted based on the colour, changing the tint. Red paper = deeper green; blue paper = orange; yellow paper = deeper purple.

NOTES:

In step 2, it may be difficult to focus on the white

paper. In such a case, adjust focus manually (pg. 25).

A subject can be shot under various types of lighting conditions indoors (natural, flourescent, candlelight, etc.). Because the colour temperature is different depending on the light source, the subject tint will differ depending on the white balance settings. Use this function for a more natural result.

Once you adjust white balance manually, the setting is retained even if the power is turned off or the battery removed.

Page 28
Image 28
JVC GR-DVL30 specifications White Balance Adjustment, Manual White Balance Operation, To Return To Automatic White Balance

GR-DVL30 specifications

The JVC GR-DVL30 is a compact digital video camcorder that was introduced in the early 2000s, aimed at both amateur filmmakers and enthusiasts who wanted to capture high-quality videos with ease. This camcorder offers a blend of advanced features, intuitive design, and innovative technology, making it a popular choice for users seeking portability without compromising video quality.

One of the standout features of the GR-DVL30 is its 1/4-inch progressive scan CCD sensor, which allows for clear and vibrant image reproduction. With a maximum resolution of 800,000 pixels, this camcorder is capable of capturing stunning footage in various lighting conditions. The device supports both 16:9 wide and 4:3 standard aspect ratios, providing users with flexibility in how their videos are framed and displayed.

In terms of zoom capabilities, the GR-DVL30 features a powerful 10x optical zoom lens, complemented by a 100x digital zoom. This combination allows users to capture distant subjects with impressive clarity, making it ideal for events such as sports or wildlife observation. The lens also includes a built-in optical image stabilization system, which significantly reduces the effects of shake and vibrations, providing smooth, jitter-free video.

The camcorder incorporates advanced digital effects and transitions, giving users the ability to add creative touches to their footage. Some of these effects include night vision mode, slow motion, and various digital filters that enhance the overall viewing experience. Additionally, the 2.5-inch LCD display allows users to easily review their recordings and navigate the camcorder's menu system with convenience.

Connectivity is another highlight of the JVC GR-DVL30, with options including FireWire and USB ports for easy transfer of videos to a computer. This is particularly useful for editing and sharing videos online. The device also features an AV output, enabling users to connect the camcorder to a TV for immediate playback of their recorded media.

Overall, the JVC GR-DVL30 is a versatile and user-friendly camcorder that embodies the perfect balance between functionality and portability. Its robust set of features and solid performance make it an excellent choice for video enthusiasts who want to document their lives and adventures in high quality. Whether for personal memories or creative projects, the GR-DVL30 remains a noteworthy option in the realm of handheld camcorders.