40![]()
![]()
![]() EN
EN ![]()
![]()
![]()
![]()
![]()
![]()
![]()
![]()
![]()
![]()
![]()
![]()
![]()
![]()
![]()
![]()
![]()
![]()
![]()
![]()
![]()
![]()
Picture Wipe/Dissolve


 RECORDING
 Advanced Features (Cont.)
Combine the Picture Wipe and Dissolve functions for a professional transition effect. There are 6 Picture
Wipe effects and 1 Dissolve effect. Select the Picture Wipe effect at the Fader/Wipe Menu ( | ☞ pg. 38). |
Select any one effect from |
|
| P, |
|
|
P, ![]()
![]() P,
P, ![]()
![]()
P , 


 P,
P, 

 P and
P and 


 P of the Fader/Wipe Menu.
Previous scene end | Example |
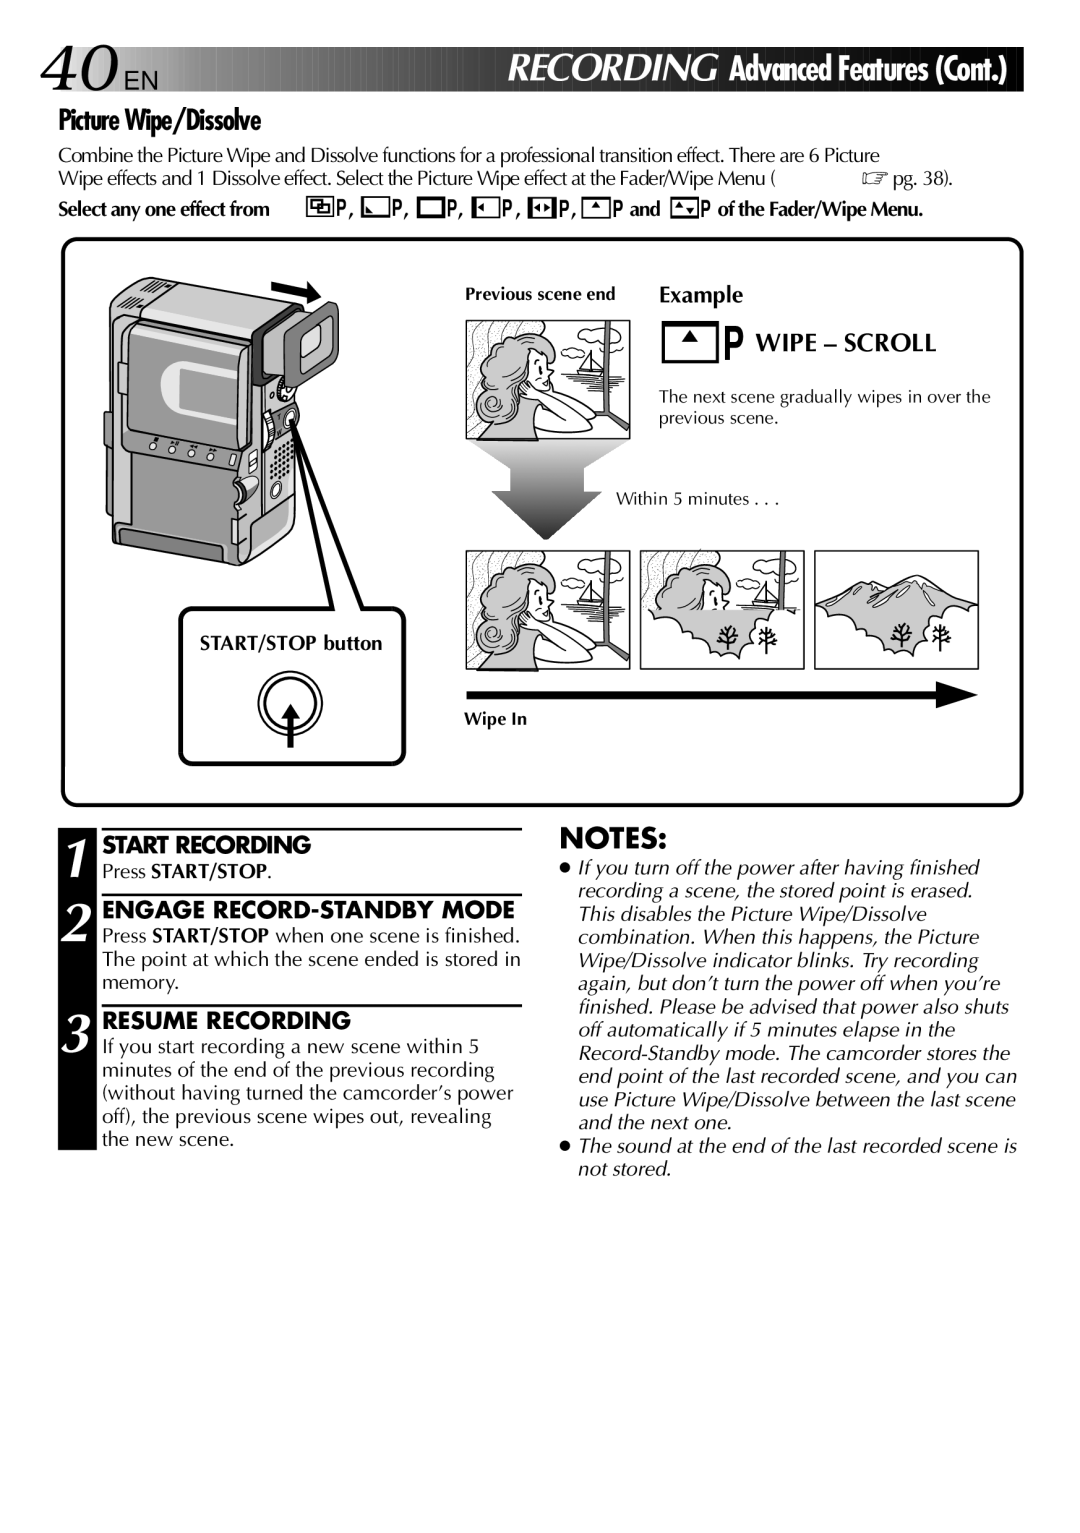
P WIPE – SCROLL
The next scene gradually wipes in over the previous scene.
Within 5 minutes . . .
START/STOP button
Wipe In
1 START RECORDING
Press START/STOP.
2 ENGAGE
3 RESUME RECORDING
If you start recording a new scene within 5 minutes of the end of the previous recording (without having turned the camcorder’s power off), the previous scene wipes out, revealing the new scene.
NOTES:
●If you turn off the power after having finished recording a scene, the stored point is erased. This disables the Picture Wipe/Dissolve combination. When this happens, the Picture Wipe/Dissolve indicator blinks. Try recording again, but don’t turn the power off when you’re finished. Please be advised that power also shuts off automatically if 5 minutes elapse in the
●The sound at the end of the last recorded scene is not stored.
