48![]()
![]()
![]() EN
EN![]()
![]()
![]()
![]()
![]()
![]()
![]()
![]()
![]()
![]()
![]()
![]()
![]()
![]()
![]()
![]()
![]()
![]()
![]()
![]()
![]()
![]()
![]()
![]()
![]()
![]()
USING

 THE
THE

 REMOTE

 CONTROL
 UNIT
UNIT


The
1 | Installing The Battery |
7
2
8
3![]()
![]()
![]() 9
9
4![]()
![]()
![]()
![]()
![]() 0
0
5![]()
![]()
![]()
![]() !
!
6@
2
Slot
![]() 3
3
1
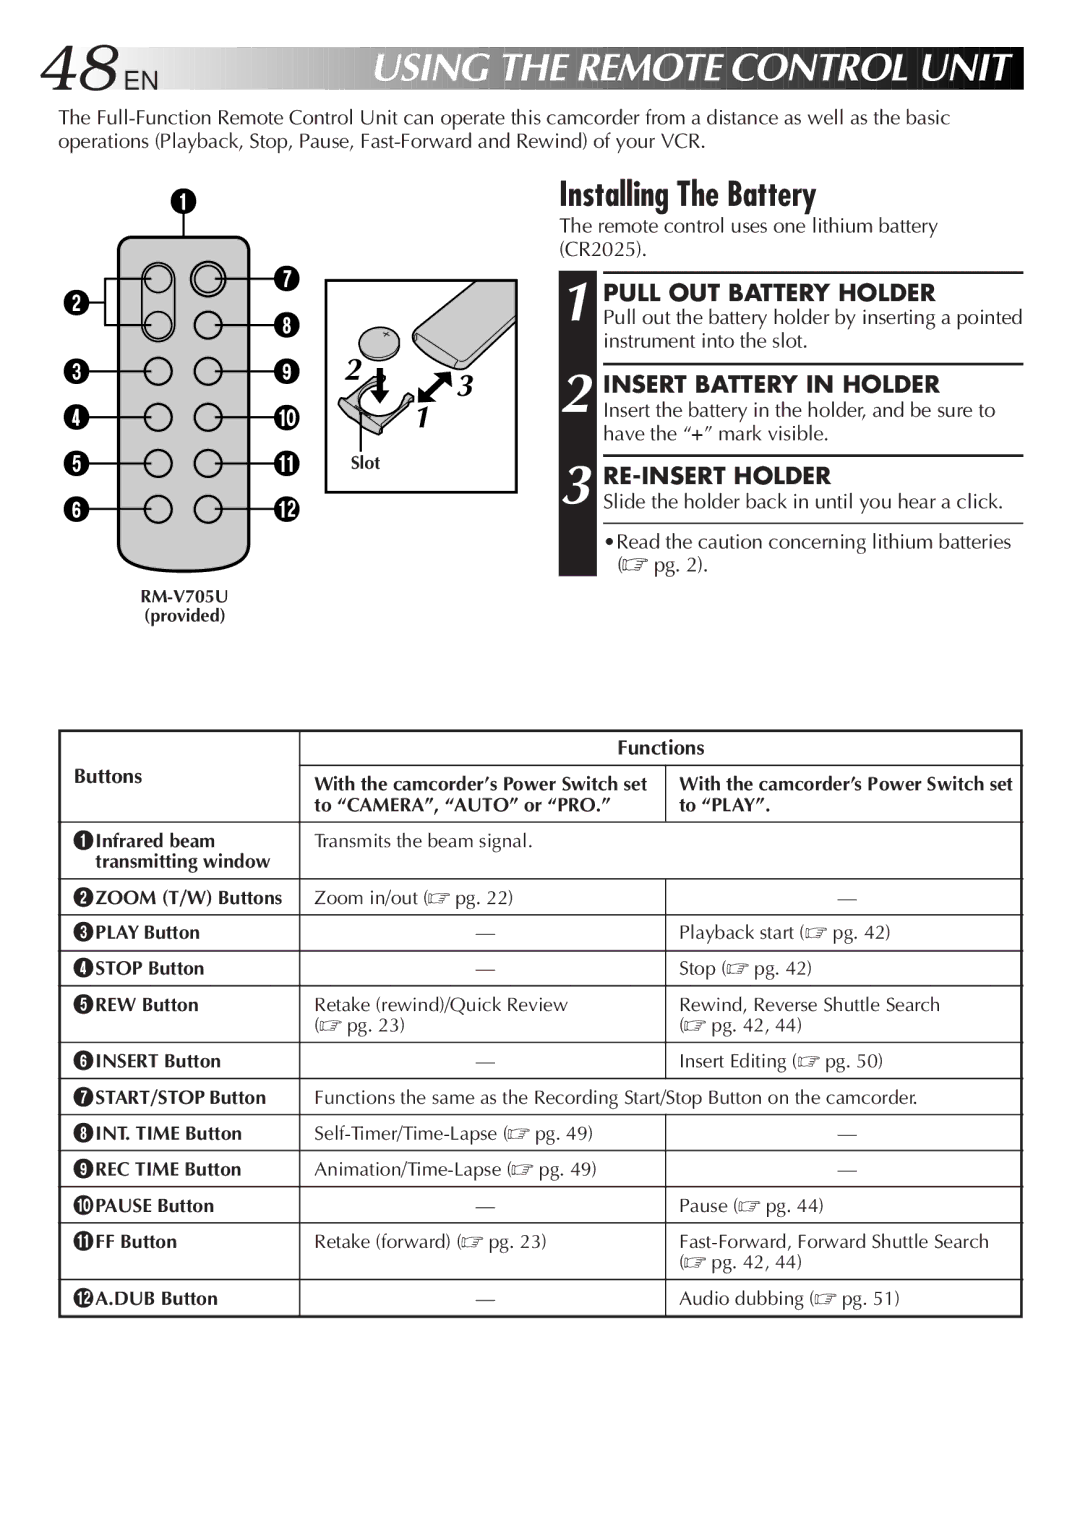
The remote control uses one lithium battery (CR2025).
1 PULL OUT BATTERY HOLDER
Pull out the battery holder by inserting a pointed instrument into the slot.
2 INSERT BATTERY IN HOLDER Insert the battery in the holder, and be sure to have the “+” mark visible.
3 RE-INSERT HOLDER
Slide the holder back in until you hear a click.
•Read the caution concerning lithium batteries (☞ pg. 2).
| Functions | ||
Buttons |
|
| |
With the camcorder’s Power Switch set | With the camcorder’s Power Switch set | ||
| |||
| to “CAMERA”, “AUTO” or “PRO.” | to “PLAY”. | |
|
|
| |
1Infrared beam | Transmits the beam signal. |
| |
transmitting window |
|
| |
2ZOOM (T/W) Buttons | Zoom in/out (☞ pg. 22) | — | |
|
|
| |
3PLAY Button | — | Playback start (☞ pg. 42) | |
|
|
| |
4STOP Button | — | Stop (☞ pg. 42) | |
5REW Button | Retake (rewind)/Quick Review | Rewind, Reverse Shuttle Search | |
| (☞ pg. 23) | (☞ pg. 42, 44) | |
|
|
| |
6INSERT Button | — | Insert Editing (☞ pg. 50) | |
7START/STOP Button | Functions the same as the Recording Start/Stop Button on the camcorder. | ||
8INT. TIME Button | — | ||
|
|
| |
9REC TIME Button | — | ||
0PAUSE Button | — | Pause (☞ pg. 44) | |
!FF Button | Retake (forward) (☞ pg. 23) | ||
|
| (☞ pg. 42, 44) | |
@A.DUB Button | — | Audio dubbing (☞ pg. 51) | |
