Clock Setting
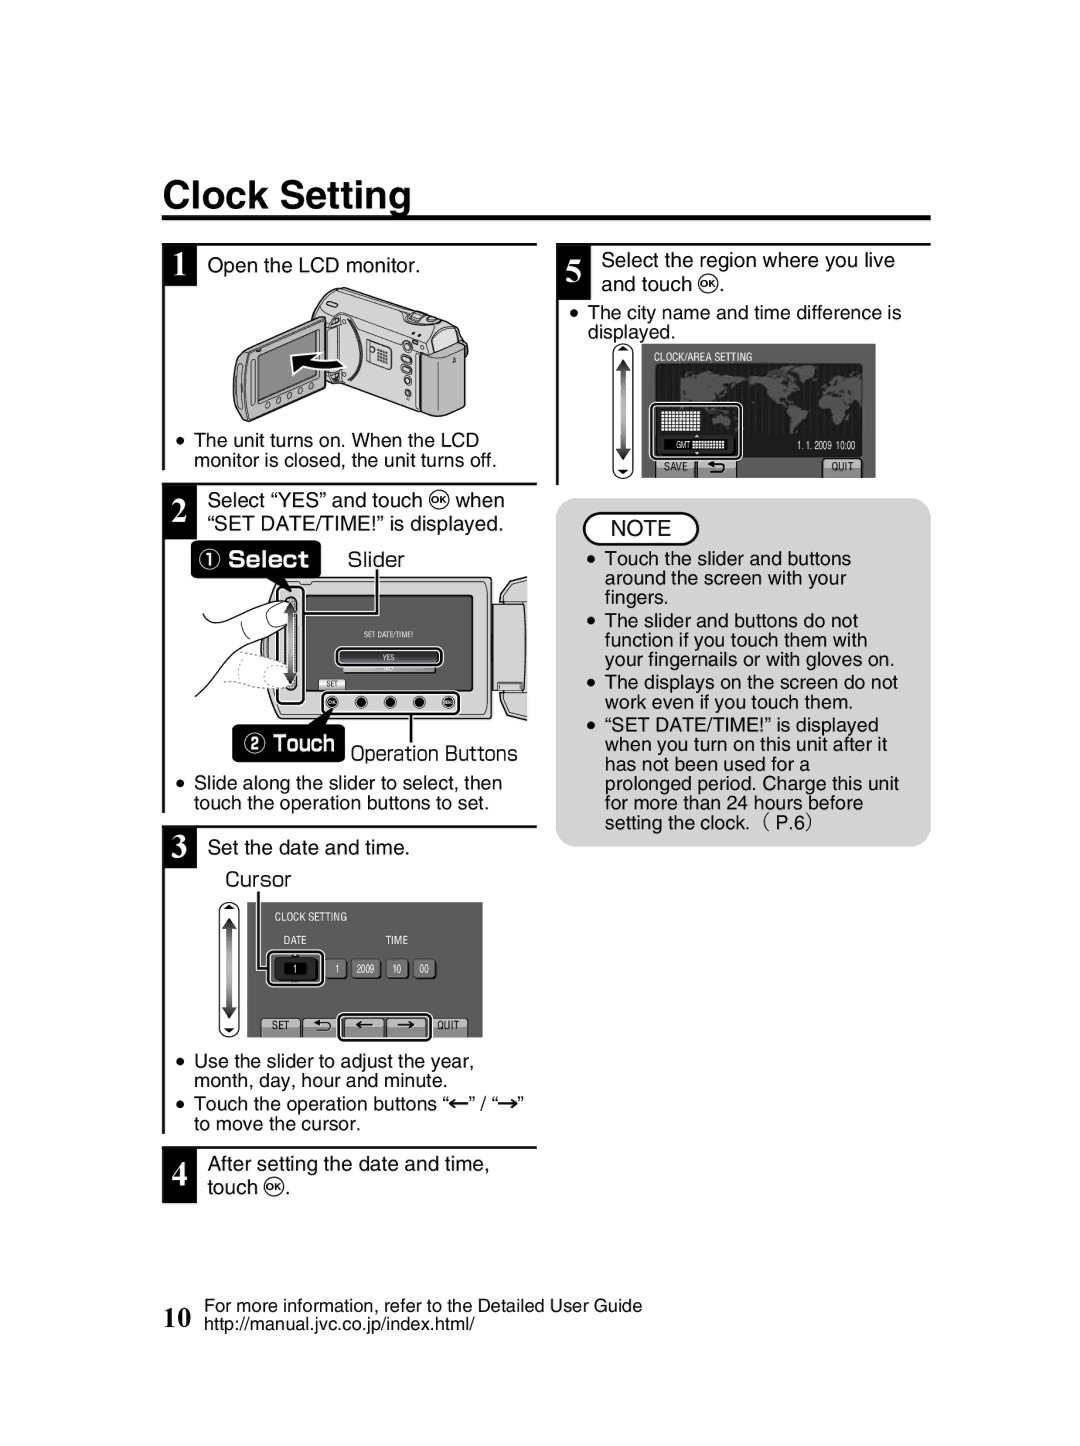
1 Open the LCD monitor.
●The unit turns on. When the LCD monitor is closed, the unit turns off.
2 | Select “YES” and touch | when | |
“SET DATE/TIME!” is displayed. | |||
| ① Select | Slider |
|
|
| SET DATE/TIME! |
|
|
| YES |
|
|
| NO |
|
|
| SET |
|
|
| OK | MENU |
②Touch Operation Buttons
●Slide along the slider to select, then touch the operation buttons to set.
3 Set the date and time.
Cursor
CLOCK SETTING |
|
|
| |
DATE |
|
| TIME |
|
1 | 1 | 2009 | 10 | 00 |
SET ![]()
![]()
![]() QUIT
QUIT
●Use the slider to adjust the year, month, day, hour and minute.
●Touch the operation buttons “&” / “ ” to move the cursor.
4 | After setting the date and time, |
touch . | |
|
|
5 | Select the region where you live |
and touch . | |
|
|
●The city name and time difference is displayed.
CLOCK/AREA SETTING
GMT | 1. 1. 2009 10:00 |
SAVE | QUIT |
![]() NOTE
NOTE
●Touch the slider and buttons around the screen with your fingers.
●The slider and buttons do not function if you touch them with your fingernails or with gloves on.
●The displays on the screen do not work even if you touch them.
●“SET DATE/TIME!” is displayed when you turn on this unit after it has not been used for a prolonged period. Charge this unit for more than 24 hours before setting the clock.( P.6)
10 For more information, refer to the Detailed User Guide http://manual.jvc.co.jp/index.html/