– Recording –
Recording Features
Specifying recording length
— Instant Timer Recording (ITR)
During recording, press REC (7) on the VCR repeatedly until the recording length you want appears on the display panel. The REC indicator on the display panel starts blinking.
●Each time you press the button, recording length increases in
●The VCR shuts off after recording is finished.
●To cancel an ITR, press STOP (8) on the Remote or STOP/EJECT (0) on the VCR.
Watching one program while recording another
During recording…
●If you connect the TV and the VCR only using the RF connection to view pictures from the VCR, press TV/VCR on the Remote so that VCR mode indicator goes off from the display panel. (The TV broadcast being recorded disappears.)
●If you are using the AV connection to view pictures from the VCR, change the TV’s input mode from AV to TV.
Then, select the channel you want to watch, on the TV.
Second Audio Recording
This VCR’s
Timer Recording
Up to 8 timer recording programs can be made using VCR Plus+ timer programing or Express timer programing method as far as a year in advance. Remember, the clock must be set before you can program the timer.
NOTES:
●If all the 8 programs have already been set, “PROGRAM FULL” or “Full” appears on the TV screen or the display panel.
●After timer recording is completed, the VCR turns off automatically.
●You can program the timer recording while a regular recording is in progress; the menu screens will not be recorded.
●To
●In case of a power failure after programming, the VCR’s memory backup keeps your selections for approximately 10 minutes.
Changing VCR Plus+® Setting
The VCR Plus+ programing system assigns a VCR Plus+ guide channel to the TV channels and the cable channels. These guide channel numbers are also called the VCR Plus+ channel codes. Most TV listings have a section, usually a chart, indicating the guide channel numbers assigned to each station.
To ensure that VCR Plus+ timer recording operates correctly, it is necessary to set the VCR Plus+ “Guide Channel Set” for each station.
If you have moved to a different area or if a broadcasting station’s channel number has been changed, perform the following steps to set the correct guide channel number.
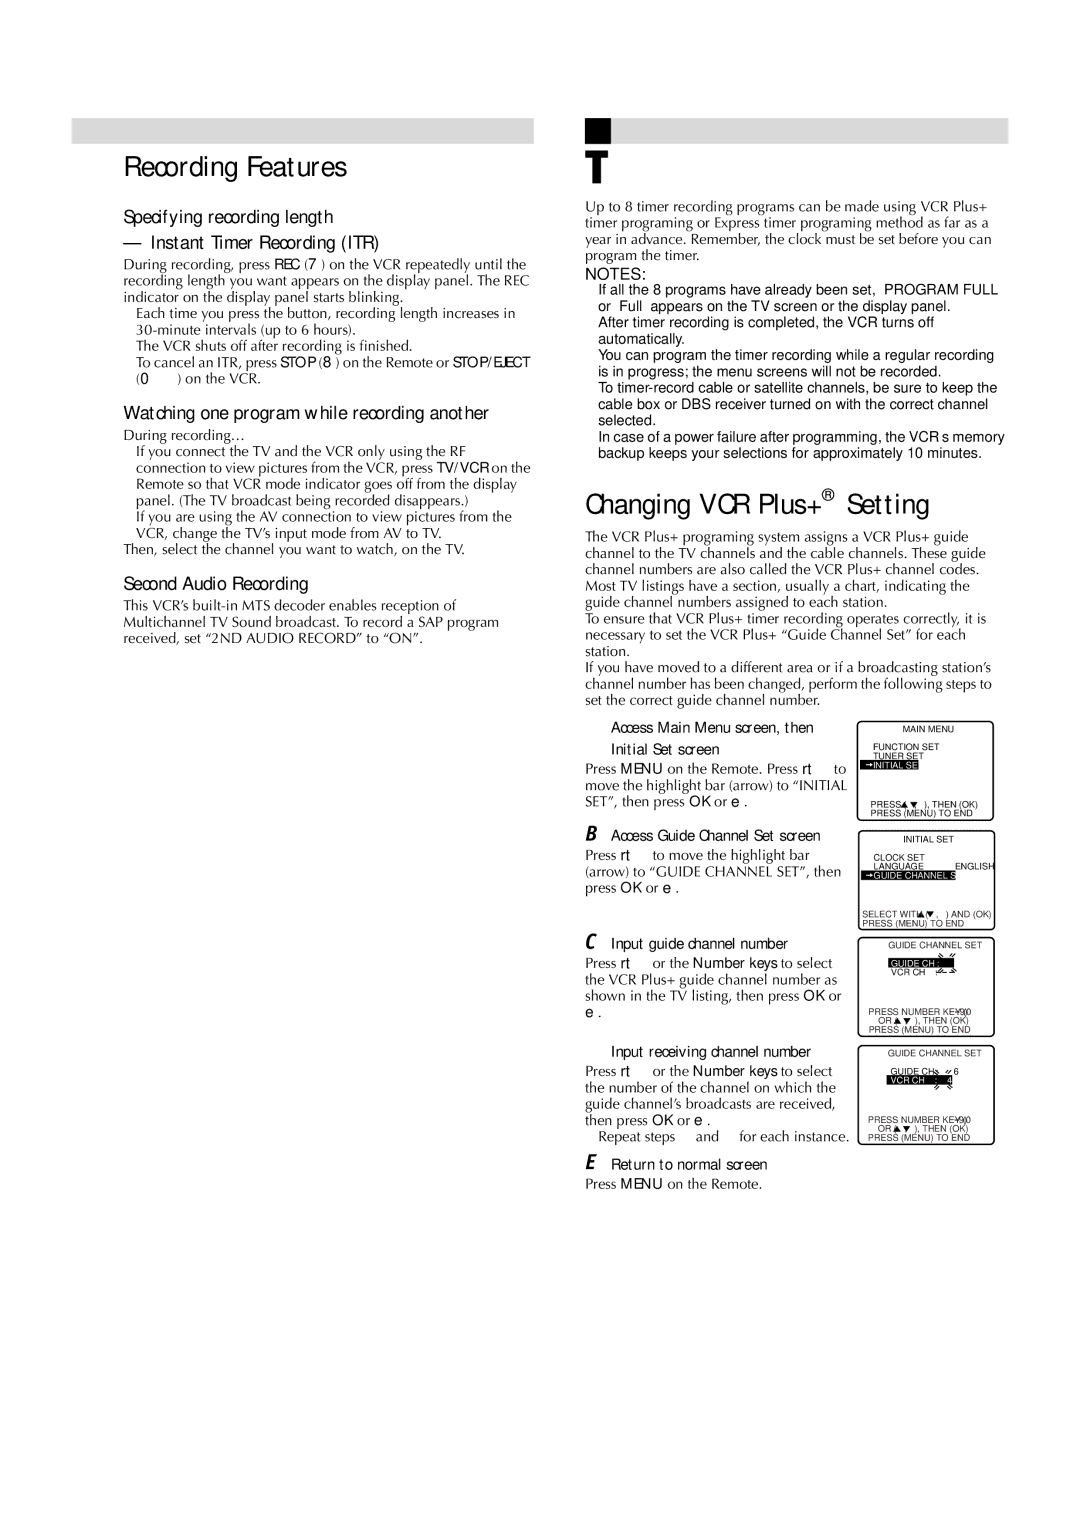
A Access Main Menu screen, then | MAIN MENU | |
Initial Set screen | TUNER SET | |
| FUNCTION SET | |
Press MENU on the Remote. Press rt to | INITIAL SET |
|
|
| |
move the highlight bar (arrow) to “INITIAL |
|
|
SET”, then press OK or e. | PRESS ( , ), THEN (OK) | |
| PRESS (MENU) TO END | |
BAccess Guide Channel Set screen
Press rt to move the highlight bar (arrow) to “GUIDE CHANNEL SET”, then press OK or e.
CInput guide channel number
Press rt or the Number keys to select the VCR Plus+ guide channel number as shown in the TV listing, then press OK or e.
DInput receiving channel number
Press rt or the Number keys to select the number of the channel on which the guide channel’s broadcasts are received, then press OK or e.
●Repeat steps 3 and 4 for each instance.
INITIAL SET
CLOCK SET
LANGUAGE ENGLISH ![]() GUIDE CHANNEL SET
GUIDE CHANNEL SET
SELECT WITH ( ,![]() ) AND (OK)
) AND (OK)
PRESS (MENU) TO END
GUIDE CHANNEL SET
GUIDE CH : | 6 |
VCR CH : | – – – |
PRESS NUMBER KEY
OR ( ,![]() ), THEN (OK)
), THEN (OK)
PRESS (MENU) TO END
GUIDE CHANNEL SET
GUIDE CH : | 6 |
VCR CH : | 47 |
PRESS NUMBER KEY
OR ( ![]() , ), THEN (OK)
, ), THEN (OK)
PRESS (MENU) TO END
EReturn to normal screen
Press MENU on the Remote.