3

4

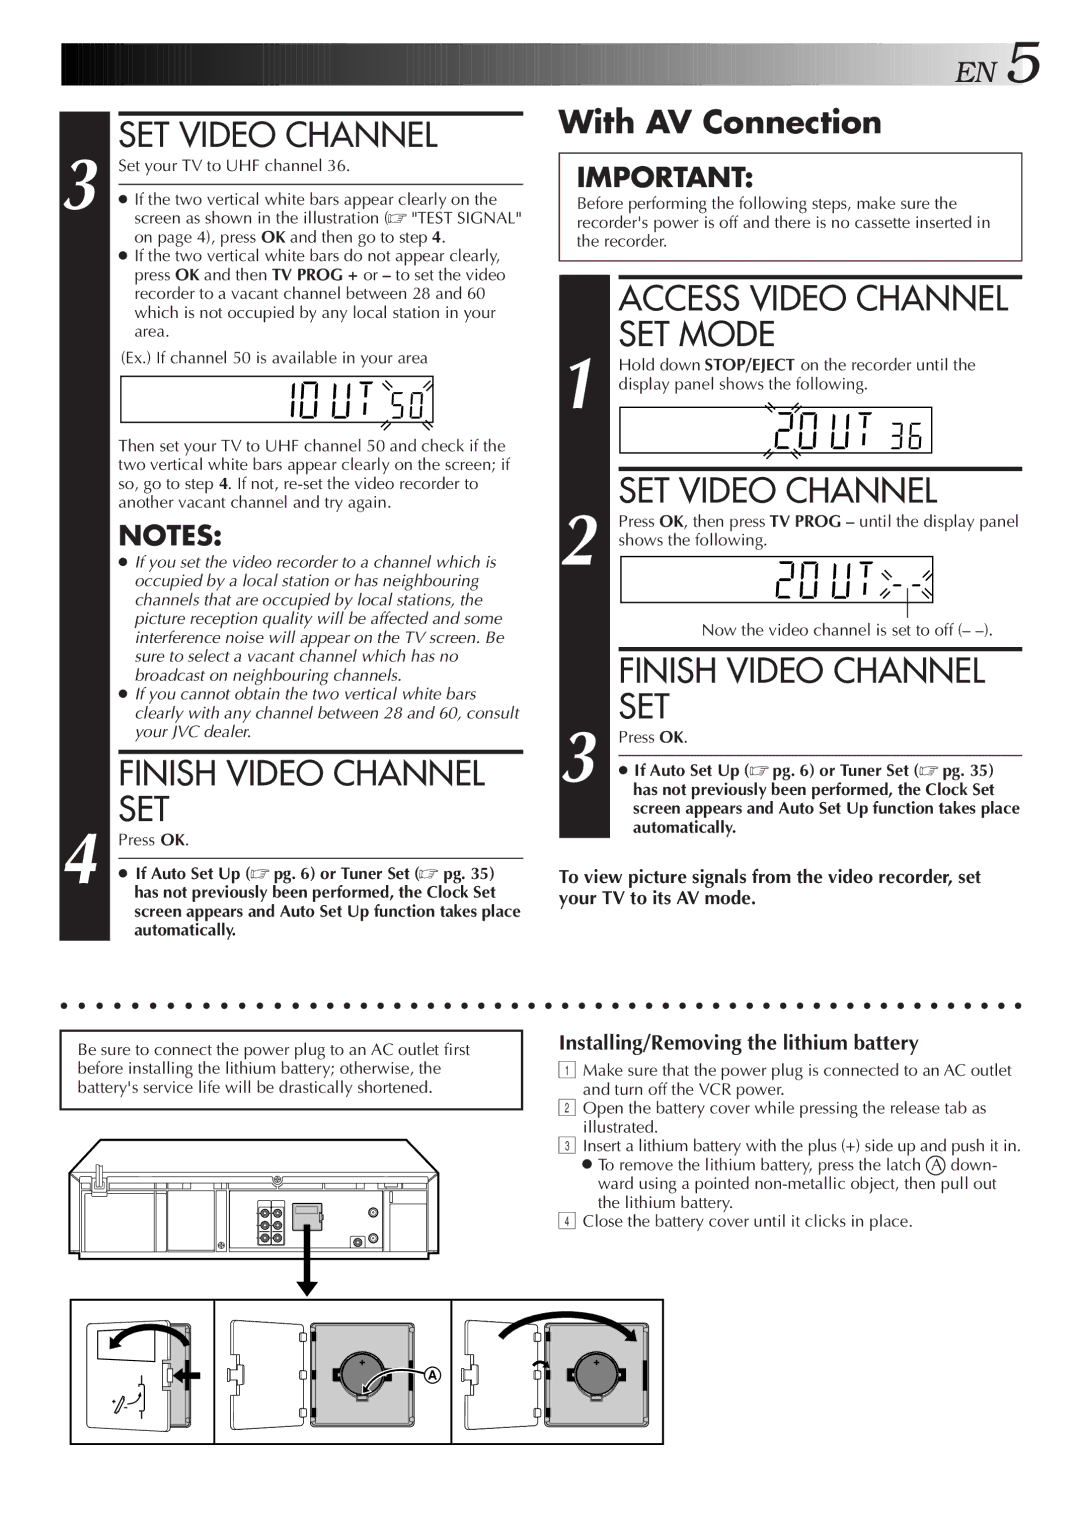
SET VIDEO CHANNEL

Set your TV to UHF channel 36.

If the two vertical white bars appear clearly on the screen as shown in the illustration ("TEST SIGNAL" on page 4), press OK and then go to step 4.

If the two vertical white bars do not appear clearly, press OK and then TV PROG + or to set the video recorder to a vacant channel between 28 and 60 which is not occupied by any local station in your area.

(Ex.) If channel 50 is available in your area

Then set your TV to UHF channel 50 and check if the two vertical white bars appear clearly on the screen; if so, go to step 4. If not, re-set the video recorder to another vacant channel and try again.

NOTES:

If you set the video recorder to a channel which is occupied by a local station or has neighbouring channels that are occupied by local stations, the picture reception quality will be affected and some interference noise will appear on the TV screen. Be sure to select a vacant channel which has no broadcast on neighbouring channels.

If you cannot obtain the two vertical white bars clearly with any channel between 28 and 60, consult your JVC dealer.

FINISH VIDEO CHANNEL SET

Press OK.

If Auto Set Up (pg. 6) or Tuner Set (pg. 35) has not previously been performed, the Clock Set screen appears and Auto Set Up function takes place automatically.

EN5

With AV Connection

IMPORTANT:

Before performing the following steps, make sure the recorder's power is off and there is no cassette inserted in the recorder.

ACCESS VIDEO CHANNEL SET MODE


Hold down STOP/EJECT on the recorder until the

1

display panel shows the following.


SET VIDEO CHANNEL


Press OK, then press TV PROG – until the display panel

2


shows the following.


Now the video channel is set to off (– –).


FINISH VIDEO CHANNEL

3

SET

Press OK.


If Auto Set Up (pg. 6) or Tuner Set (pg. 35)


has not previously been performed, the Clock Set


screen appears and Auto Set Up function takes place


automatically.

To view picture signals from the video recorder, set your TV to its AV mode.

Be sure to connect the power plug to an AC outlet first before installing the lithium battery; otherwise, the battery's service life will be drastically shortened.

Installing/Removing the lithium battery

1Make sure that the power plug is connected to an AC outlet and turn off the VCR power.

2Open the battery cover while pressing the release tab as illustrated.

3Insert a lithium battery with the plus (+) side up and push it in.

To remove the lithium battery, press the latch A down- ward using a pointed non-metallic object, then pull out the lithium battery.

4Close the battery cover until it clicks in place.

A

Page 5
Image 5
JVC HR-J655EA specifications SET Video Channel, Finish Video Channel SET, Set, With AV Connection

HR-J655EA specifications

The JVC HR-J655EA is a standout model in the realm of VHS players and recorders, showcasing a blend of cutting-edge technology and practical features that cater to both casual viewers and avid collectors of video media. Launched as a part of JVC's renowned lineup of VHS products, the HR-J655EA maintains a reputation for reliability and performance.

One of the primary features of the JVC HR-J655EA is its superior image quality, aided by the integration of JVC's advanced 4-head video technology. This technology allows for improved playback and recording, providing users with clear and vibrant images. The machine is equipped to support various tape speeds, including SP and LP, offering the flexibility to choose between standard quality and extended recording time, which is particularly advantageous for capturing longer television programming or events.

The HR-J655EA also incorporates a built-in timer that enables users to schedule recordings with ease. This feature is especially useful for those who wish to record their favorite shows while they are away from home. Furthermore, the unit supports various playback formats, ensuring compatibility with a wide range of VHS tapes, including S-VHS for those who seek even higher quality recordings.

One of the key characteristics of the JVC HR-J655EA is its user-friendly interface. The machine is designed with straightforward controls that make navigation simple, and the remote control provides added convenience for adjusting settings from across the room. The on-screen programming guide enhances usability, allowing viewers to browse and schedule recordings without hassle.

In terms of connectivity, the unit boasts multiple input and output options, including AV and RF connections, making it easy to connect to televisions and other multimedia devices. This versatility ensures that users can integrate the HR-J655EA into their existing home entertainment setups with minimal effort.

Moreover, JVC has included features such as Auto Tracking, which optimizes playback by automatically adjusting the tape position for the best possible image quality. The machine's robust build quality further adds to its longevity, making it a reliable choice for VHS enthusiasts.

In summary, the JVC HR-J655EA combines classic VHS technology with modern functionality, making it an invaluable device for anyone looking to relive the nostalgia of a bygone era of home entertainment. Its blend of high-quality video playback, user-friendly features, and reliable build makes it a cherished asset for video collectors and casual viewers alike.