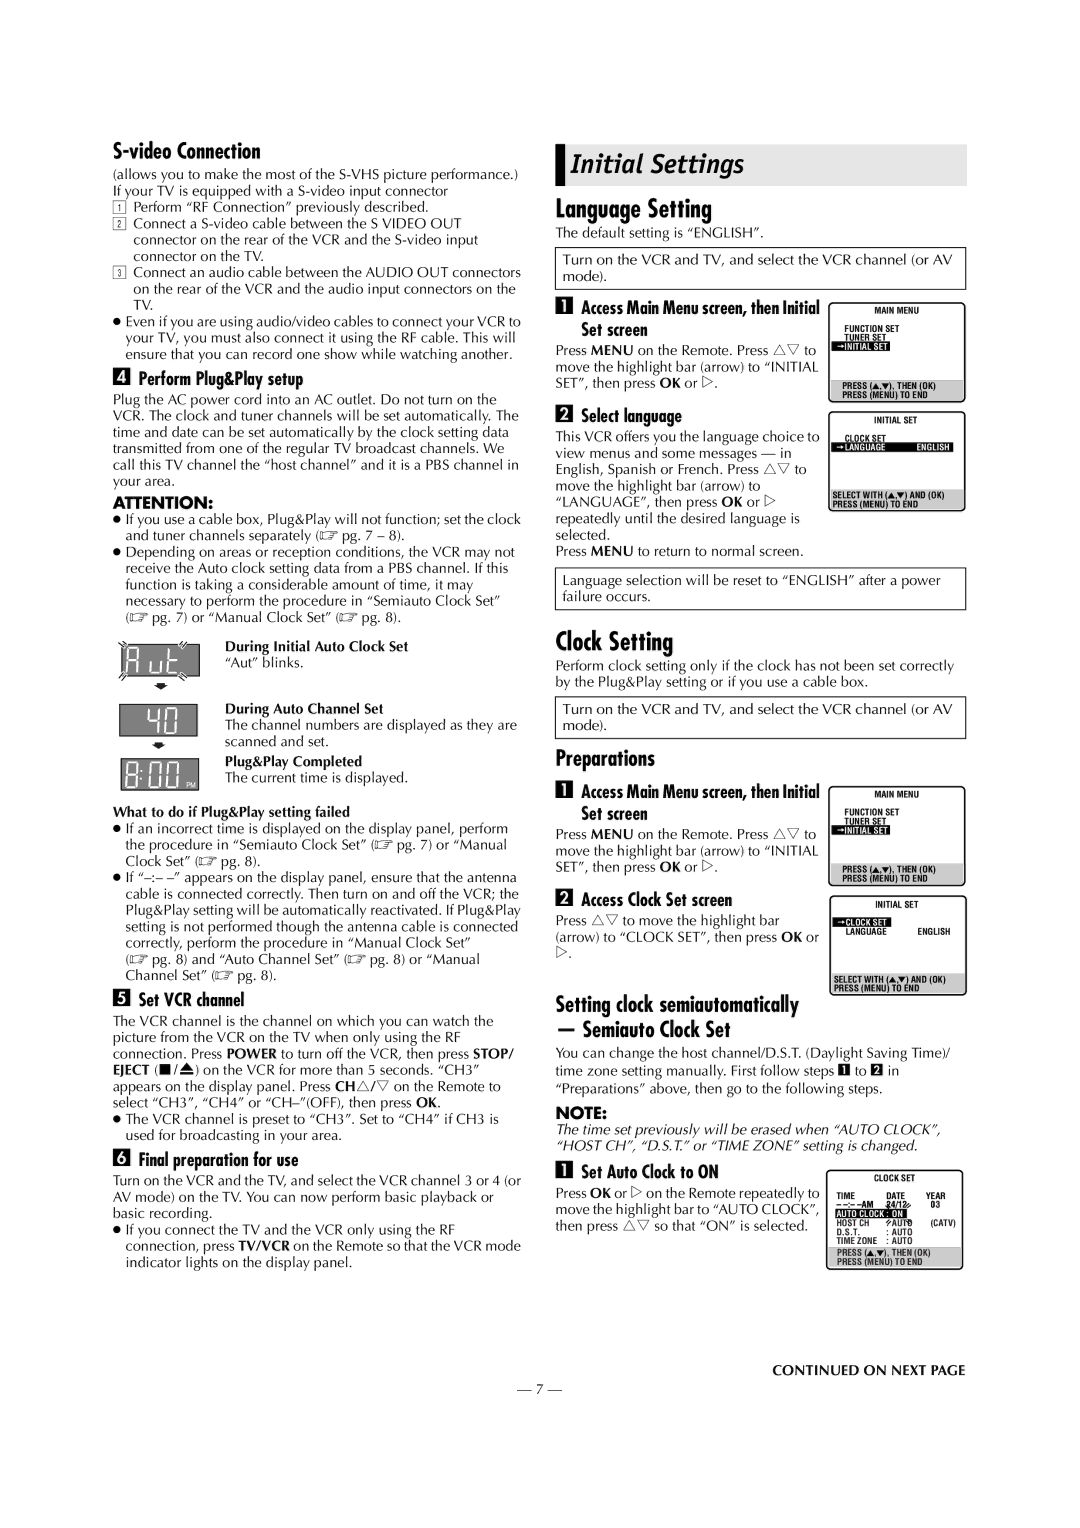
—7—
Page 7 February 9, 2004 6:50 pm

S-video Connection

(allows you to make the most of the S-VHS picture performance.)
If your TV is equipped with a S-video input connector
APerform “RF Connection” previously described.
BConnect a S-video cable between the S VIDEO OUT
connector on the rear of the VCR and the S-video input
connector on the TV.
CConnect an audio cable between the AUDIO OUT connectors
on the rear of the VCR and the audio input connectors on the
TV.
Even if you are using audio/video cables to connect your VCR to
your TV, you must also connect it using the RF cable. This will
ensure that you can record one show while watching another.
DPerform Plug&Play setup
Plug the AC power cord into an AC outlet. Do not turn on the
VCR. The clock and tuner channels will be set automatically. The
time and date can be set automatically by the clock setting data
transmitted from one of the regular TV broadcast channels. We
call this TV channel the “host channel” and it is a PBS chann el in
your area.
ATTENTION:
If you use a cable box, Plug&Play will not function; set the clock
and tuner channels separately (pg. 7 – 8).
Depending on areas or reception conditions, the VCR may not
receive the Auto clock setting data from a PBS channel. If this
function is taking a considerable amount of time, it may
necessary to perform the procedure in “Semiauto Clock Set”
(pg.7) or “Manual Clock Set” (pg. 8).
What to do if Plug&Play setting failed
If an incorrect time is displayed on the display panel, perform
the procedure in “Semiauto Clock Set” (pg. 7) or “Manual
Clock Set” (pg.8).
If “–:– –” appears on the display panel, ensure that the antenna
cable is connected correctly. Then turn on and off the VCR; the
Plug&Play setting will be automatically reactivated . If Plug&Play
setting is not performed though the antenna cable is connected
correctly, perform the procedure in “Manual Clock Set”
(pg.8) and “Auto Channel Set” (pg. 8) or “Manual
Channel Set” (pg.8).
ESet VCR channel
The VCR channel is the channel on which you can watch the
picture from the VCR on the TV when only using the RF
connection. Press POWER to turn off the VCR, then press STOP/
EJECT (0) on the VCR for more than 5seconds. “CH3”
appears on the display panel. Press CHr/t on the Remote to
select “CH3”, “CH4” or “CH–”(OFF), then press OK.
The VCR channel is preset to “CH3”. Set to “CH4” if CH3 is
used for broadcasting in your area.
FFinal preparation for use
Turn on the VCR and the TV, and select the VCR channel3 or 4 (or
AV mode) on the TV. You can now perform basic playback or
basic recording.
If you connect the TV and the VCR only using the RF
connection, press TV/VCR on the Remote so that the VCR mode
indicator lights on the display panel.

Language Setting

The default setting is “ENGLISH”.
AAccess Main Menu screen, then Initial
Set screen
Press MENU on the Remote. Press rt to
move the highlight bar (arrow) to “INITIAL
SET”, then press OK or e.
BSelect language
This VCR offers you the language choice to
view menus and some messages — in
English, Spanish or French. Press rt to
move the highlight bar (arrow) to
“LANGUAGE”, then press OK or e
repeatedly until the desired language is
selected.
Press MENU to return to normal screen.

Clock Setting

Perform clock setting only if the clock has not been set correctly
by the Plug&Play setting or if you use a cable box.

Preparations

AAccess Main Menu screen, then Initial
Set screen
Press MENU on the Remote. Press rt to
move the highlight bar (arrow) to “INITIAL
SET”, then press OK or e.
BAccess Clock Set screen
Press rt to move the highlight bar
(arrow) to “CLOCK SET”, then press OK or
e.

Setting clock semiautomatically

— Semiauto Clock Set

You can change the host channel/D.S.T. (Daylight Saving Time)/
time zone setting manually. First follow steps 1 to 2 in
“Preparations” above, then go to the following steps .
NOTE:
The time set previously will be erased when “AUTO CLOCK”,
“HOST CH”, “D.S.T.” or “TIME ZONE” setting is changed.
ASet Auto Clock to ON
Press OK or e on the Remote repeatedly to
move the highlight bar to “AUTO CLOCK”,
then press rt so that “ON” is selected.
During Initial Auto Clock Set
“Aut” blinks.
During Auto Channel Set
The channel numbers are displayed as they are
scanned and set.
Plug&Play Completed
The current time is displayed.
Initial Settings
Turn on the VCR and TV, and select the VCR channel (or AV
mode).
Language selection will be reset to “ENGLISH” after a power
failure occurs.
Turn on the VCR and TV, and select the VCR channel (or AV
mode).
MAIN MENU
FUNCTION SET
TUNER SET
INITIAL SET
PRESS ( , ), THEN (OK)
PRESS (MENU) TO END
SELECT WITH ( , ) AND (OK)
PRESS (MENU) TO END
INITIAL SET
CLOCK SET
LANGUAGE ENGLISH
MAIN MENU
FUNCTION SET
TUNER SET
INITIAL SET
PRESS ( , ), THEN (OK)
PRESS (MENU) TO END
SELECT WITH ( , ) AND (OK)
PRESS (MENU) TO END
INITIAL SET
CLOCK SET
LANGUAGE ENGLISH
PRESS ( , ), THEN (OK)
PRESS (MENU) TO END
CLOCK SET
TIME DATE YEAR
AUTO CLOCK: ON
HOST CH :AUTO (CATV)
D.S.T. : AUTO
TIME ZONE :AUTO
CONTINUED ON NEXT PAGE
HR-S2913U_EN.fm Page 7 Monday, February 9, 2004 6:51 PM