HR-VP436U
Do not place the VCR
Dear Customer
Important Product Safety Instructions
Should be moved with care. Quick
Product and cart combination
Contents
Basic Connections
During Auto Clock Set
Dual Quick Set
Perform Dual Quick SET
Initial Settin GS
Clock
Select Host Channel
Clock Setting
Select Time Zone
Select D.S.T. Mode
CH or Shuttle Plus
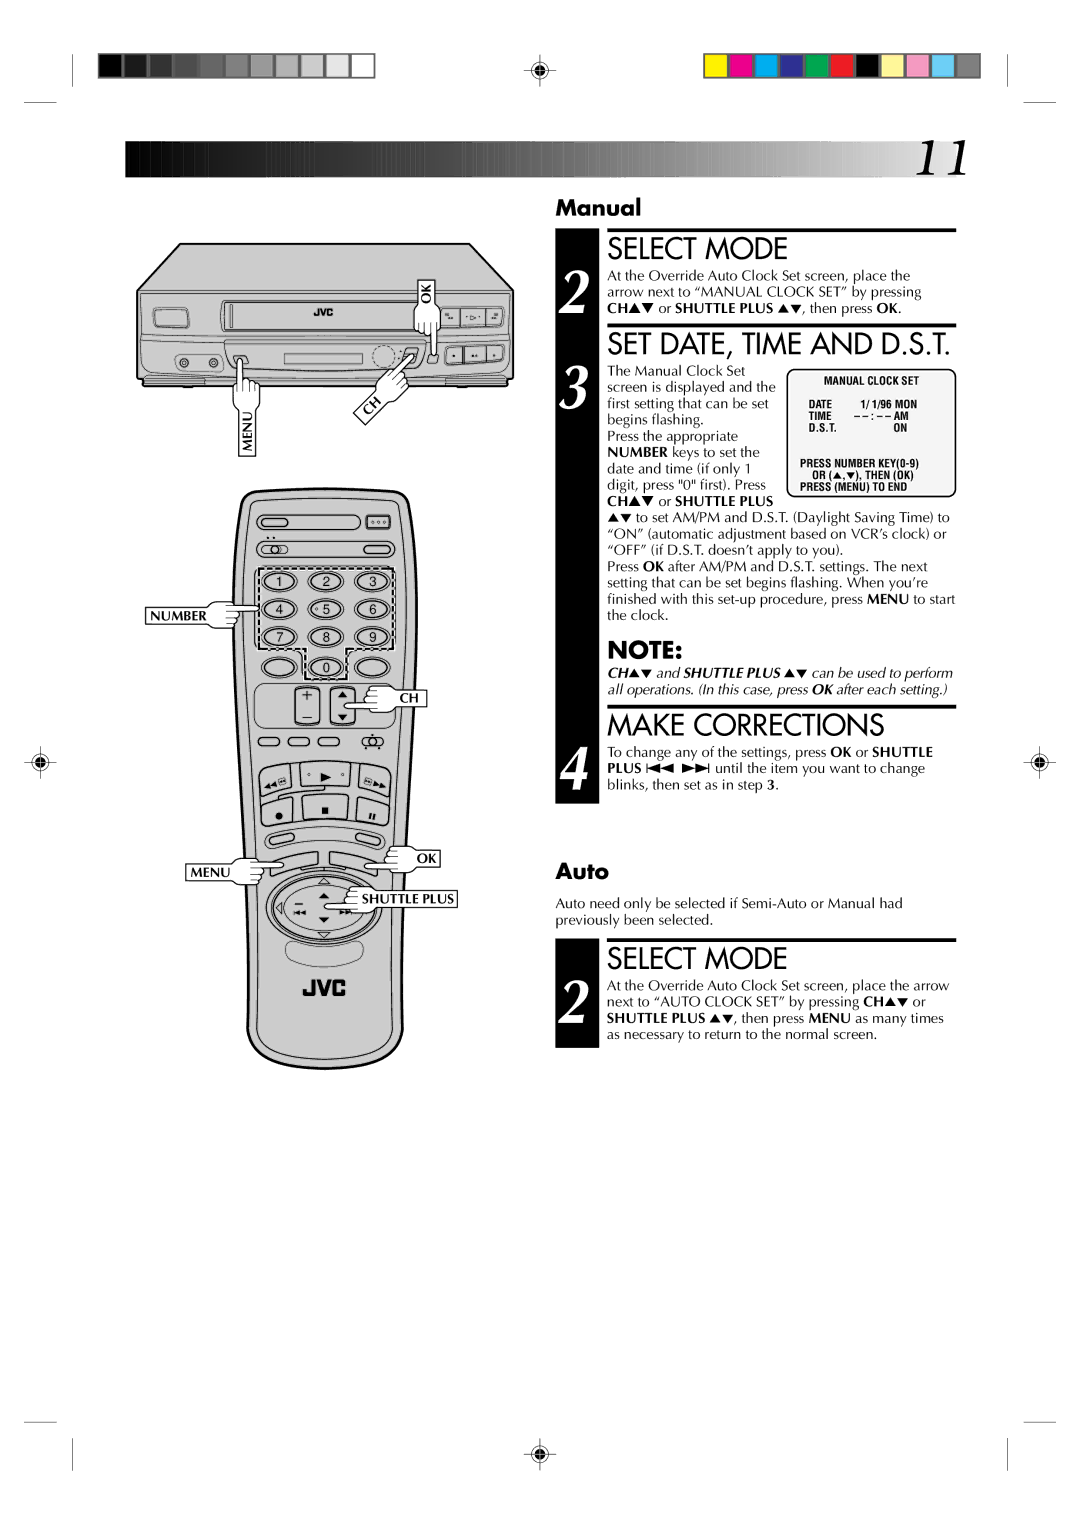
Select Mode
Make Corrections
CH or Shuttle Plus 5, then press OK
Tuner
Access Main Menu
Access Tuner SET
Access Band Screen
Return to Normal Screen
Perform Auto Channel SET
Store Desired Channel
Access Tuner SET Screen
Access AFC Screen
Make Selection
Connect Cable BOX to VCR
Tuner Cable Box Controller
Situate Controller
Attach Controller
Set Cable Box Output Channel
Access Cable BOX
Output Screen
Set Cable Box Brand
Return to VCR PLUS+ SET-UP Screen
Turn on Cable BOX
Brand SET Screen
30, 31, 32, 33, 34, 35, 36
52, 53, 54, 85
13, 14, 15
52, 53
Access Main Menu Screen
VCR Plus+ Setup
Input Guide Channel Number
Access Custom SET Screen
Access VCR PLUS+ SET-UP Screen
Access Guide Channel SET Screen
Input Receiving Channel Number
Start Playback
Simple Playback
Load a Cassette
Find Program Start Point
Simple Recording
During Playback
FRAME-BY-FRAME
Playback
Resume Normal
Manual Tracking
Engage Manual Tracking Mode
Adjust Manual Tracking
RE-ENGAGE Automatic Tracking
Return to Normal
Access Function SET
Access Superimpose
Layback and Recording Features
Stop Repeat
Access Distant Code
Skip Over Unwanted Sections
Start Repeat
Memory
Reset Counter to Zero
Activate Instant Review
Activate Counter
Next-Function Memory
Tape Position Indicator
Relation to B Beginning or E End shows you where you are on
Press REW, then press Timer within 2 seconds
Active Video Calibration
Access Video Calibration Screen
Begins with the picture level optimized
Recording
VCR takes about Seconds to assess
Quality of the tape Use, then recording
Tape in use
Playback
Record One Program While Watching Another
Engage TV Mode
Select Channel for Viewing
Display Elapsed Time on Screen
Enter Program Information
VCR Plus+ Timer Programming
Timer Recording
Check Input Data
Press SP/EP
Engage Timer Mode
Press TIMER. The VCR turns off automatically
CHECK/CORRECT Input Data
Access Program SET Screen
Instant Timer Recording ITR
On-Screen Timer Programming
Engage ITR Mode
Information
Select Program Number
SET Program
RE-ENGAGE Timer
Disengage Timer
Access Program SET
Cancel a Program
Your choice on or
Access Auto Timer
Auto Timer
Place the arrow next to
Edit To Or From Another
Player
Edit From a Camcorder
SET RECORDER’S Input
Mode
Assemble Editing
SET TV Brand Code
SET Remote Control Mode
Speci AL Features
Turn on the TV
24, 25
01, 02, 03, 04, 05, 06, 07
15, 16, 17
19, 20
Cord
SET A/B Code Switch
Plug in Power Cord
Turn VCR Power on
Cassette gets stuck partway
Troubleshooting
Recording
Timer again
Doesn’t work properly
Re-perform the VCR Plus+ setup
Procedure pg
Roubleshooting
Playback
Quest Ions and Answers
Maximum recording time
EIA monochrome signal
Year programmable timer
20C to 60C -4F to140F
List Of Terms
MBR Multi-Brand Remote Code Setting
VCR Plus+ Timer Programming
Index
Front View
Front Display Panel
Remote Control Provided
For Servicing
HOW to Locate Your JVC Service Center
Limited Warranty
Warranty
HR-VP436U