INITIAL SET
CLOCK SET
LANGUAGE ENGLISH GUIDE CHANNEL SET
CABLE BOX SET DBS RECEIVER SET
SELECT WITH ( , ) AND (OK)
PRESS (MENU) TO END
CABLE BOX SET
OFF
PRESS ( , ) THEN (OK)
PRESS (MENU) TO END

– Initial Settings –

Setting channels manually

— Manual Channel Set

You can add the channels you want or delete the channels you do not want manually.

A Access Main Menu screen, then Tuner


MAIN MENU

Set screen

TUNER SET


FUNCTION SET


Press MENU on the Remote. Press rt to

INITIAL SET


move the highlight bar (arrow) to “TUNER


SET”, then press OK or e.


PRESS ( ,

), THEN (OK)


PRESS (MENU) TO END

B Access Manual Channel Set screen


TUNER SET

Press rt to move the highlight bar

BAND


CATV

(arrow) to “MANUAL CHANNEL SET”,

AUTO CHANNEL SET

MANUAL CHANNEL SET


then press OK or e.


SELECT WITH ( , ) AND (OK)


PRESS (MENU) TO END

C Add or skip desired channels

MANUAL CHANNEL SET

To add channels


(CATV)

A Press the Number keys on the Remote


CH

45 ADD


to input a channel number you want to


add.

PRESS NUMBER KEY (0–9)

OR ( ,

), THEN (OK)

B Press OK or e to set to “ADD”.

PRESS (MENU) TO END

CRepeat A to B to add other channels. Press MENU to return to normal screen.

To skip channels

APress rtor the Number keys to select a channel number you want to skip.

BPress OK or e to set to “SKIP”.

CRepeat A and B to skip other channels. Press MENU to return to normal screen.

Cable Box and/or DBS Receiver Control Setting

The following procedure is required if you receive your TV channels through a cable box (descrambler) and/or if you receive satellite channels through DBS (Direct Broadcast Satellite) receiver. The Controller allows the VCR to automatically switch the cable box or DBS receiver’s channel during timer recording.

NOTES:

The Controller is not supplied with this unit. It can be requested by mailing in the completed JVC Cable Mouse Certificate that is included with the accessory package.

For the cable box, the Controller is effective for VCR Plus+ or Express timer programing.

For the DBS receiver, the Controller is effective only for Express timer programing.

When connecting your cable box or DBS receiver, refer to its instruction manual.

ASituate Controller

If both a cable box and a DBS receiver are used, position the Controller so its signal reaches the remote sensors on both the cable box and DBS receiver.

BAttach Controller

Fix securely using the adhesive strip attached on the back of the Controller.

Cable box or DBS receiver

CConnect cable box and/or DBS receiver to VCR


Cable box or DBS receiver

Transmitter

RF out

Audio/video output


Controller


To ANT. IN

To AUDIO/VIDEO IN


VCR

If your cable box or DBS receiver does not have audio/video output connectors, connect the RF output terminal on the unit to the ANT. IN terminal on the rear of your VCR.

If your cable box or DBS receiver has audio/video output connectors, connect an audio/video cable between the AUDIO/ VIDEO IN connectors on the rear of the VCR and the audio/ video output connectors on the unit.

If both a cable box and a DBS receiver are used, it is recommended that you connect the DBS receiver to your VCR’s AUDIO/VIDEO IN connectors and the cable box to your VCR’s ANT. IN connector.

DConnect Controller to VCR

Connect the Controller to the CABLE BOX Controller connector on the rear panel.

ETurn on cable box or DBS receiver

Select a channel other than channel 9 on your cable box, or channels 55, 100, 205 on your DBS receiver.

FAccess Main Menu screen, then Initial Set screen on VCR

Press MENU on the Remote. Press rt to move the highlight bar (arrow) to “INITIAL SET”, then press OK or e.

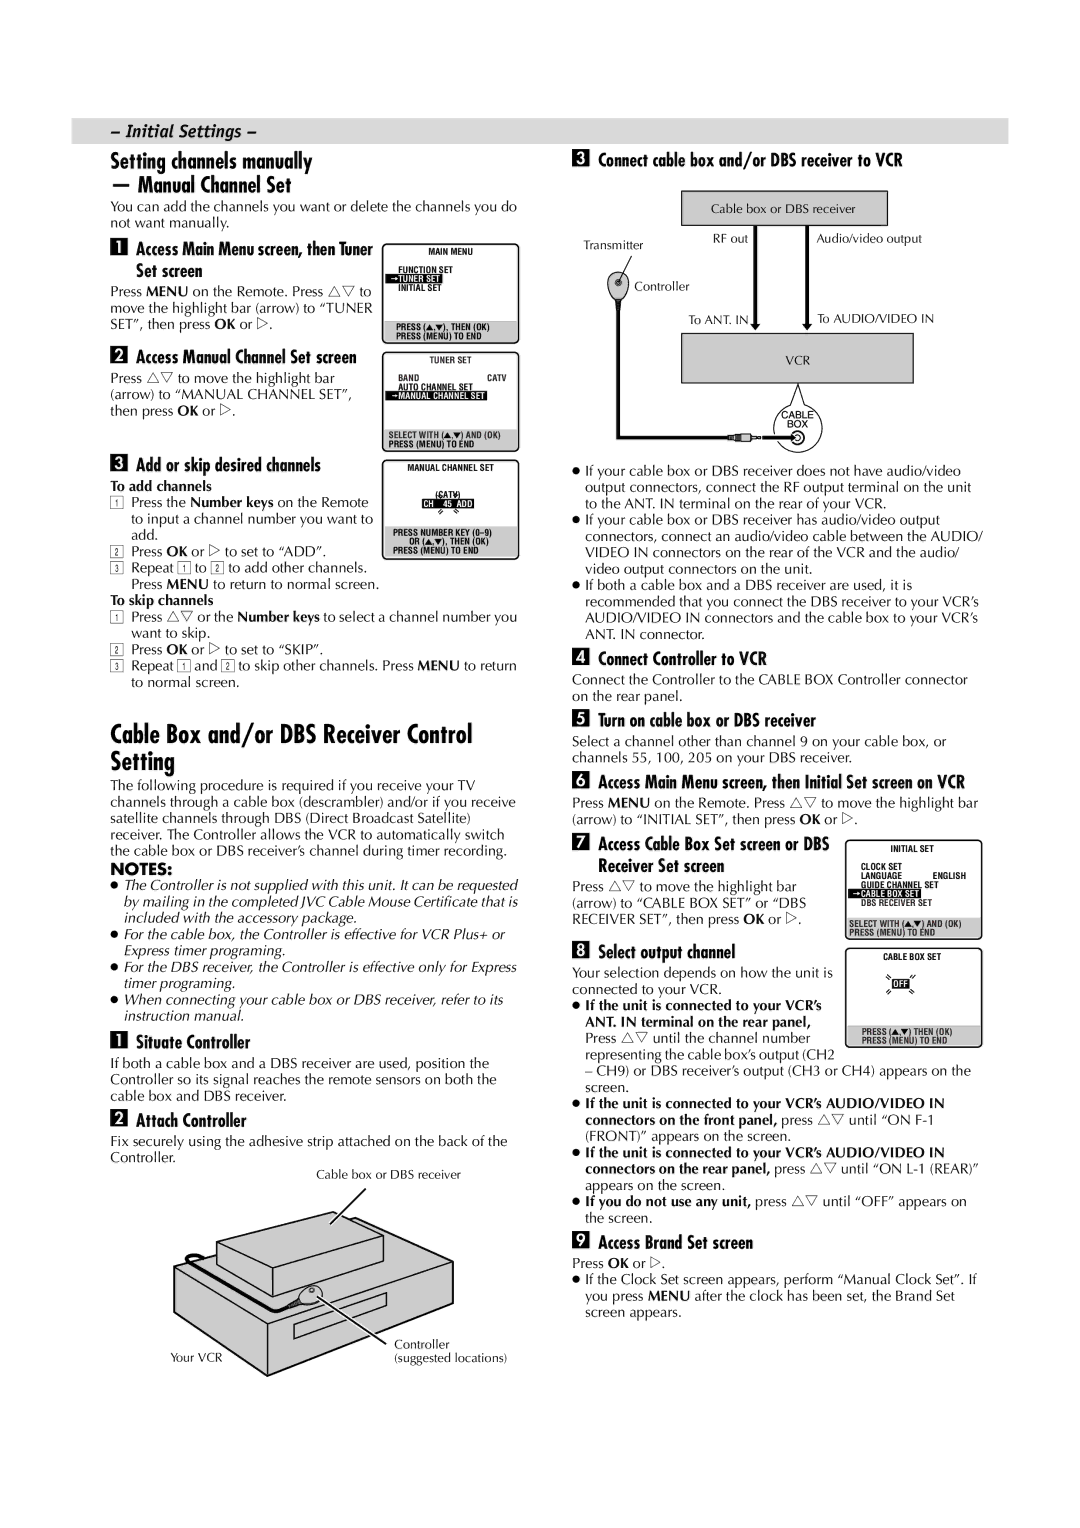
G Access Cable Box Set screen or DBS

Receiver Set screen

Press rt to move the highlight bar (arrow) to “CABLE BOX SET” or “DBS RECEIVER SET”, then press OK or e.

H Select output channel

Your selection depends on how the unit is connected to your VCR.

If the unit is connected to your VCR’s ANT. IN terminal on the rear panel,

Press rt until the channel number representing the cable box’s output (CH2

– CH9) or DBS receiver’s output (CH3 or CH4) appears on the screen.

If the unit is connected to your VCR’s AUDIO/VIDEO IN connectors on the front panel, press rt until “ON F-1 (FRONT)” appears on the screen.

If the unit is connected to your VCR’s AUDIO/VIDEO IN connectors on the rear panel, press rtuntil “ON L-1 (REAR)” appears on the screen.

If you do not use any unit, press rt until “OFF” appears on the screen.

IAccess Brand Set screen

Press OK or e.

If the Clock Set screen appears, perform “Manual Clock Set”. If you press MENU after the clock has been set, the Brand Set screen appears.

Your VCR

Controller

(suggested locations)

Page 6
Image 6
JVC HR-VP790U Cable Box and/or DBS Receiver Control Setting, Setting channels manually Manual Channel Set

HR-VP790U specifications

The JVC HR-VP790U is a sophisticated VCR that showcases JVC's renowned expertise in the field of video technology. As a versatile VCR, it combines high-quality video playback and recording capabilities, making it a desirable choice for both casual viewers and video enthusiasts alike.

One of the standout features of the HR-VP790U is its ability to support VHS, S-VHS, and S-VHS ET formats. This flexibility allows users to enjoy a wide range of video content, whether it comes from standard VHS tapes or high-resolution S-VHS tapes. The incorporation of the S-VHS ET technology enhances the video output quality of standard VHS tapes, enabling users to experience sharper and clearer images compared to traditional VHS playback.

The HR-VP790U is equipped with JVC's advanced digital noise reduction technology, which minimizes visual artifacts and enhances the overall picture quality. This technology is particularly beneficial for users who often deal with older tapes that may have suffered from degradation over time. Additionally, the VCR features various playback modes, including slow motion and frame-by-frame playback, which add to the viewing experience by allowing users to engage with the content more intimately.

Another significant characteristic of the HR-VP790U is its robust recording capabilities. The unit features a one-touch recording function that simplifies the process of capturing video content onto tape. Users can easily set the timer recording functions to ensure they never miss their favorite shows. This feature is especially useful for those with busy schedules who want to keep up with television programming.

In terms of connectivity, the HR-VP790U boasts composite video and audio outputs, making it compatible with a wide variety of televisions and other multimedia devices. Additionally, the unit provides a simple and intuitive interface, allowing users to navigate through menus and settings with ease.

Overall, the JVC HR-VP790U is a well-rounded VCR that combines quality, versatility, and ease of use. Whether you are reliving memories from your VHS collection or recording new content, this model delivers impressive performance tailored to meet the needs of modern users while honoring the legacy of traditional video technology. Its combination of advanced features and user-friendly design makes it a remarkable choice for home entertainment enthusiasts.