Installation (continued)
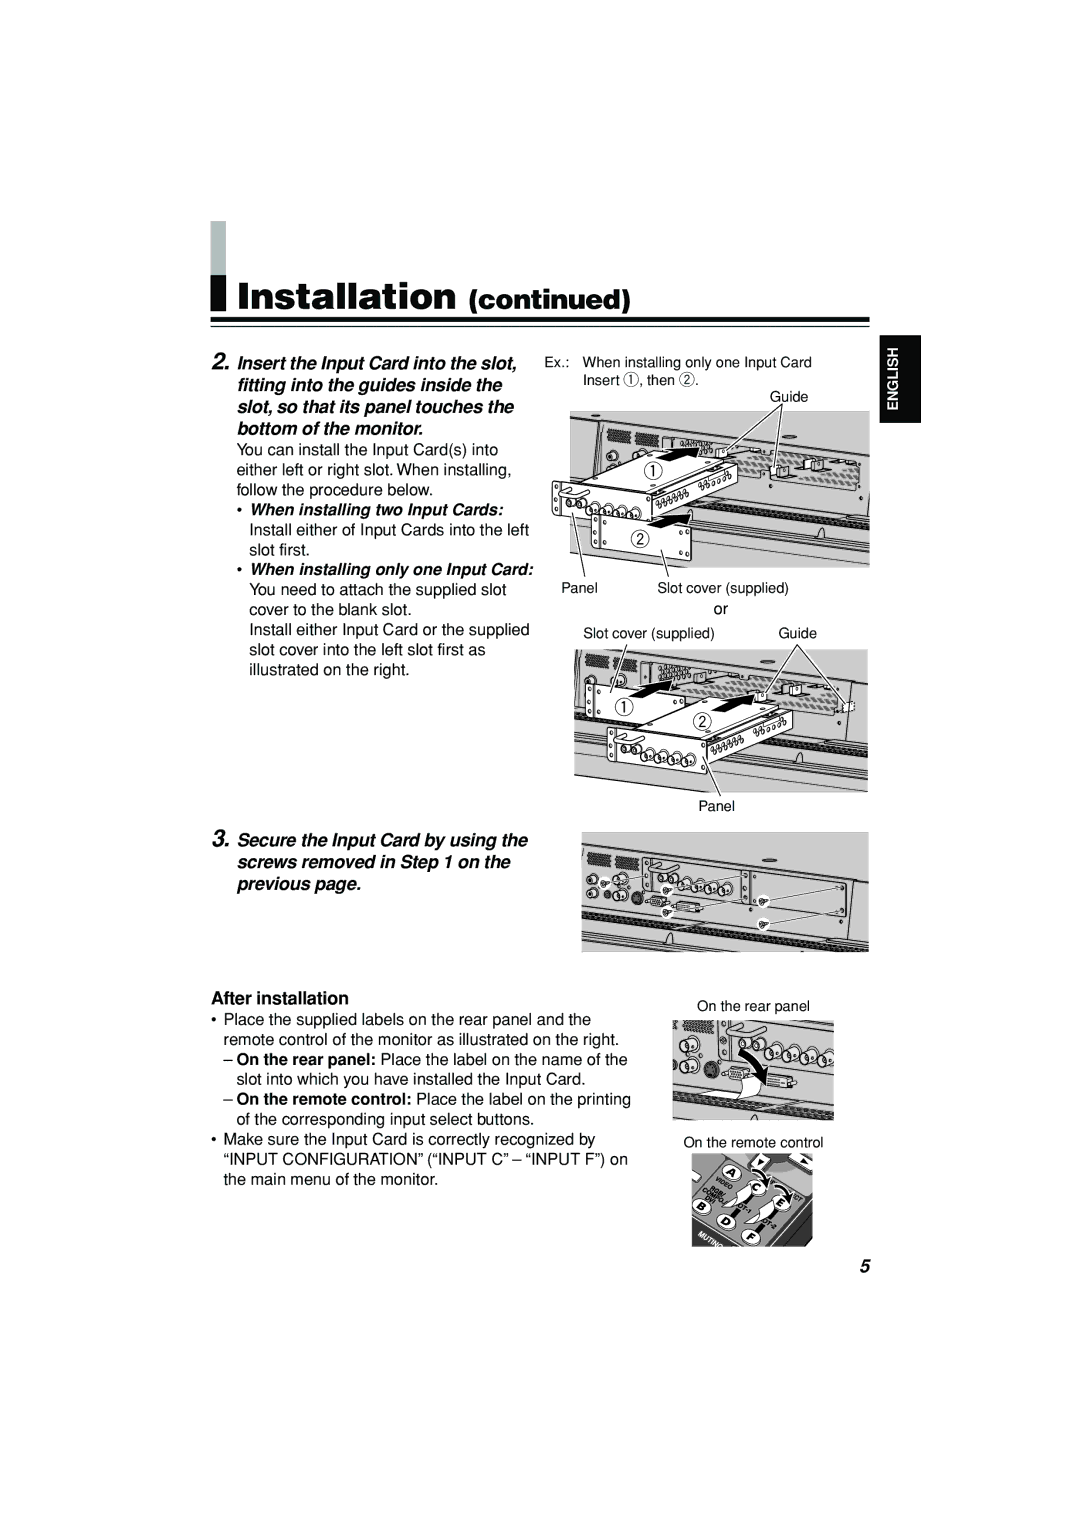
2.Insert the Input Card into the slot, fitting into the guides inside the slot, so that its panel touches the bottom of the monitor.
You can install the Input Card(s) into either left or right slot. When installing, follow the procedure below.
•When installing two Input Cards: Install either of Input Cards into the left slot first.
•When installing only one Input Card: You need to attach the supplied slot cover to the blank slot.
Install either Input Card or the supplied slot cover into the left slot first as illustrated on the right.
Ex.: When installing only one Input Card Insert 1, then 2.
Guide
Panel | Slot cover (supplied) | |
| or |
|
Slot cover (supplied) | Guide | |
ENGLISH
Panel
3.Secure the Input Card by using the
screws removed in Step 1 on the previous page.
After installation
•Place the supplied labels on the rear panel and the remote control of the monitor as illustrated on the right.
– On the rear panel: Place the label on the name of the slot into which you have installed the Input Card.
–On the remote control: Place the label on the printing of the corresponding input select buttons.
•Make sure the Input Card is correctly recognized by “INPUT CONFIGURATION” (“INPUT C” – “INPUT F”) on the main menu of the monitor.
On the rear panel
On the remote control
5