Attaching the Network Pack to the Camera
1.Insure that the
2.If attached, remove the battery holder from the rear of the
3.With the enclosed rubber gasket aligned with the screw holes on the rear of the camera, hook the Network Pack to the back of the camera from the top.
4.Feed the one large and two small power connectors through the hole in the
5.Press the Network Pack firmly to the back of the camera.
6.Secure the Network Pack to the camera with the two screws at the bottom of the network pack.
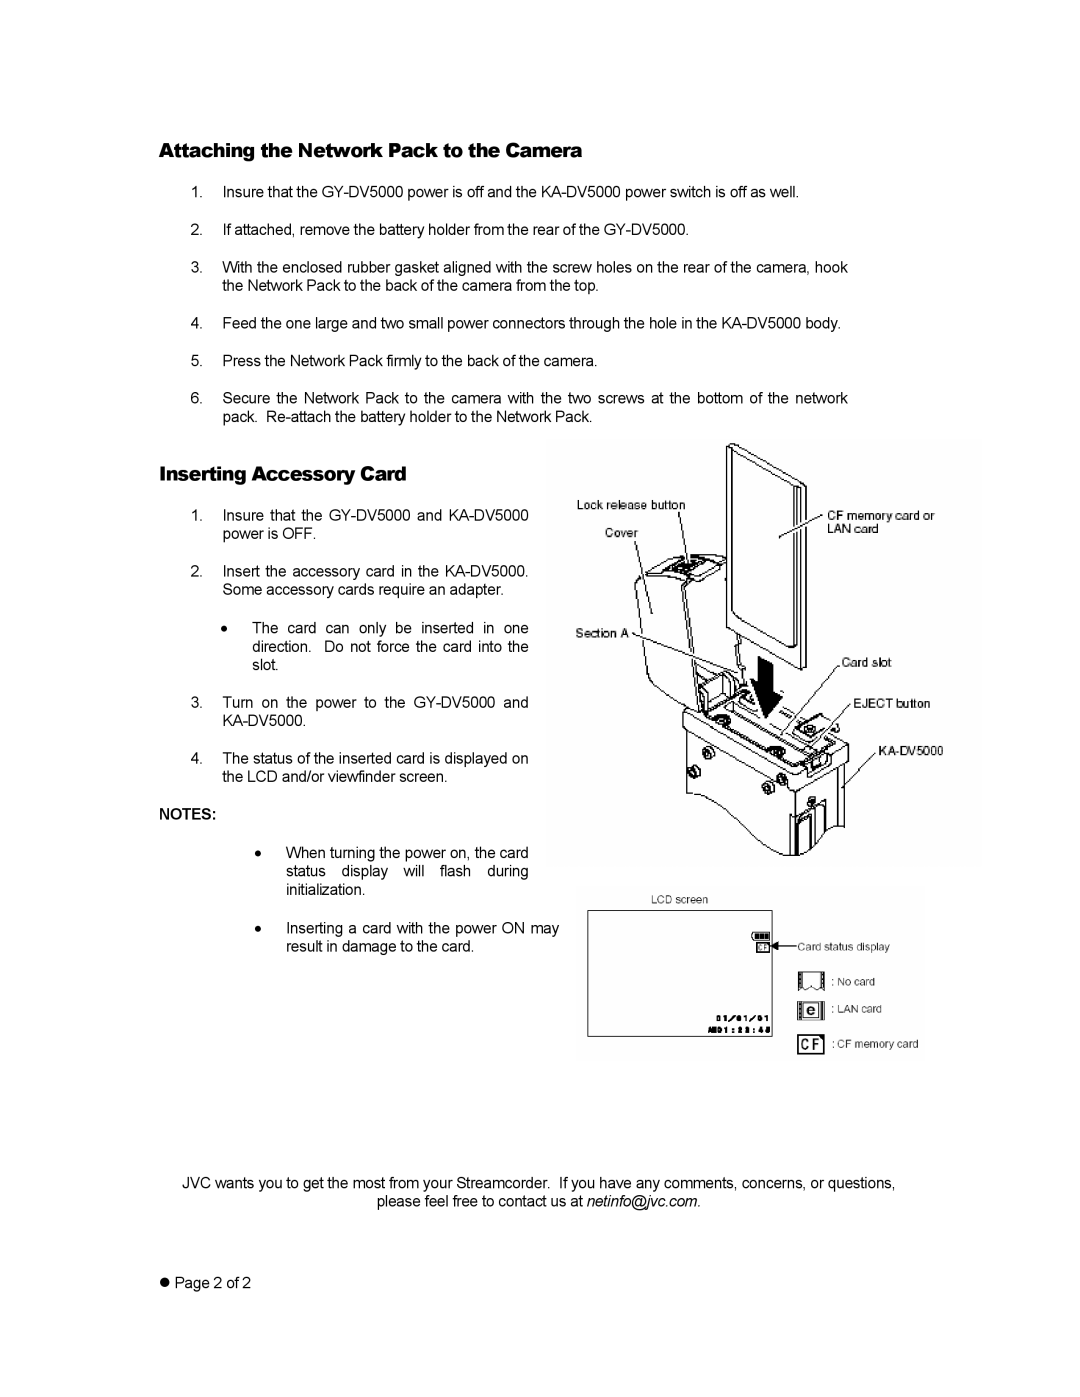
Inserting Accessory Card
1.Insure that the
2.Insert the accessory card in the
•The card can only be inserted in one direction. Do not force the card into the slot.
3.Turn on the power to the
4.The status of the inserted card is displayed on the LCD and/or viewfinder screen.
NOTES:
•When turning the power on, the card status display will flash during initialization.
•Inserting a card with the power ON may result in damage to the card.
JVC wants you to get the most from your Streamcorder. If you have any comments, concerns, or questions,
please feel free to contact us at netinfo@jvc.com.
zPage 2 of 2
