Manuals
/
JVC
/
Home Audio
/
Stereo System
JVC
manual
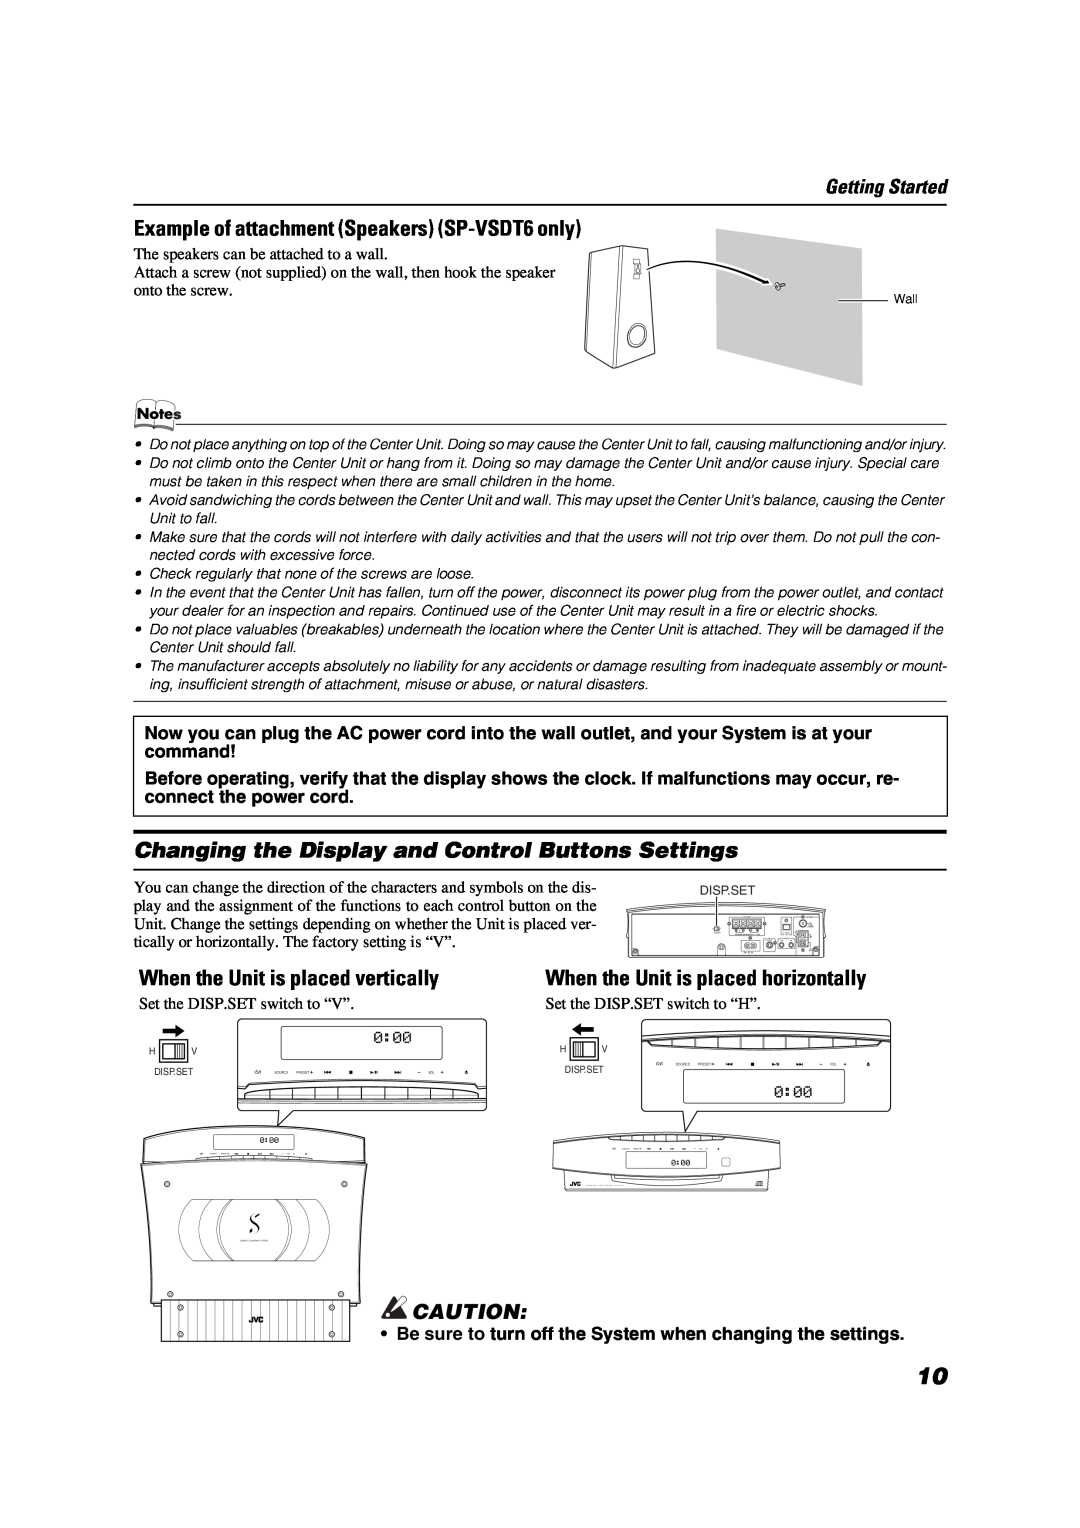
Example of attachment Speakers SP-VSDT6only, When the Unit is placed vertically
Models:
P-VSDT6
LVT0853-009B
1
13
32
32
Download
32 pages
3.42 Kb
10
11
12
13
14
15
16
17
Troubleshooting
Specs
Install
Signal cord not supplied
Setting the Daily Timer
CD-inindicator
Connecting the FM Antenna
Maintenance
Accessories
Manual Tuning
Page 13
Image 13
Page 12
Page 14
Page 13
Image 13
Page 12
Page 14
Contents
COMPACT COMPONENT SYSTEM
VS-DT6R/VS-DT7R/VS-DT9R
Consists of CA-VSDT6Rand SP-VSDT6
Consists of CA-VSDT7Rand SP-VSDT6
Warnings, Cautions and Others
SAFETY INSTRUCTIONS
1Installation of the System
Features
2Power cord
Introduction
Specifications
Table of Contents
How To Put Batteries In the Remote Control
Accessories
Getting Started
Using the Supplied Wire Antenna
Connecting the FM Antenna
Using the Coaxial Type Connector Not Supplied
Rear Panel of the Center Unit
Rear Panel of the Center Unit
Connecting the AM MW/LW Antenna
Getting Started
The AM loop antenna can be attached to a wall
When removing
Connecting the Speakers
When attaching the speaker grilles
Removing the speaker grilles
Connecting External Equipment
Connecting a Subwoofer
Signal cord not supplied
Signal cord not supplied
Connecting the AC Power Cord
Connecting an MD Recorder, etc Digital Output
Installing the Unit on the Stand
CAUTIONS
Example of attachment Center Unit
Installing the Equipment on the Wall
Getting Started
CAUTIONS
When the Unit is placed vertically
Changing the Display and Control Buttons Settings
When the Unit is placed horizontally
Example of attachment Speakers SP-VSDT6only
COMPU Play
Using the Remote Control
On the Remote Control
Getting Started
Adjusting the Brightness DIMMER
Turning the Power On and Off
When the System is Turned On
Basic Operations
2Press the COLOR button on the Remote Control
Adjusting the Volume
Changing the Color COLOR VS-DT9Ronly
For private listening
Reinforcing the Bass Sound AHB PRO
on the Remote Control
Showing the Time DISPLAY
Tone Control BASS/TREBLE
Tuning In a Station
Using the Tuner
One Touch Radio
1Press the FM/AM button
Manual Presetting
Presetting Stations
Using the Tuner
1Select a band by pressing the FM/AM button
To Change the FM Reception Mode
To show the RDS signals on the display
Receiving FM Stations with RDS
Using the Tuner
Control
To search for a programme by PTY codes
3 Press the PTY SEARCH button within
10 seconds again
Using the Tuner
To select a programme type
To Insert a CD
Using the CD Player
1 Press the % button
When playing a CD-Ror CD-RW
Using the CD Player
Basics of Using the CD Player - Normal Play
To Unload a CD
To Play a CD
Random Play
To Modify the Program
Repeating Tracks
Child Lock
Listening to External Equipment
Using External Equipment
1Press the MD/AUX button
2 Start playing the external equipment
Setting the Clock
Using the Timers
Remote Control to set the hour
4 Press the SET button
Using the Timers
Setting the Daily Timer
1Setting the ON time Example
2 Setting the OFF time Example
2Press the SLEEP button on the Remote Control
Setting the SLEEP Timer
7 Press the % button to turn off the Sys- tem
1Play a CD or tune in to the desired sta- tion
Cleaning the unit
Care And Maintenance
Compact Discs
Moisture Condensation
Symptom
Troubleshooting
Possible Cause
Action
Specifications
Top
Page
Image
Contents