
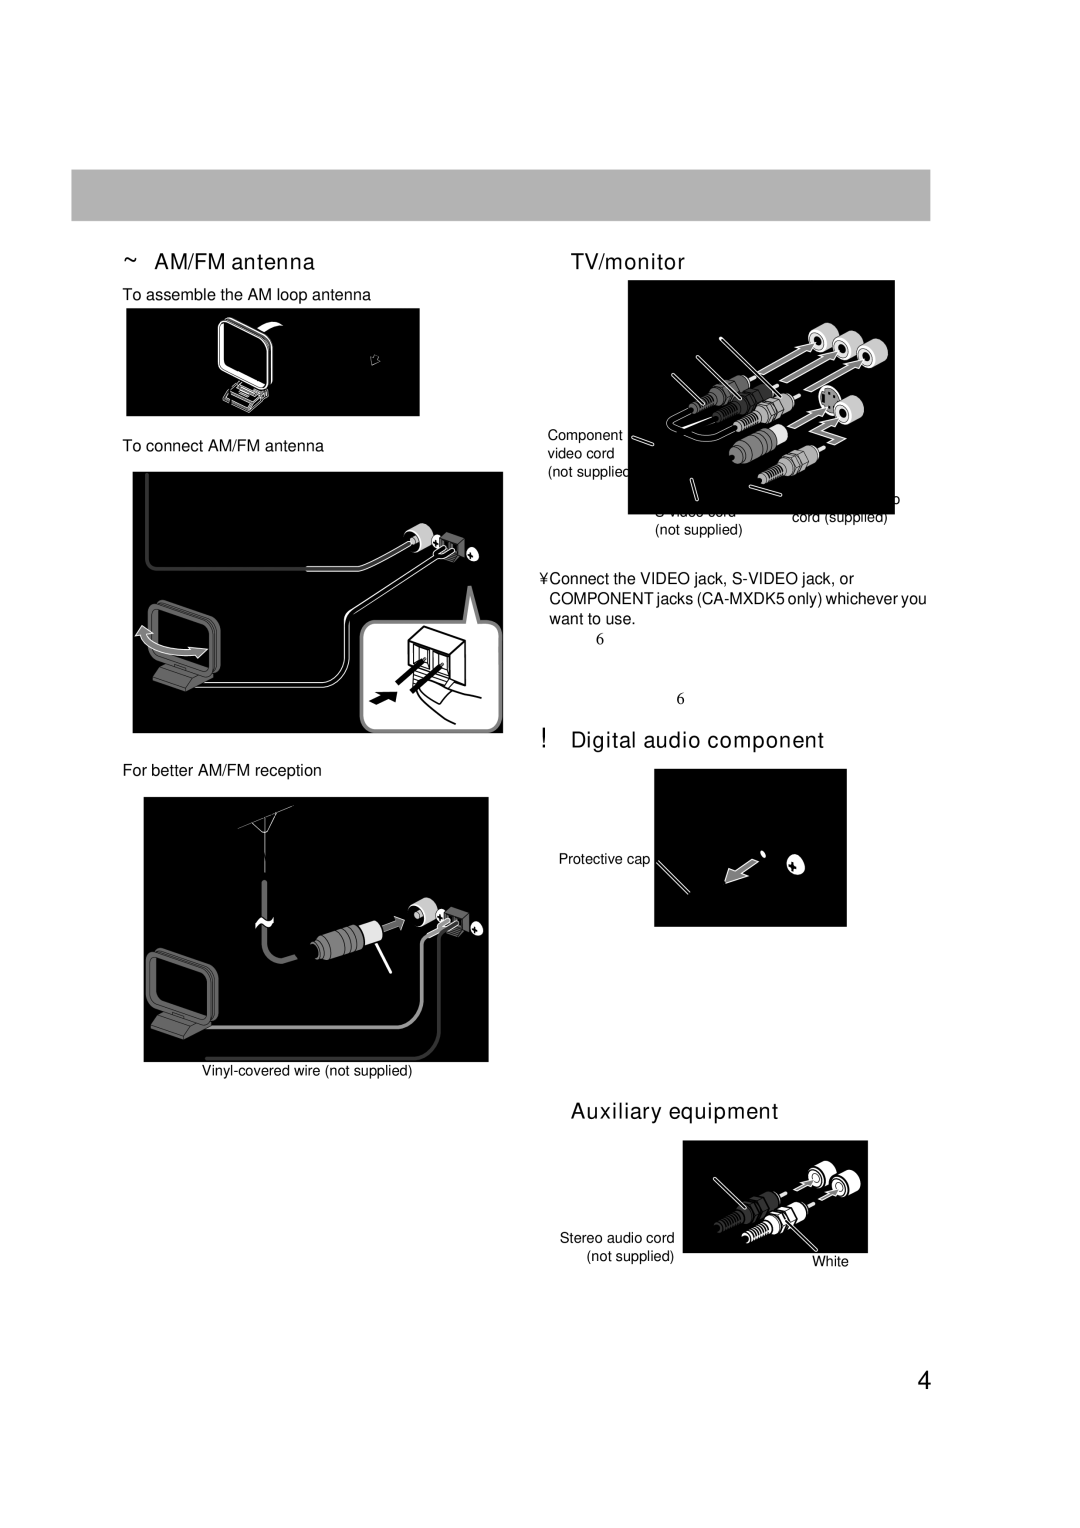
MX-DK1, MX-DK15, MX-DK3 specifications
The JVC MX series, comprising models like the MX-DK3, MX-DK1, and MX-DK15, redefines the audio experience with their powerful sound technology and versatile functionalities. These compact mini systems are engineered to deliver high-quality audio performance while being user-friendly and aesthetically pleasing.Starting with the JVC MX-DK3, this model distinguishes itself with a robust speaker system that supports a variety of audio playback options. The MX-DK3 features a 3-disc CD changer which allows users to enjoy continuous music without the need for manual disc swapping. Its dual cassette deck is perfect for archiving music from cassette tapes or for creating custom mixtapes, showcasing JVC’s commitment to retro functionality in a modern format. The system also includes an FM/AM tuner and supports auxiliary input, making it easy to connect external devices such as smartphones and MP3 players.
The MX-DK1 follows closely, boasting a sleek design and an easy-to-use interface. This model is particularly known for its powerful bass response, thanks to JVC's innovative bass boost technology, which enhances low frequencies for a richer listening experience. The MX-DK1 also has an integrated equalizer, allowing users to tailor sound profiles according to personal preferences and music genres. Bluetooth connectivity is a standout feature of this model, enabling wireless streaming from smart devices, which is convenient for modern users.
Lastly, the JVC MX-DK15 represents the pinnacle of this mini system lineup. With advanced sound technologies such as Virtual Surround and dynamic sound control, this model immerses listeners in a full-bodied audio experience. The MX-DK15 also features a USB port for direct digital playback and recording, catering to the needs of users who prefer to enjoy music through USB devices. The inclusion of an LCD display allows for easy navigation and track information visibility, enhancing the user experience.
Across the MX series, JVC has prioritized user engagement and compatibility with multiple audio formats while maintaining quality sound. Each model represents a blend of functionality, style, and advanced technology, making them suitable for various settings, from casual listening at home to more robust sound setups for parties or events. Whether you're an audiophile or someone seeking a reliable music system, the JVC MX-DK3, MX-DK1, and MX-DK15 deliver performance and convenience in equal measure.