English

Using the Timers


2. Press the 4or ¢button to set the minute, then press the

Setting the Daily Timer

SET button.


Once you have set the Daily Timer, the timer will be activated at


the same time every day.


The Timer indicator ( ) on the display shows that the Daily Tim-

DAILY

er you have set is in effect.


You can set the Daily Timer whether the System is turned on or

“OFF TIME” appears for 2 seconds, and the System enters

off.

OFF-time setting mode. The current OFF time appears on


the display, and the hour digits blink.


• Perform each setting within 30 seconds. Otherwise, set-


ting will be cleared and the procedure must be repeated from the beginning.

If you have made a mistake while setting the timer, press the CANCEL button on the Unit. However, this does not al- ways cancel the current setting. If the CANCEL button does not work, press the CLOCK/TIMER button on the Unit repeatedly until the display returns to the original dis- play, and start from the first step.

Using the Unit

1 Press the % STANDBY/ON button to turn on the System.

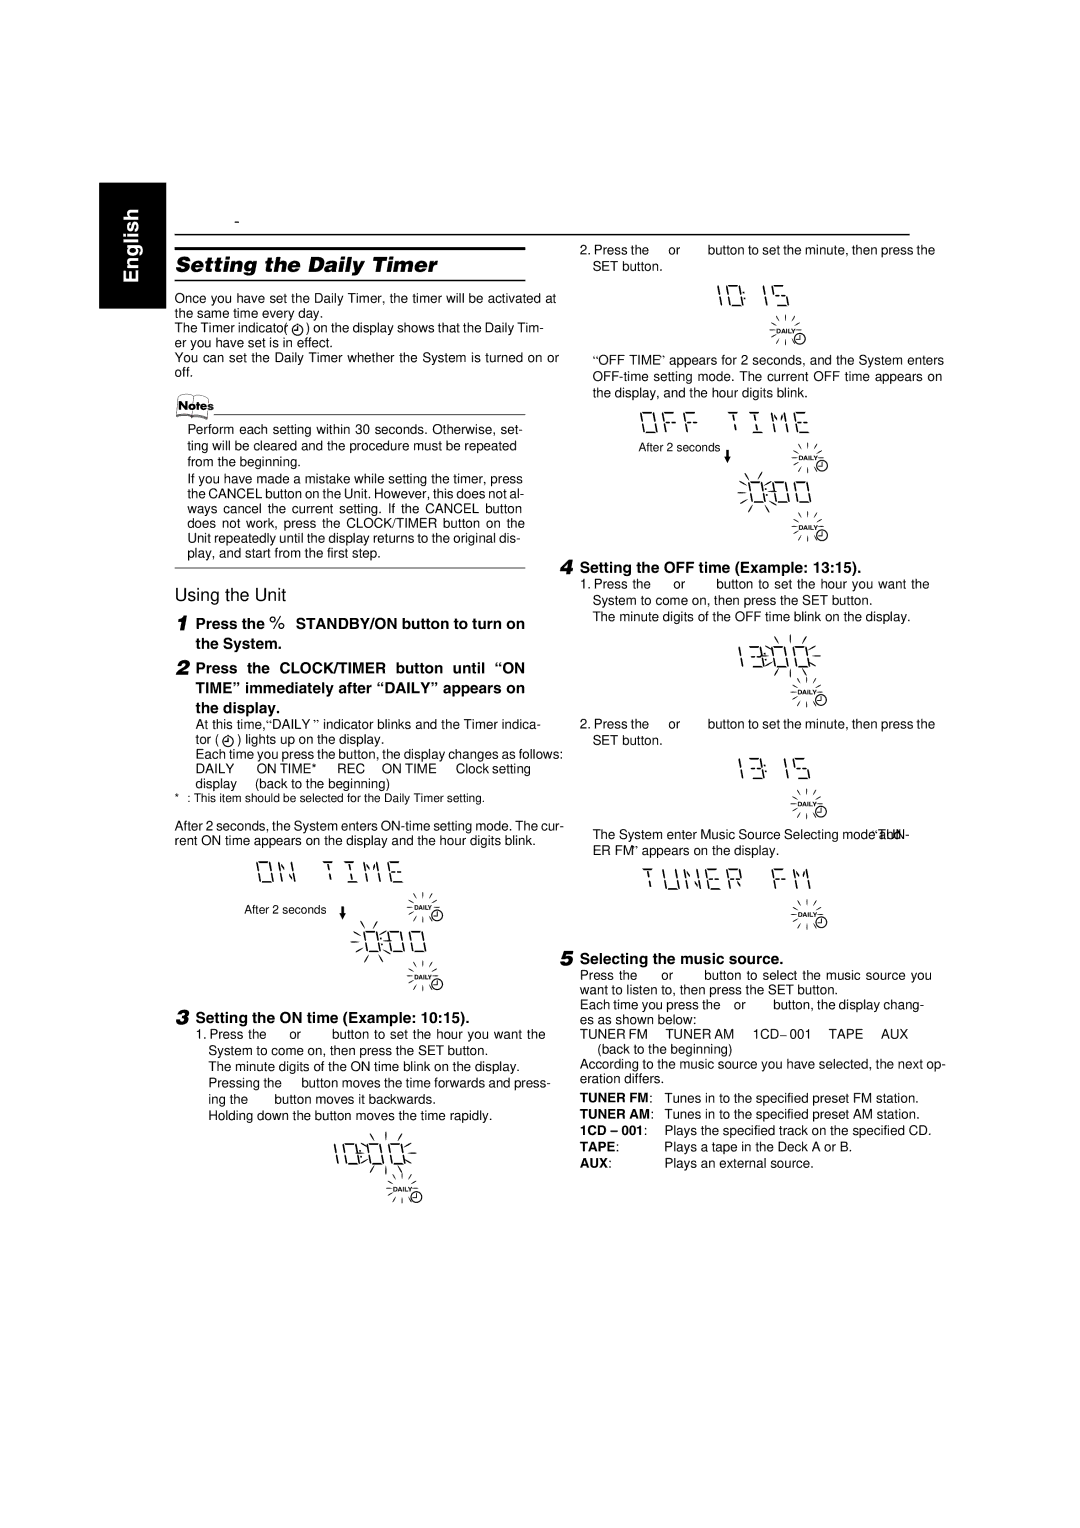
2 Press the CLOCK/TIMER button until “ON TIME” immediately after “DAILY” appears on the display.

At this time, “DAILY” indicator blinks and the Timer indica- tor ( ) lights up on the display.

Each time you press the button, the display changes as follows: DAILY =ON TIME* =REC =ON TIME =Clock setting display = (back to the beginning)

* : This item should be selected for the Daily Timer setting.

After 2 seconds

DAILY

DAILY

4 Setting the OFF time (Example: 13:15).

1.Press the 4 or ¢ button to set the hour you want the System to come on, then press the SET button.

The minute digits of the OFF time blink on the display.

DAILY

2.Press the 4or ¢button to set the minute, then press the SET button.

DAILY

After 2 seconds, the System enters ON-time setting mode. The cur-

rent ON time appears on the display and the hour digits blink.The System enter Music Source Selecting mode and “TUN- ER FM” appears on the display.

After 2 seconds

DAILY


DAILY

3 Setting the ON time (Example: 10:15).

1.Press the 4 or ¢ button to set the hour you want the System to come on, then press the SET button.

The minute digits of the ON time blink on the display. Pressing the ¢button moves the time forwards and press- ing the 4 button moves it backwards.

Holding down the button moves the time rapidly.

DAILY

5 Selecting the music source.

Press the 4 or ¢ button to select the music source you want to listen to, then press the SET button.

Each time you press the 4or ¢button, the display chang- es as shown below:

TUNER FM =TUNER AM =1CD – 001 =TAPE =AUX

=(back to the beginning)

According to the music source you have selected, the next op- eration differs.

TUNER FM: Tunes in to the specified preset FM station.

TUNER AM: Tunes in to the specified preset AM station.

1CD – 001: Plays the specified track on the specified CD.

TAPE: Plays a tape in the Deck A or B.

AUX: Plays an external source.

DAILY

25

Page 28
Image 28
JVC MX-K350V manual Setting the Daily Timer, Setting the OFF time Example, Setting the on time Example, After 2 seconds

MX-K350V specifications

The JVC MX-K350V is a versatile and powerful mini component system designed to deliver an exceptional audio experience for music lovers and casual listeners alike. Famous for its robust build quality and innovative technology, this component system has captured the attention of many audiophiles globally.

At the heart of the JVC MX-K350V lies its advanced audio capabilities, featuring a dual cassette deck that allows for both playback and recording. This vintage-inspired technology appeals to users looking to enjoy their classic cassette collection while also having the opportunity to create mixtapes or transfer old recordings to new media. The system also supports multiple digital formats, making it a superb choice for those who wish to enjoy music from various sources.

Another key feature of the JVC MX-K350V is its powerful amplifier, which delivers crisp and clean sound with impressive bass response. The system is equipped with a sophisticated equalizer offering various presets, enabling users to customize their audio experience according to their preferences. The sound staging and clarity offered by this system are truly commendable, pushing the boundaries of expectation for mini component systems.

In addition to its audio prowess, the JVC MX-K350V includes a built-in CD player, catering to those who still value physical media. With seamless track navigation, users can easily explore their CD collection while enjoying dynamic sound quality. Furthermore, the system supports MP3 playback, providing flexibility for users who enjoy digital music files.

Connectivity is another highlight of the JVC MX-K350V. The system features USB ports, allowing for quick and easy access to music files stored on flash drives. Users can effortlessly connect their music players or smartphones to the system via its auxiliary input, broadening their listening options.

The design of the MX-K350V exudes elegance with its sleek and compact finish that complements any home décor. The intuitive user interface is user-friendly, making it simple for both tech-savvy individuals and novices alike to navigate and enjoy its functionalities.

Overall, the JVC MX-K350V stands out as a feature-packed mini component system, adept at delivering high-quality sound while accommodating various media formats. Its impressive combination of classic and modern technologies ensures a timeless audio solution for households of all sizes.