English |
■Using the Cassette Deck (Recording)
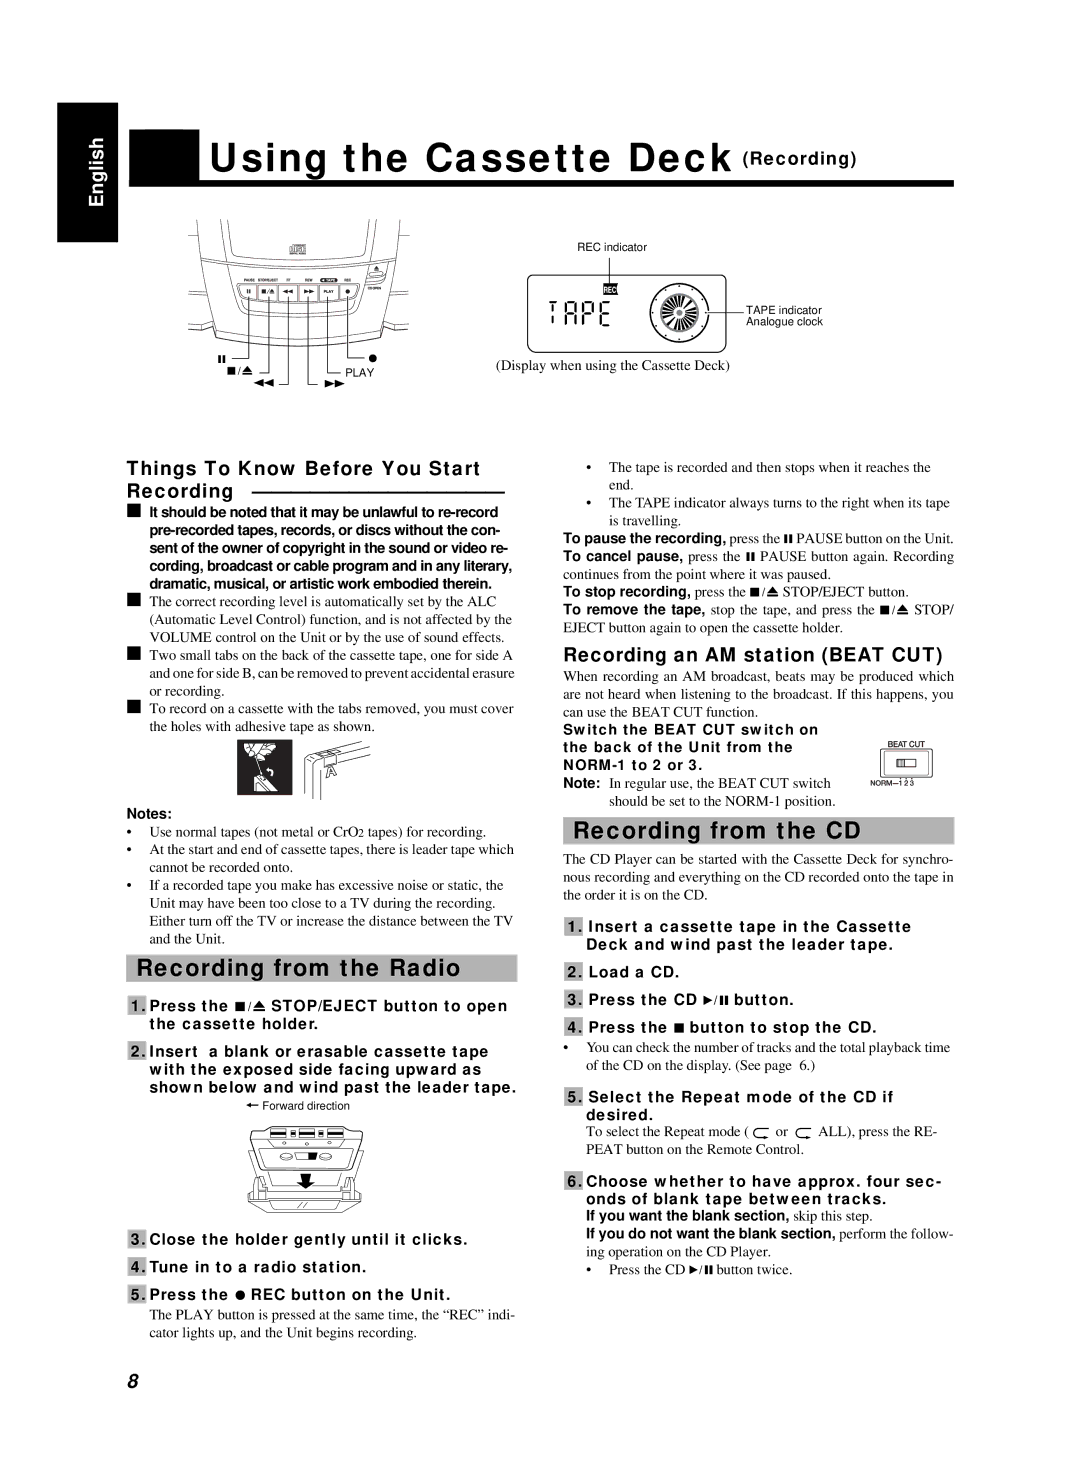
REC indicator
![]() TAPE indicator
TAPE indicator
Analogue clock
8 |
|
|
|
|
|
|
| ¦ | (Display when using the Cassette Deck) |
|
|
| |||||||
¤ |
|
|
| PLAY | |||||
|
|
|
| ||||||
1Á
Things To Know Before You Start Recording —————————————
■It should be noted that it may be unlawful to
■The correct recording level is automatically set by the ALC (Automatic Level Control) function, and is not affected by the VOLUME control on the Unit or by the use of sound effects.
■Two small tabs on the back of the cassette tape, one for side A and one for side B, can be removed to prevent accidental erasure or recording.
■To record on a cassette with the tabs removed, you must cover the holes with adhesive tape as shown.
Notes:
•Use normal tapes (not metal or CrO 2 tapes) for recording.
•At the start and end of cassette tapes, there is leader tape which cannot be recorded onto.
•If a recorded tape you make has excessive noise or static, the Unit may have been too close to a TV during the recording. Either turn off the TV or increase the distance between the TV and the Unit.
Recording from the Radio
■1. Press the ¤ STOP/EJECT button to open the cassette holder.
■2. Insert a blank or erasable cassette tape with the exposed side facing upward as shown below and wind past the leader tape.
+Forward direction
■3. Close the holder gently until it clicks. ■4. Tune in to a radio station.
■5. Press the ¦ REC button on the Unit.
The PLAY button is pressed at the same time, the “REC” indi- cator lights up, and the Unit begins recording.
•The tape is recorded and then stops when it reaches the end.
•The TAPE indicator always turns to the right when its tape
is travelling.
To pause the recording, press the 8PAUSE button on the Unit. To cancel pause, press the 8 PAUSE button again. Recording continues from the point where it was paused.
To stop recording, press the ¤STOP/EJECT button.
To remove the tape, stop the tape, and press the ¤ STOP/ EJECT button again to open the cassette holder.
Recording an AM station (BEAT CUT)
When recording an AM broadcast, beats may be produced which are not heard when listening to the broadcast. If this happens, you can use the BEAT CUT function.
Switch the BEAT CUT switch on the back of the Unit from the
Note: In regular use, the BEAT CUT switch should be set to the
Recording from the CD
The CD Player can be started with the Cassette Deck for synchro- nous recording and everything on the CD recorded onto the tape in the order it is on the CD.
■1. Insert a cassette tape in the Cassette
Deck and wind past the leader tape. ■2. Load a CD.
■3. Press the CD 6 button.
■4. Press the 7 button to stop the CD.
•You can check the number of tracks and the total playback time of the CD on the display. (See page 6.)
■5. Select the Repeat mode of the CD if desired.
To select the Repeat mode ( ![]() or
or ![]() ALL), press the RE- PEAT button on the Remote Control.
ALL), press the RE- PEAT button on the Remote Control.
■6. Choose whether to have approx. four sec- onds of blank tape between tracks.
If you want the blank section, skip this step.
If you do not want the blank section, perform the follow-
ing operation on the CD Player.
• Press the CD 6button twice.
8