FOR OPTIMUM PERFORMANCE
Optimum throw distance from screen to projector: 12 - 28 feet (3.5 to 8.5 meters).
Ratio of throw distance to screen width: 1.7 minimum.
Designed projector mounting configuration: ceiling mounted (i.e. projector feet "up") and horizontally centered (approximately) on the center of the screen.
Optimum vertical position of the projector: +/- 20% of screen height from the top of the screen.
Design tip: Variations from optimum guidance will typically not cause noticeable effects on image quality, although a small ratio of throw distance to screen width will likely result in the image being cut off at the edges (overall, a larger ratio is recommended).
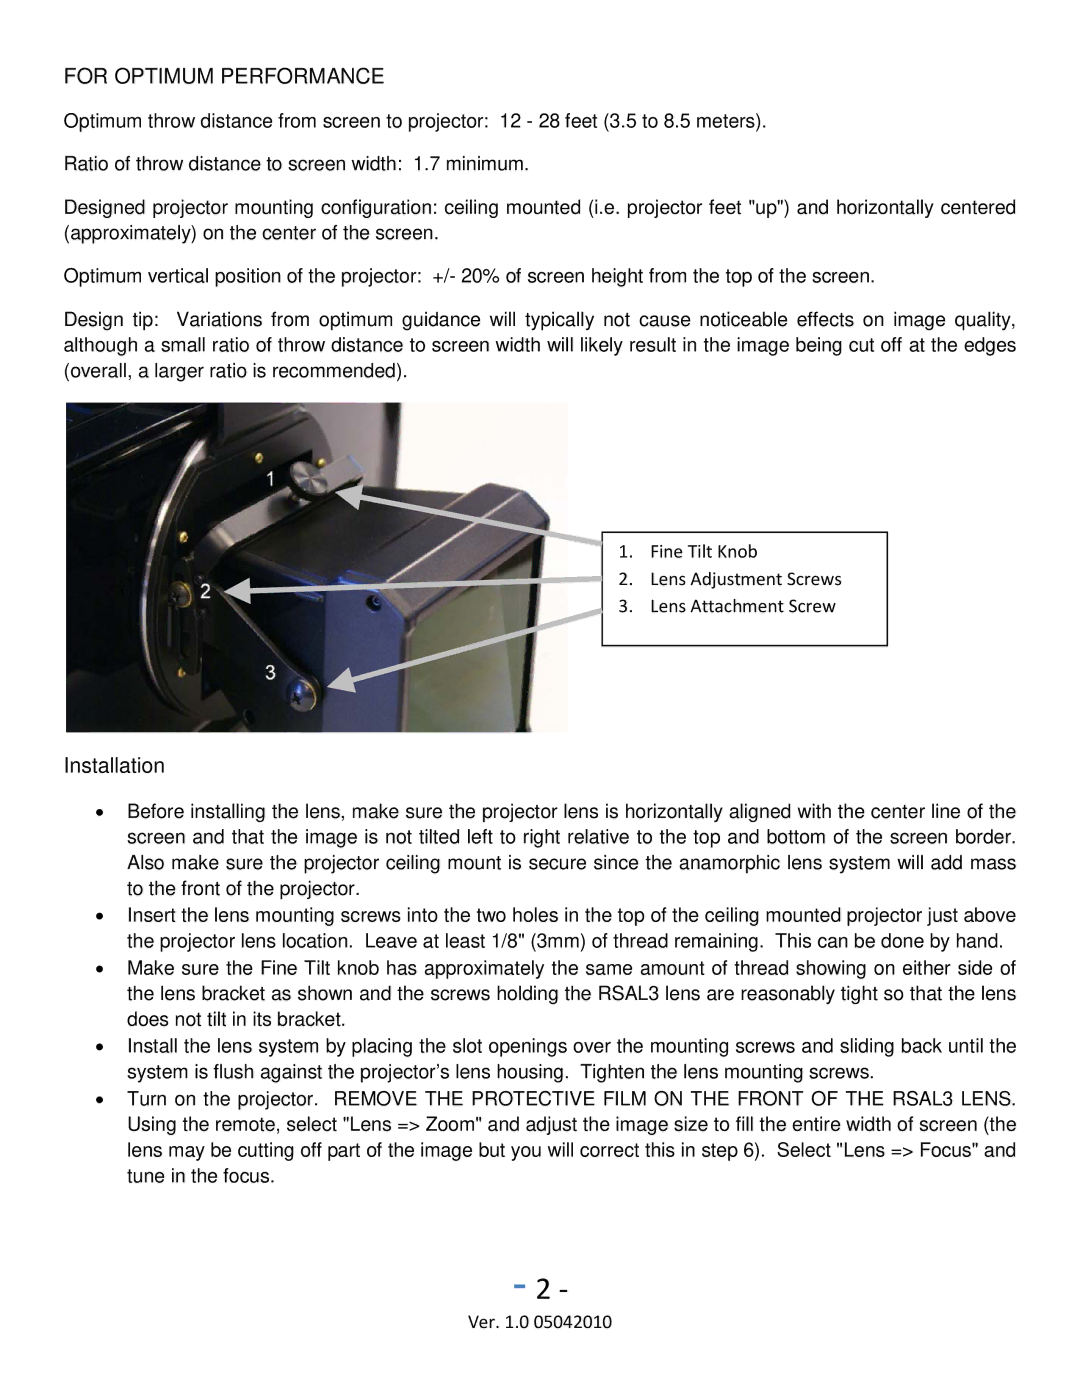
1. Fine Tilt Knob
2. Lens Adjustment Screws
3. Lens Attachment Screw
Installation
•Before installing the lens, make sure the projector lens is horizontally aligned with the center line of the screen and that the image is not tilted left to right relative to the top and bottom of the screen border. Also make sure the projector ceiling mount is secure since the anamorphic lens system will add mass to the front of the projector.
•Insert the lens mounting screws into the two holes in the top of the ceiling mounted projector just above the projector lens location. Leave at least 1/8" (3mm) of thread remaining. This can be done by hand.
•Make sure the Fine Tilt knob has approximately the same amount of thread showing on either side of the lens bracket as shown and the screws holding the RSAL3 lens are reasonably tight so that the lens does not tilt in its bracket.
•Install the lens system by placing the slot openings over the mounting screws and sliding back until the system is flush against the projector's lens housing. Tighten the lens mounting screws.
•Turn on the projector. REMOVE THE PROTECTIVE FILM ON THE FRONT OF THE RSAL3 LENS. Using the remote, select "Lens => Zoom" and adjust the image size to fill the entire width of screen (the lens may be cutting off part of the image but you will correct this in step 6). Select "Lens => Focus" and tune in the focus.
-2 -
Ver. 1.0 05042010
