INSTALLATION
2.5 Adjusting the Camera Position
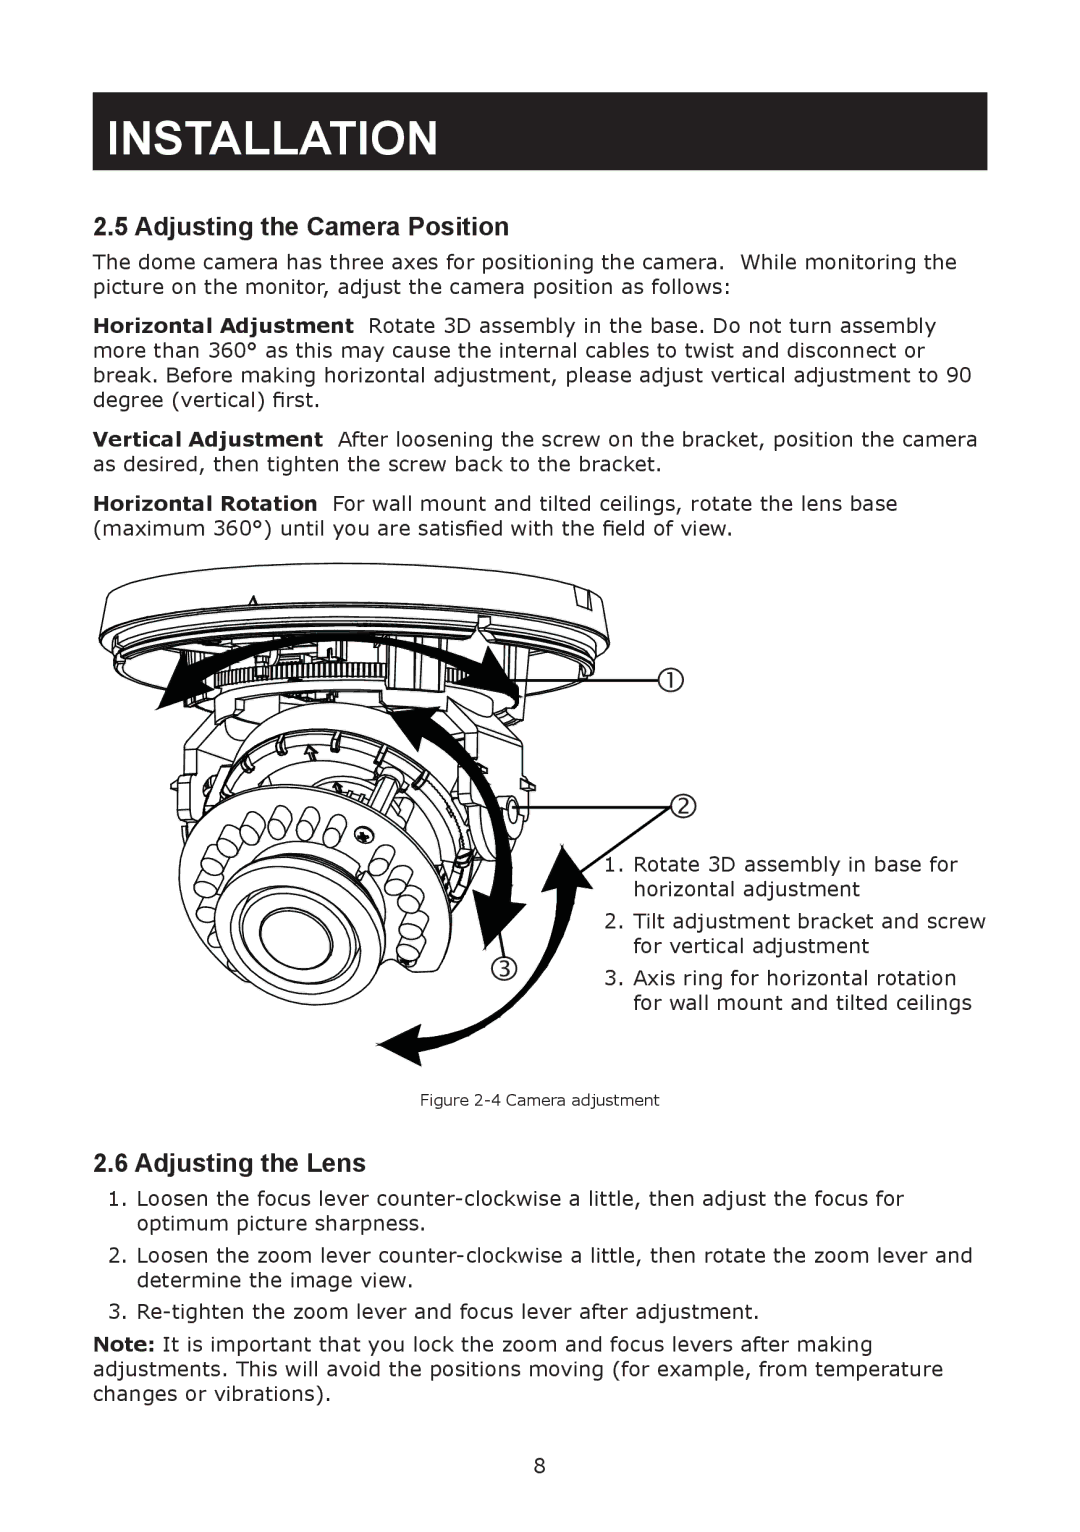
The dome camera has three axes for positioning the camera. While monitoring the picture on the monitor, adjust the camera position as follows:
Horizontal Adjustment Rotate 3D assembly in the base. Do not turn assembly more than 360° as this may cause the internal cables to twist and disconnect or break. Before making horizontal adjustment, please adjust vertical adjustment to 90 degree (vertical) first.
Vertical Adjustment After loosening the screw on the bracket, position the camera as desired, then tighten the screw back to the bracket.
Horizontal Rotation For wall mount and tilted ceilings, rotate the lens base (maximum 360°) until you are satisfied with the field of view.
1. Rotate 3D assembly in base for ![]()
![]() horizontal adjustment
horizontal adjustment
2. Tilt adjustment bracket and screw
for vertical adjustment
3. Axis ring for horizontal rotation for wall mount and tilted ceilings
Figure 2-4 Camera adjustment
2.6 Adjusting the Lens
1.Loosen the focus lever
2.Loosen the zoom lever
3.
Note: It is important that you lock the zoom and focus levers after making adjustments. This will avoid the positions moving (for example, from temperature changes or vibrations).
8
