Continued
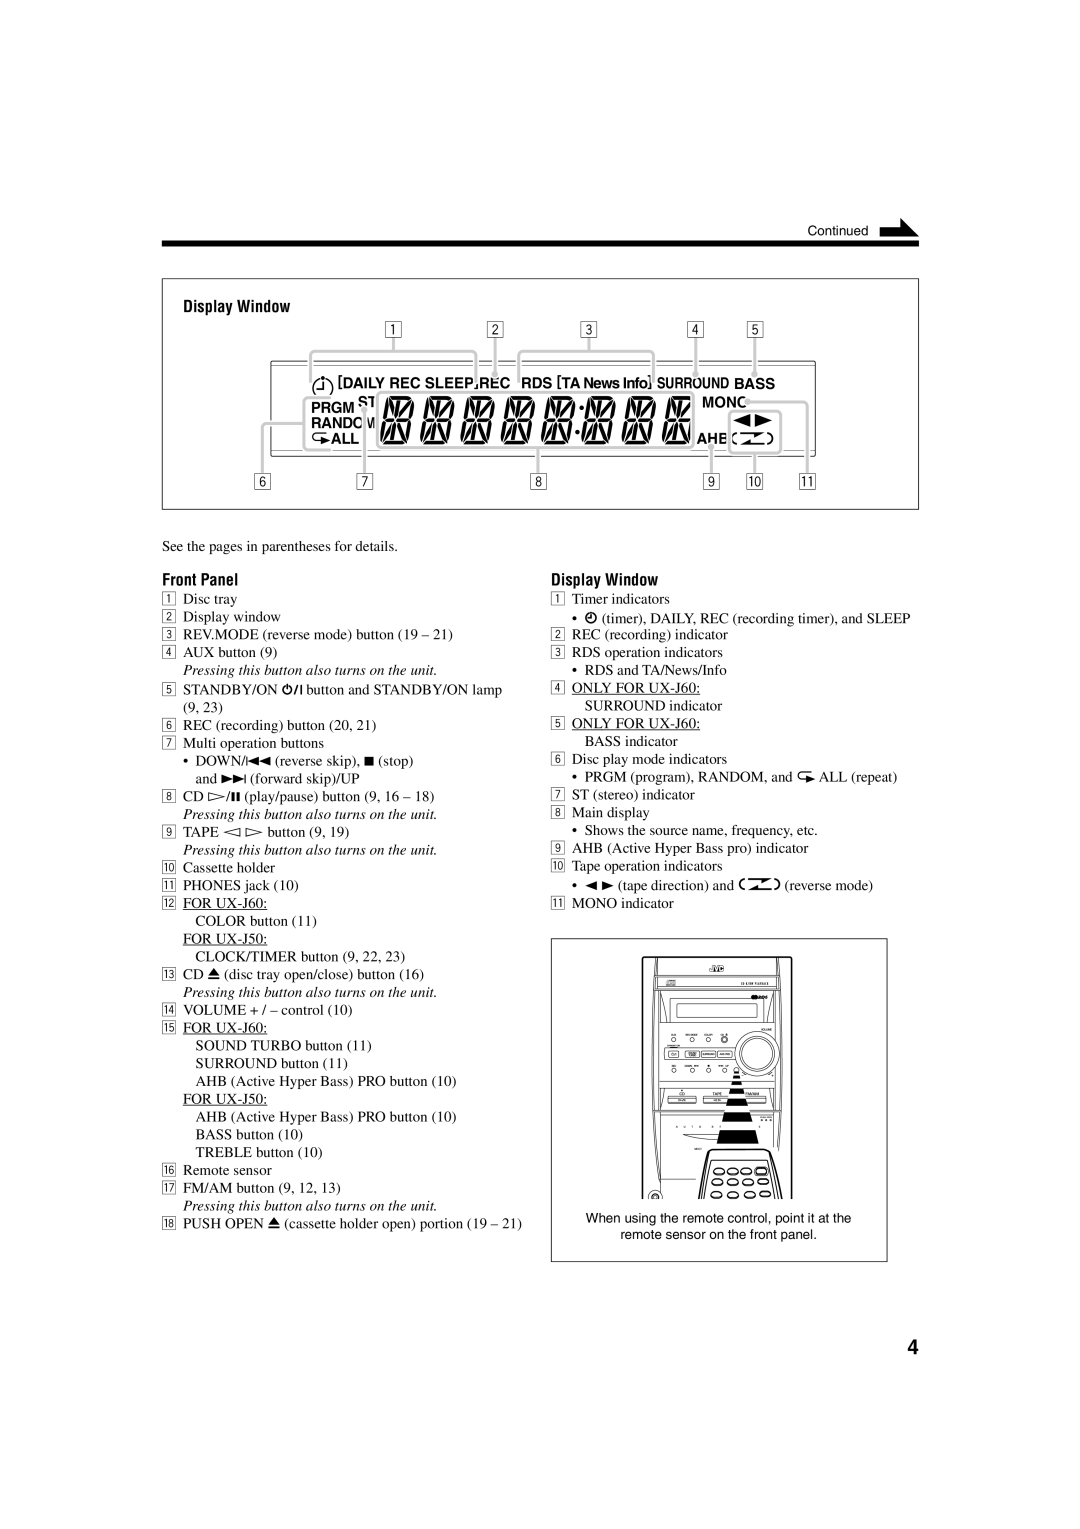
Display Window
1 | 2 | 3 | 4 | 5 |
| [DAILY REC SLEEP]REC | RDS [TA News Info] SURROUND BASS |
| ||
| PRGM ST |
| MONO |
| |
| RANDOM |
|
|
|
|
| ALL |
| AHB |
|
|
6 | 7 | 8 | 9 | p | q |
See the pages in parentheses for details.
Front Panel
1Disc tray
2Display window
3REV.MODE (reverse mode) button (19 – 21)
4 AUX button (9)
Pressing this button also turns on the unit.
5 STANDBY/ON ![]() button and STANDBY/ON lamp (9, 23)
button and STANDBY/ON lamp (9, 23)
6 REC (recording) button (20, 21)
7 Multi operation buttons
•DOWN/4 (reverse skip), 7 (stop) and ¢ (forward skip)/UP
8CD ‹/8 (play/pause) button (9, 16 – 18) Pressing this button also turns on the unit.
9TAPE ¤ ‹ button (9, 19)
Pressing this button also turns on the unit.
pCassette holder q PHONES jack (10) w FOR
COLOR button (11) FOR
CLOCK/TIMER button (9, 22, 23) e CD 0 (disc tray open/close) button (16)
Pressing this button also turns on the unit. r VOLUME + / – control (10)
t FOR
SOUND TURBO button (11) SURROUND button (11)
AHB (Active Hyper Bass) PRO button (10) FOR
AHB (Active Hyper Bass) PRO button (10) BASS button (10)
TREBLE button (10) y Remote sensor
u FM/AM button (9, 12, 13)
Pressing this button also turns on the unit.
i PUSH OPEN 0 (cassette holder open) portion (19 – 21)
Display Window
1Timer indicators
•![]() (timer), DAILY, REC (recording timer), and SLEEP 2 REC (recording) indicator
(timer), DAILY, REC (recording timer), and SLEEP 2 REC (recording) indicator
3 RDS operation indicators
•RDS and TA/News/Info
4ONLY FOR
5ONLY FOR
6Disc play mode indicators
•PRGM (program), RANDOM, and ![]() ALL (repeat) 7 ST (stereo) indicator
ALL (repeat) 7 ST (stereo) indicator
8 Main display
•Shows the source name, frequency, etc.
9AHB (Active Hyper Bass pro) indicator p Tape operation indicators
•2 3 (tape direction) and ![]()
![]()
![]() (reverse mode) q MONO indicator
(reverse mode) q MONO indicator
When using the remote control, point it at the
remote sensor on the front panel.
4