Manuals
/
JVC
/
Home Audio
/
Stereo System
JVC
GNT0065-018A
dimensions
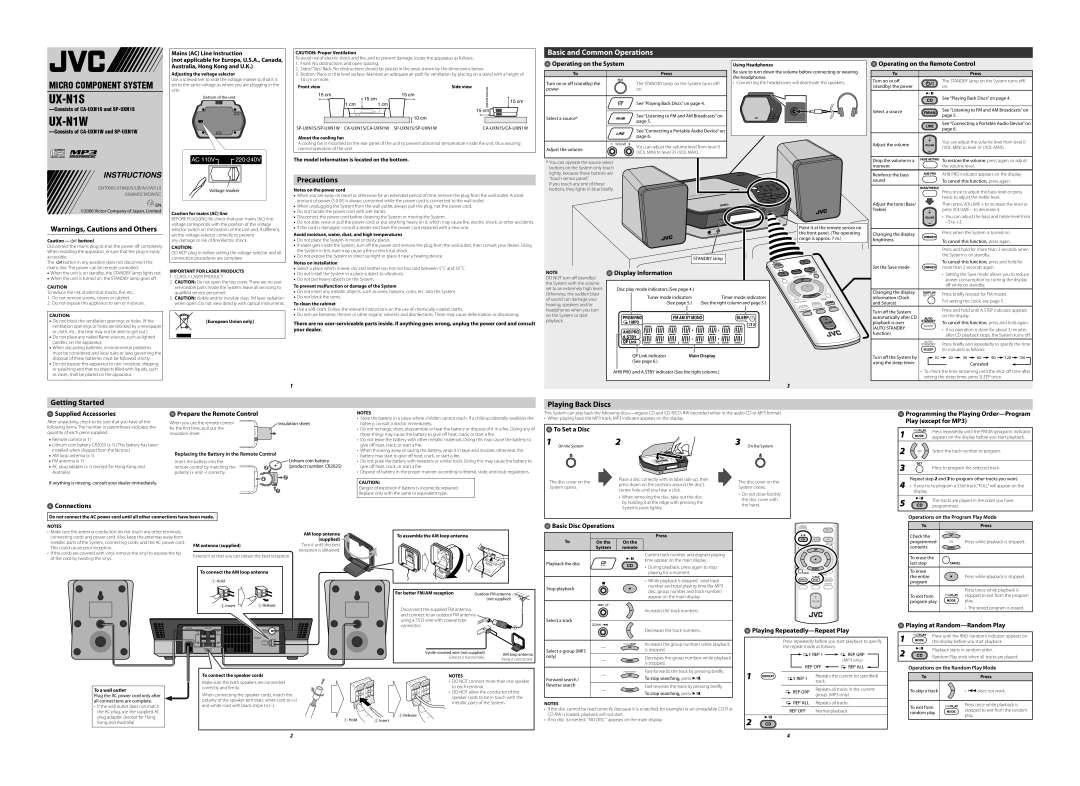
Warnings, Cautions and Others, Precautions, Getting Started, UX-N1S
Models:
0306MOCMDWJSC
GNT0065-018A
UX-N1W
1
1
2
2
Download
2 pages
29.57 Kb
1
2
Troubleshooting
Precautions
Page 1
Image 1
Page 1
Page 2
Page 1
Image 1
Page 1
Page 2
Contents
Warnings, Cautions and Others
Precautions
Getting Started
Playing Back Discs
Troubleshooting
Setting the Clock and Daily Timer
Connecting a Portable Audio Device
Maintenance
Top
Page
Image
Contents