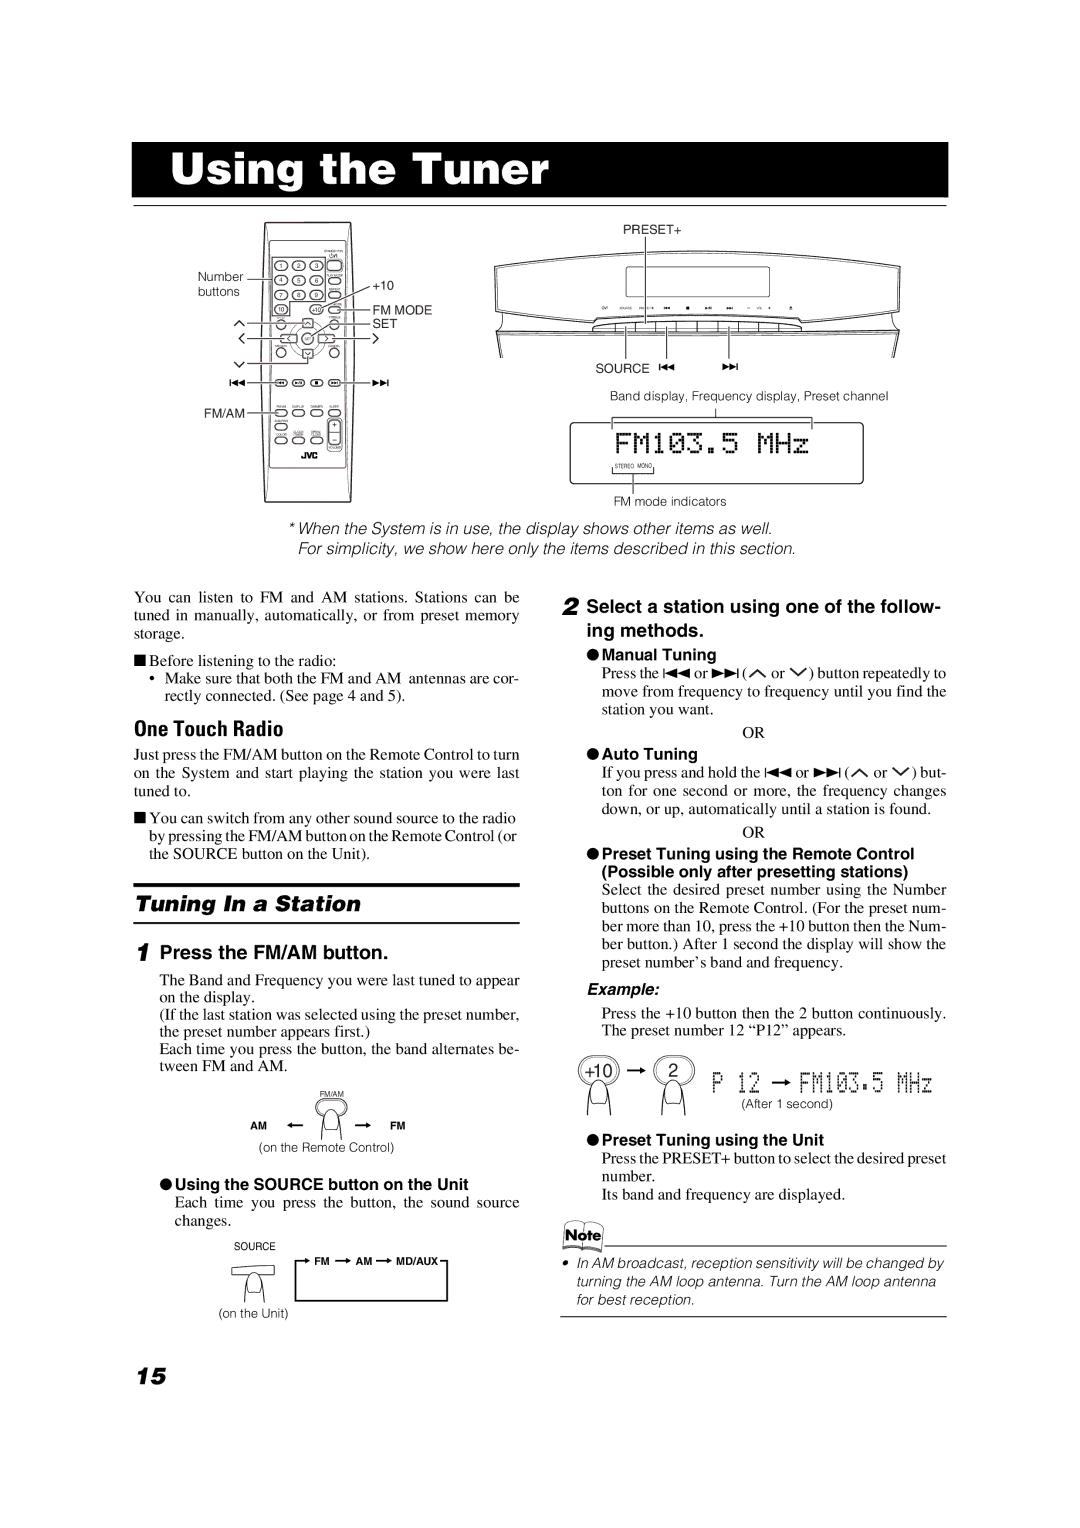
Using the Tuner

Number buttons

STANDBY/ON

1

2

3

4


PLAY MODE

5

6


REPEAT

7

8

9

10


FM MODE


+10

BASS


TREBLE


PRESET+


+10


FM MODE

SOURCE PRESET

VOL

SET


SET

MD/AUXCANCEL

SOURCE

Band display, Frequency display, Preset channel

FM/AM DISPLAY DIMMER SLEEP

FM/AM

AHB PRO

CLOCK OPEN/

COLOR /TIMER CLOSE

VOLUME

STEREO MONO

FM mode indicators

*When the System is in use, the display shows other items as well. For simplicity, we show here only the items described in this section.

You can listen to FM and AM stations. Stations can be tuned in manually, automatically, or from preset memory storage.

Before listening to the radio:

Make sure that both the FM and AM antennas are cor- rectly connected. (See page 4 and 5).

2 Select a station using one of the follow- ing methods.

Manual Tuning

Press the 4 or ¢( or ) button repeatedly to move from frequency to frequency until you find the station you want.

One Touch Radio

Just press the FM/AM button on the Remote Control to turn on the System and start playing the station you were last tuned to.

You can switch from any other sound source to the radio by pressing the FM/AM button on the Remote Control (or the SOURCE button on the Unit).

Tuning In a Station

1Press the FM/AM button.

The Band and Frequency you were last tuned to appear on the display.

(If the last station was selected using the preset number, the preset number appears first.)

Each time you press the button, the band alternates be- tween FM and AM.

FM/AM

AM

FM

(on the Remote Control)

Using the SOURCE button on the Unit

Each time you press the button, the sound source changes.

SOURCE

FM AM MD/AUX

(on the Unit)

OR

Auto Tuning

If you press and hold the 4 or ¢ ( or ) but- ton for one second or more, the frequency changes down, or up, automatically until a station is found.

OR

Preset Tuning using the Remote Control (Possible only after presetting stations)

Select the desired preset number using the Number buttons on the Remote Control. (For the preset num- ber more than 10, press the +10 button then the Num- ber button.) After 1 second the display will show the preset number’s band and frequency.

Example:

Press the +10 button then the 2 button continuously. The preset number 12 “P12” appears.

+10 2

(After 1 second)

Preset Tuning using the Unit

Press the PRESET+ button to select the desired preset number.

Its band and frequency are displayed.

In AM broadcast, reception sensitivity will be changed by turning the AM loop antenna. Turn the AM loop antenna for best reception.

15

Page 18
Image 18
JVC VS-DT6/VS-DT8 manual Using the Tuner, One Touch Radio, Tuning In a Station, Press the FM/AM button

VS-DT6/VS-DT8 specifications

The JVC VS-DT6 and VS-DT8 are advanced video production monitors designed for professionals in broadcasting, film, and live events. These monitors are renowned for their impressive display quality, robust features, and a user-friendly interface, making them essential tools for any video production setup.

Both models support high-resolution inputs, including 4K and UHD content, ensuring that users can monitor the highest quality video signals available. With a resolution of 1920x1080 pixels, the monitors provide stunning clarity and detail, crucial for critical color grading and precise image evaluation.

One of the standout characteristics of the VS-DT6 and VS-DT8 is their advanced display technology. They utilize an IPS panel, which provides wide viewing angles and exceptional color reproduction. This results in images that are consistent and accurate, regardless of the viewing angle, making these monitors ideal for collaborative environments where multiple people may need to view the screen simultaneously.

Color accuracy is further enhanced by the inclusion of a 10-bit color depth and a wide color gamut. This capability allows users to achieve more vivid and lifelike colors, which is especially important for productions that demand a high level of visual fidelity. The monitors are also equipped with various color space options including Rec. 709, which allows creative professionals to work with industry-standard color settings.

In terms of connectivity, the VS-DT6 and VS-DT8 come with a variety of input options, including HDMI, SDI, and even support for network protocols. This versatility ensures that users can easily integrate these monitors into their existing setups without the need for extensive modifications.

Both models feature a comprehensive set of monitoring tools, including waveform, vectorscope, histogram, and peaking functions. These tools provide users with detailed information about their video signals, enabling precise adjustments during the production process.

In conclusion, the JVC VS-DT6 and VS-DT8 are exceptional video production monitors that offer a blend of advanced technology, superior image quality, and versatile connectivity options. Their features cater to the needs of professionals in the broadcasting and film industries, making them invaluable for anyone looking to achieve the highest standards in video production.