Preparations
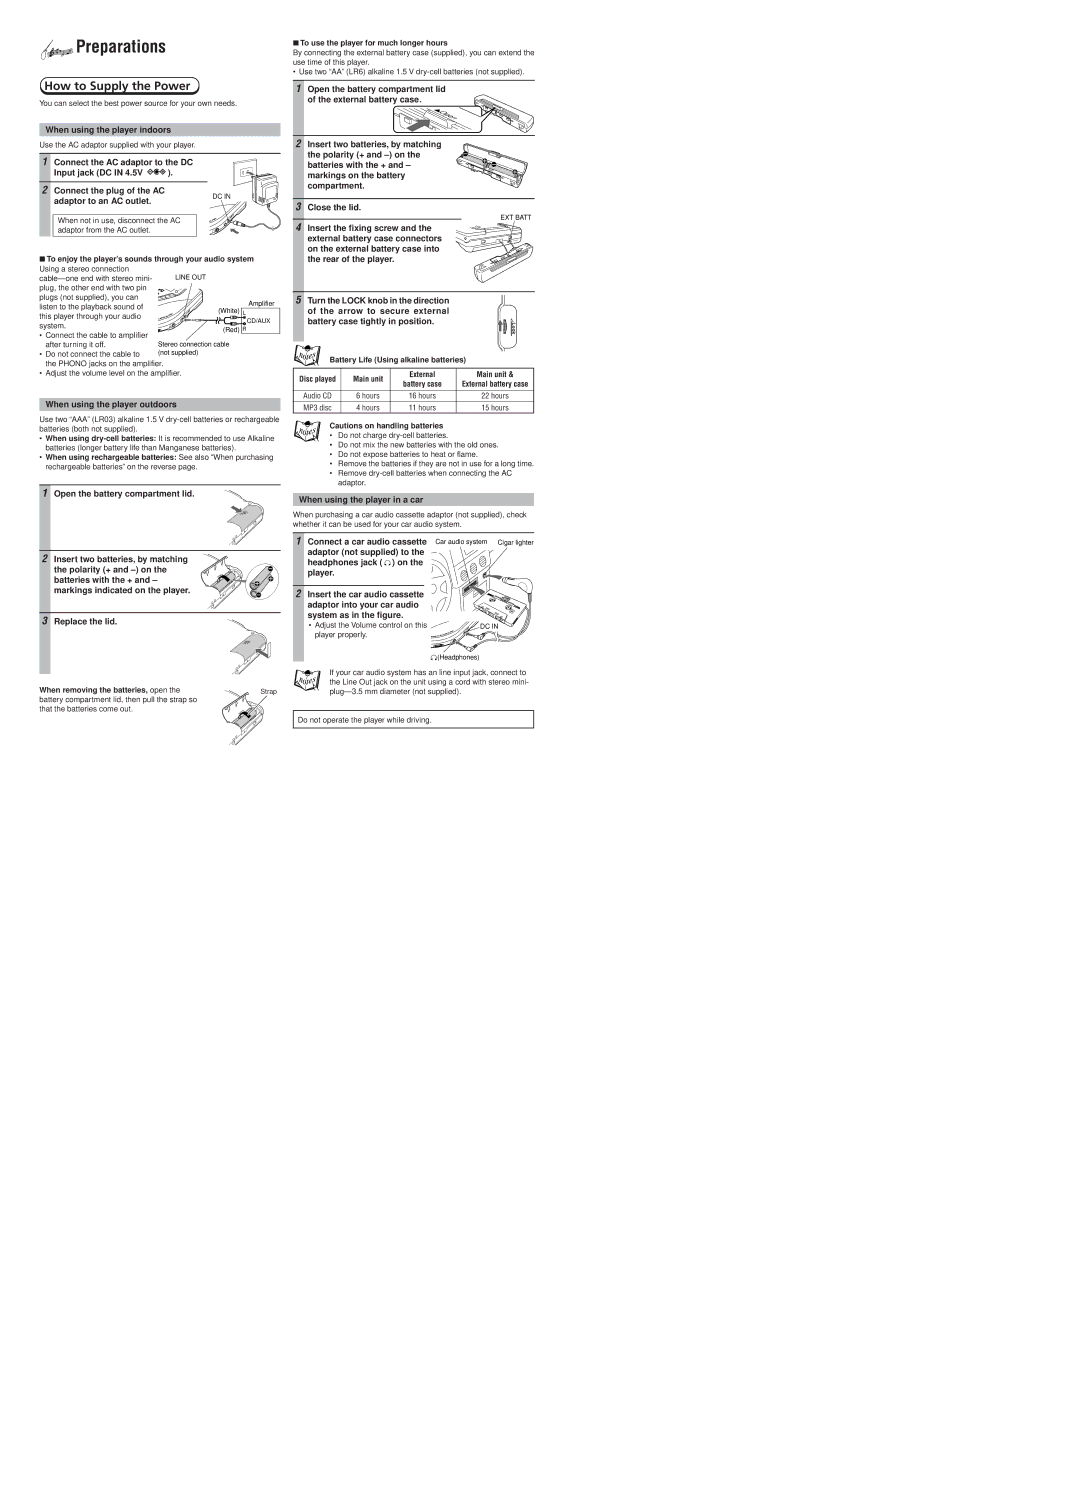
How to Supply the Power
You can select the best power source for your own needs.
When using the player indoors
Use the AC adaptor supplied with your player.
7To use the player for much longer hours
By connecting the external battery case (supplied), you can extend the use time of this player.
• Use two “AA” (LR6) alkaline 1.5 V
1 Open the battery compartment lid of the external battery case.
Open
2 Insert two batteries, by matching the polarity (+ and
1Connect the AC adaptor to the DC
Input jack (DC IN 4.5V ![]() ).
).
2Connect the plug of the AC adaptor to an AC outlet.
When not in use, disconnect the AC adaptor from the AC outlet.
DC IN
![]() 4.5V
4.5V
IN
C
D
| e O | ut |
Lin |
|
|
batteries with the + and – markings on the battery compartment.
3 Close the lid.
4 Insert the fixing screw and the external battery case connectors on the external battery case into
EXT BATT
EXT BATT
7To enjoy the player’s sounds through your audio system
the rear of the player.
Using a stereo connection |
|
|
|
| |
plug, the other end with two pin | +10 |
|
plugs (not supplied), you can |
|
|
listen to the playback sound of |
|
|
this player through your audio | Line O | ut |
| ||
system. |
|
|
•Connect the cable to amplifier after turning it off.
•Do not connect the cable to
the PHONO jacks on the amplifier.
•Adjust the volume level on the amplifier.
![]() 4.5V
4.5V
IN
![]() DC
DC
Amplifier
(White) L
CD/AUX
(Red) R
5 Turn the LOCK knob in the direction of the arrow to secure external battery case tightly in position.
Battery Life (Using alkaline batteries)
Disc played | Main unit | External | Main unit & | |
battery case | External battery case | |||
|
| |||
|
|
|
| |
Audio CD | 6 hours | 16 hours | 22 hours |
When using the player outdoors
Use two “AAA” (LR03) alkaline 1.5 V
•When using
•When using rechargeable batteries: See also “When purchasing rechargeable batteries” on the reverse page.
1Open the battery compartment lid.
2 Insert two batteries, by matching the polarity (+ and
3Replace the lid.
When removing the batteries, open the | Strap |
battery compartment lid, then pull the strap so that the batteries come out.
MP3 disc | 4 hours | 11 hours | 15 hours |
Cautions on handling batteries
• Do not charge
•Do not mix the new batteries with the old ones.
•Do not expose batteries to heat or flame.
•Remove the batteries if they are not in use for a long time.
•Remove
When using the player in a car
When purchasing a car audio cassette adaptor (not supplied), check whether it can be used for your car audio system.
1 Connect a car audio cassette | Car audio system Cigar lighter | |
adaptor (not supplied) to the |
|
|
headphones jack ( ) on the |
|
|
player. |
|
|
2 Insert the car audio cassette |
|
|
adaptor into your car audio |
|
|
system as in the figure. |
|
|
• Adjust the Volume control on this | IN 4.5V | DC IN |
player properly. | DC |
|
|
| |
| Volume |
|
![]()
![]() (Headphones)
(Headphones)
If your car audio system has an line input jack, connect to the Line Out jack on the unit using a cord with stereo mini-
Do not operate the player while driving.