Getting started
started
To connect to audio equipment with a digital input
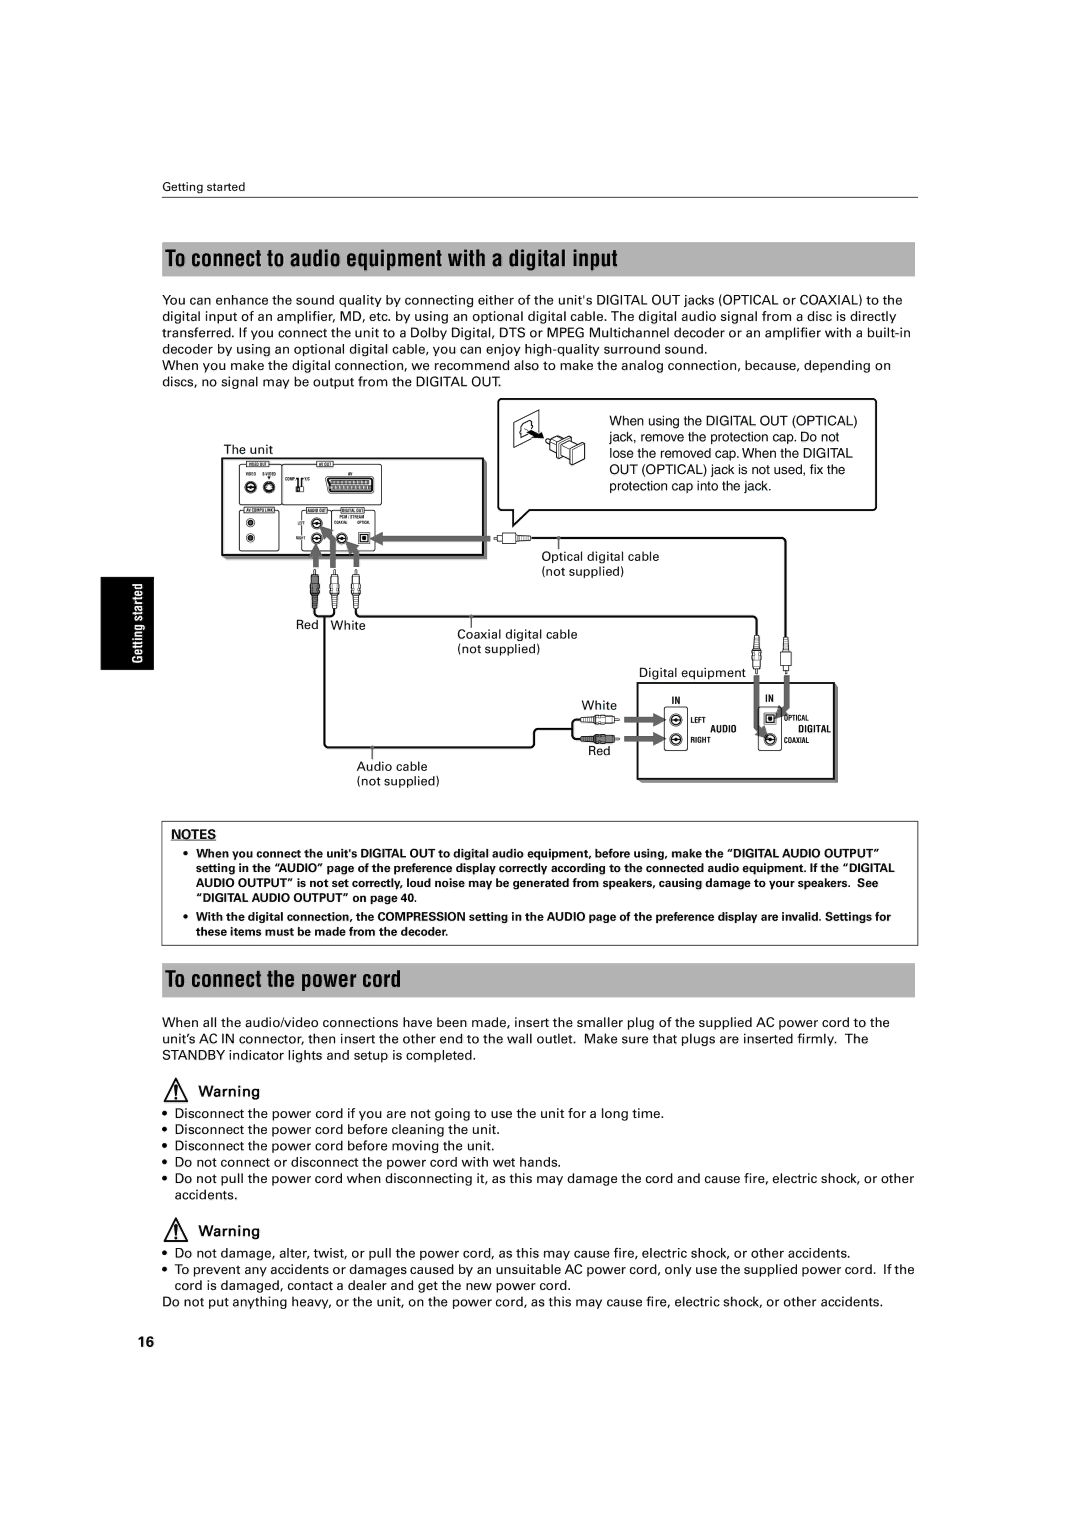
You can enhance the sound quality by connecting either of the unit's DIGITAL OUT jacks (OPTICAL or COAXIAL) to the digital input of an amplifier, MD, etc. by using an optional digital cable. The digital audio signal from a disc is directly transferred. If you connect the unit to a Dolby Digital, DTS or MPEG Multichannel decoder or an amplifier with a
When you make the digital connection, we recommend also to make the analog connection, because, depending on discs, no signal may be output from the DIGITAL OUT.
|
|
| When using the DIGITAL OUT (OPTICAL) |
The unit |
|
| jack, remove the protection cap. Do not |
|
| lose the removed cap. When the DIGITAL | |
VIDEO OUT | AV OUT |
| OUT (OPTICAL) jack is not used, fix the |
VIDEO |
| AV | |
COMP. | Y/C |
| protection cap into the jack. |
|
|
| |
AV COMPU LINK | AUDIO OUT | DIGITAL OUT | |
|
| PCM / STREAM | |
| LEFT | COAXIAL | OPTICAL |
RIGHT |
|
| |
|
|
| Optical digital cable |
|
|
| (not supplied) |
Red White
Getting
Coaxial digital cable (not supplied)
Digital equipment ![]()
White | IN | IN |
|
| |
| LEFT | OPTICAL |
AUDIODIGITAL
RIGHT | COAXIAL |
![]() Red Audio cable
Red Audio cable
(not supplied)
NOTES
•When you connect the unit's DIGITAL OUT to digital audio equipment, before using, make the “DIGITAL AUDIO OUTPUT” setting in the “AUDIO” page of the preference display correctly according to the connected audio equipment. If the “DIGITAL AUDIO OUTPUT” is not set correctly, loud noise may be generated from speakers, causing damage to your speakers. See “DIGITAL AUDIO OUTPUT” on page 40.
•With the digital connection, the COMPRESSION setting in the AUDIO page of the preference display are invalid. Settings for these items must be made from the decoder.
To connect the power cord
When all the audio/video connections have been made, insert the smaller plug of the supplied AC power cord to the unit’s AC IN connector, then insert the other end to the wall outlet. Make sure that plugs are inserted firmly. The STANDBY indicator lights and setup is completed.
Warning
•Disconnect the power cord if you are not going to use the unit for a long time.
•Disconnect the power cord before cleaning the unit.
•Disconnect the power cord before moving the unit.
•Do not connect or disconnect the power cord with wet hands.
•Do not pull the power cord when disconnecting it, as this may damage the cord and cause fire, electric shock, or other accidents.
Warning
•Do not damage, alter, twist, or pull the power cord, as this may cause fire, electric shock, or other accidents.
•To prevent any accidents or damages caused by an unsuitable AC power cord, only use the supplied power cord. If the cord is damaged, contact a dealer and get the new power cord.
Do not put anything heavy, or the unit, on the power cord, as this may cause fire, electric shock, or other accidents.
16