REMOVING / ATTACHING BATTERY PACK
REMOVE BATTERY PACK:
CHARGING BATTERY PACK
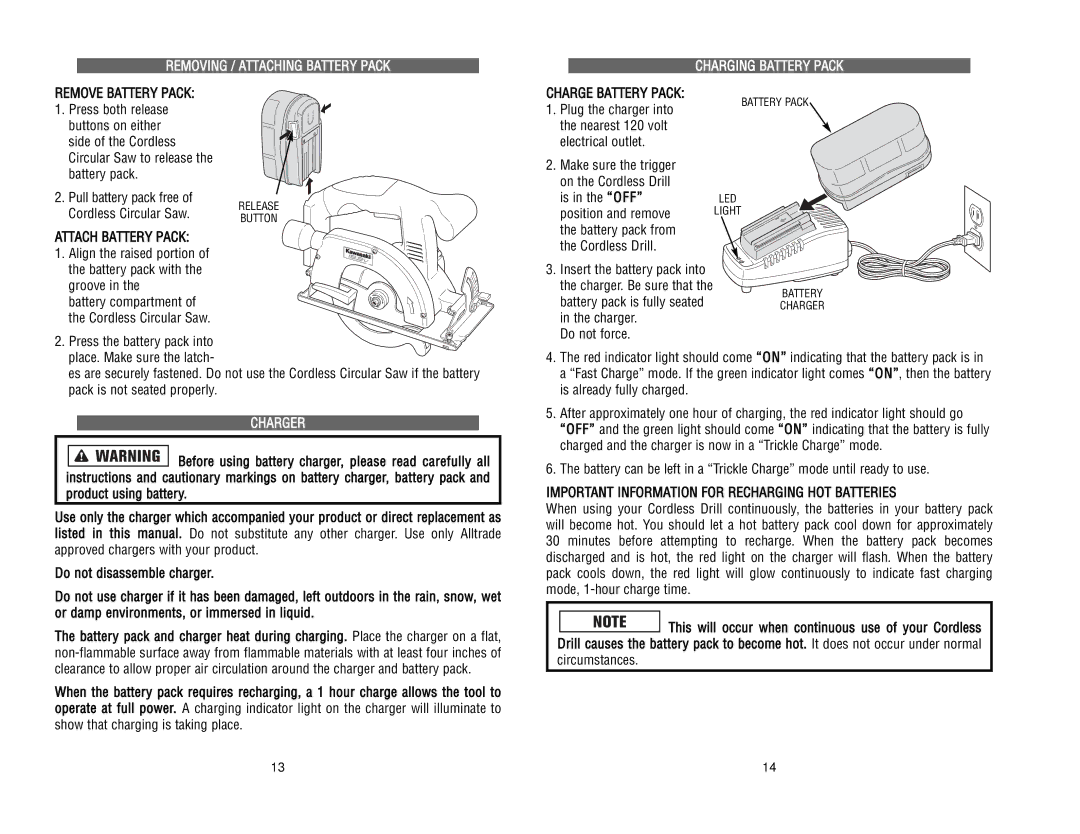
CHARGE BATTERY PACK:
1. Press both release buttons on either side of the Cordless Circular Saw to release the
1. Plug the charger into the nearest 120 volt electrical outlet.
BATTERY PACK
battery pack.
2. | Pull battery pack free of | RELEASE |
| Cordless Circular Saw. | |
| BUTTON | |
ATTACH BATTERY PACK: |
| |
1. | Align the raised portion of |
|
| the battery pack with the |
|
| groove in the |
|
| battery compartment of |
|
| the Cordless Circular Saw. |
|
2. | Press the battery pack into |
|
| place. Make sure the latch- |
|
| es are securely fastened. Do not use the Cordless Circular Saw if the battery | |
| pack is not seated properly. |
|
CHARGER
![]()
![]()
![]()
![]()
![]()
![]()
![]() Before using battery charger, please read carefully all instructions and cautionary markings on battery charger, battery pack and product using battery.
Before using battery charger, please read carefully all instructions and cautionary markings on battery charger, battery pack and product using battery.
Use only the charger which accompanied your product or direct replacement as listed in this manual. Do not substitute any other charger. Use only Alltrade approved chargers with your product.
Do not disassemble charger.
Do not use charger if it has been damaged, left outdoors in the rain, snow, wet or damp environments, or immersed in liquid.
The battery pack and charger heat during charging. Place the charger on a flat,
When the battery pack requires recharging, a 1 hour charge allows the tool to operate at full power. A charging indicator light on the charger will illuminate to show that charging is taking place.
2.Make sure the trigger on the Cordless Drill
is in the “OFF” | LED |
position and remove | LIGHT |
the battery pack from |
|
the Cordless Drill. |
|
3. Insert the battery pack into the charger. Be sure that the
BATTERY
battery pack is fully seatedCHARGER in the charger.
Do not force.
4.The red indicator light should come “ON” indicating that the battery pack is in a “Fast Charge” mode. If the green indicator light comes “ON”, then the battery is already fully charged.
5.After approximately one hour of charging, the red indicator light should go “OFF” and the green light should come “ON” indicating that the battery is fully charged and the charger is now in a “Trickle Charge” mode.
6.The battery can be left in a “Trickle Charge” mode until ready to use.
IMPORTANT INFORMATION FOR RECHARGING HOT BATTERIES
When using your Cordless Drill continuously, the batteries in your battery pack will become hot. You should let a hot battery pack cool down for approximately 30 minutes before attempting to recharge. When the battery pack becomes discharged and is hot, the red light on the charger will flash. When the battery pack cools down, the red light will glow continuously to indicate fast charging mode,
![]() This will occur when continuous use of your Cordless Drill causes the battery pack to become hot. It does not occur under normal circumstances.
This will occur when continuous use of your Cordless Drill causes the battery pack to become hot. It does not occur under normal circumstances.
13 | 14 |