S E R V I C E I N S T R U C T I O N S
www.keatingofchicago.com |
page 3
Thermostat Bulb Positioning
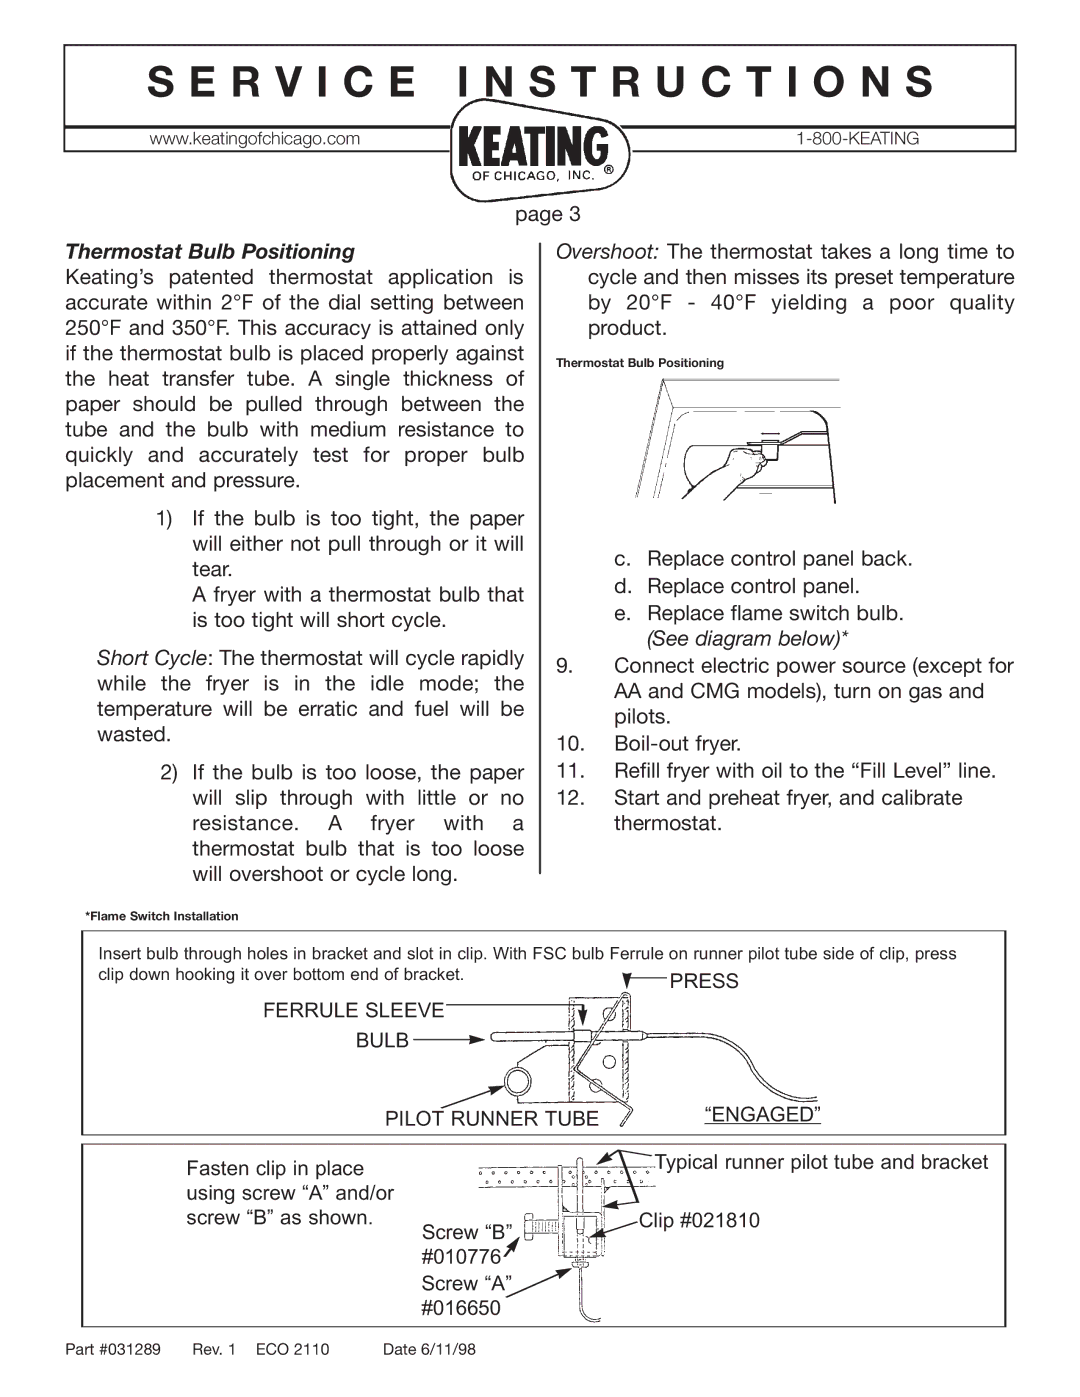
Keating’s patented thermostat application is accurate within 2°F of the dial setting between 250°F and 350°F. This accuracy is attained only if the thermostat bulb is placed properly against the heat transfer tube. A single thickness of paper should be pulled through between the tube and the bulb with medium resistance to quickly and accurately test for proper bulb placement and pressure.
1)If the bulb is too tight, the paper will either not pull through or it will tear.
A fryer with a thermostat bulb that is too tight will short cycle.
Short Cycle: The thermostat will cycle rapidly while the fryer is in the idle mode; the temperature will be erratic and fuel will be wasted.
2)If the bulb is too loose, the paper will slip through with little or no resistance. A fryer with a thermostat bulb that is too loose will overshoot or cycle long.
Overshoot: The thermostat takes a long time to cycle and then misses its preset temperature by 20°F - 40°F yielding a poor quality product.
Thermostat Bulb Positioning
c.Replace control panel back.
d.Replace control panel.
e.Replace flame switch bulb. (See diagram below)*
9.Connect electric power source (except for AA and CMG models), turn on gas and pilots.
10.
11.Refill fryer with oil to the “Fill Level” line.
12.Start and preheat fryer, and calibrate thermostat.
*Flame Switch Installation
Insert bulb through holes in bracket and slot in clip. With FSC bulb Ferrule on runner pilot tube side of clip, press
clip down hooking it over bottom end of bracket.PRESS FERRULE SLEEVE
BULB 
| PILOT RUNNER TUBE | “ENGAGED” |
Fasten clip in place |
| Typical runner pilot tube and bracket |
using screw “A” and/or | Clip #021810 | |
screw “B” as shown. | Screw “B” | |
| #010776 |
|
Screw “A” #016650
Part #031289 | Rev. 1 ECO 2110 | Date 6/11/98 |
