INSTALLING THE NEW WATER HEATER
SECURING WATER HEATER TO FLOOR AND WALL |
| WATER PIPING |
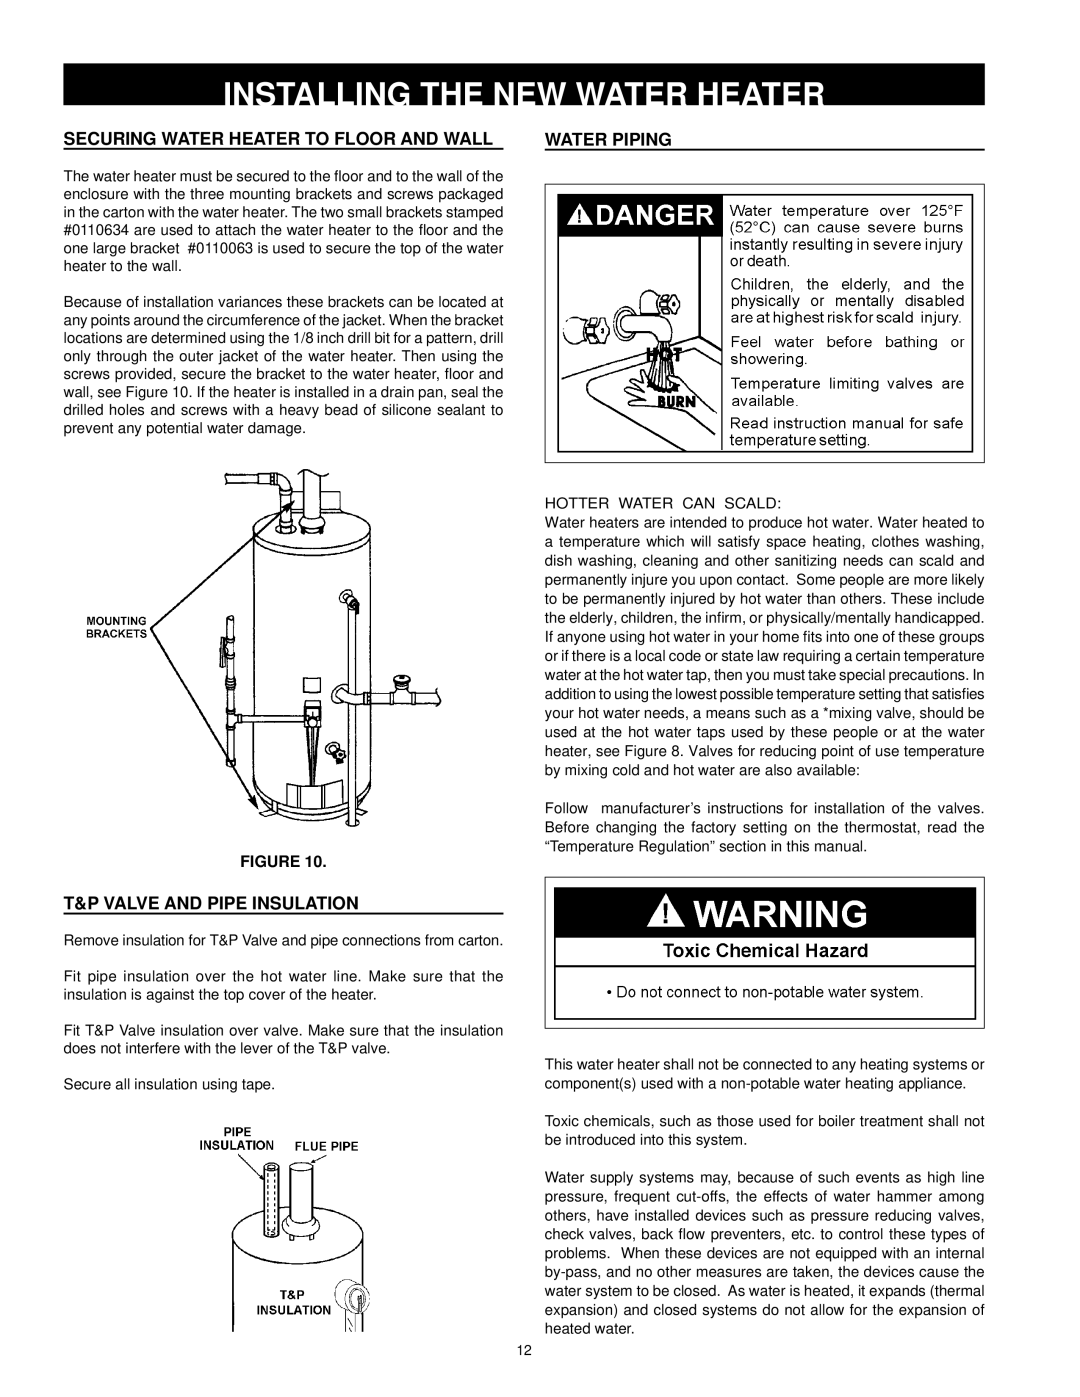
The water heater must be secured to the floor and to the wall of the enclosure with the three mounting brackets and screws packaged in the carton with the water heater. The two small brackets stamped #0110634 are used to attach the water heater to the floor and the one large bracket #0110063 is used to secure the top of the water heater to the wall.
Because of installation variances these brackets can be located at any points around the circumference of the jacket. When the bracket locations are determined using the 1/8 inch drill bit for a pattern, drill only through the outer jacket of the water heater. Then using the screws provided, secure the bracket to the water heater, floor and wall, see Figure 10. If the heater is installed in a drain pan, seal the drilled holes and screws with a heavy bead of silicone sealant to prevent any potential water damage.
FIGURE 10.
HOTTER WATER CAN SCALD:
Water heaters are intended to produce hot water. Water heated to a temperature which will satisfy space heating, clothes washing, dish washing, cleaning and other sanitizing needs can scald and permanently injure you upon contact. Some people are more likely to be permanently injured by hot water than others. These include the elderly, children, the infirm, or physically/mentally handicapped. If anyone using hot water in your home fits into one of these groups or if there is a local code or state law requiring a certain temperature water at the hot water tap, then you must take special precautions. In addition to using the lowest possible temperature setting that satisfies your hot water needs, a means such as a *mixing valve, should be used at the hot water taps used by these people or at the water heater, see Figure 8. Valves for reducing point of use temperature by mixing cold and hot water are also available:
Follow manufacturer’s instructions for installation of the valves. Before changing the factory setting on the thermostat, read the “Temperature Regulation” section in this manual.
T&P VALVE AND PIPE INSULATION
Remove insulation for T&P Valve and pipe connections from carton.
Fit pipe insulation over the hot water line. Make sure that the insulation is against the top cover of the heater.
Fit T&P Valve insulation over valve. Make sure that the insulation does not interfere with the lever of the T&P valve.
Secure all insulation using tape.
This water heater shall not be connected to any heating systems or component(s) used with a
Toxic chemicals, such as those used for boiler treatment shall not be introduced into this system.
Water supply systems may, because of such events as high line pressure, frequent
12