INSTALLATION STEPS
A. USING COMPRESSION FITTINGS, FIG. 1
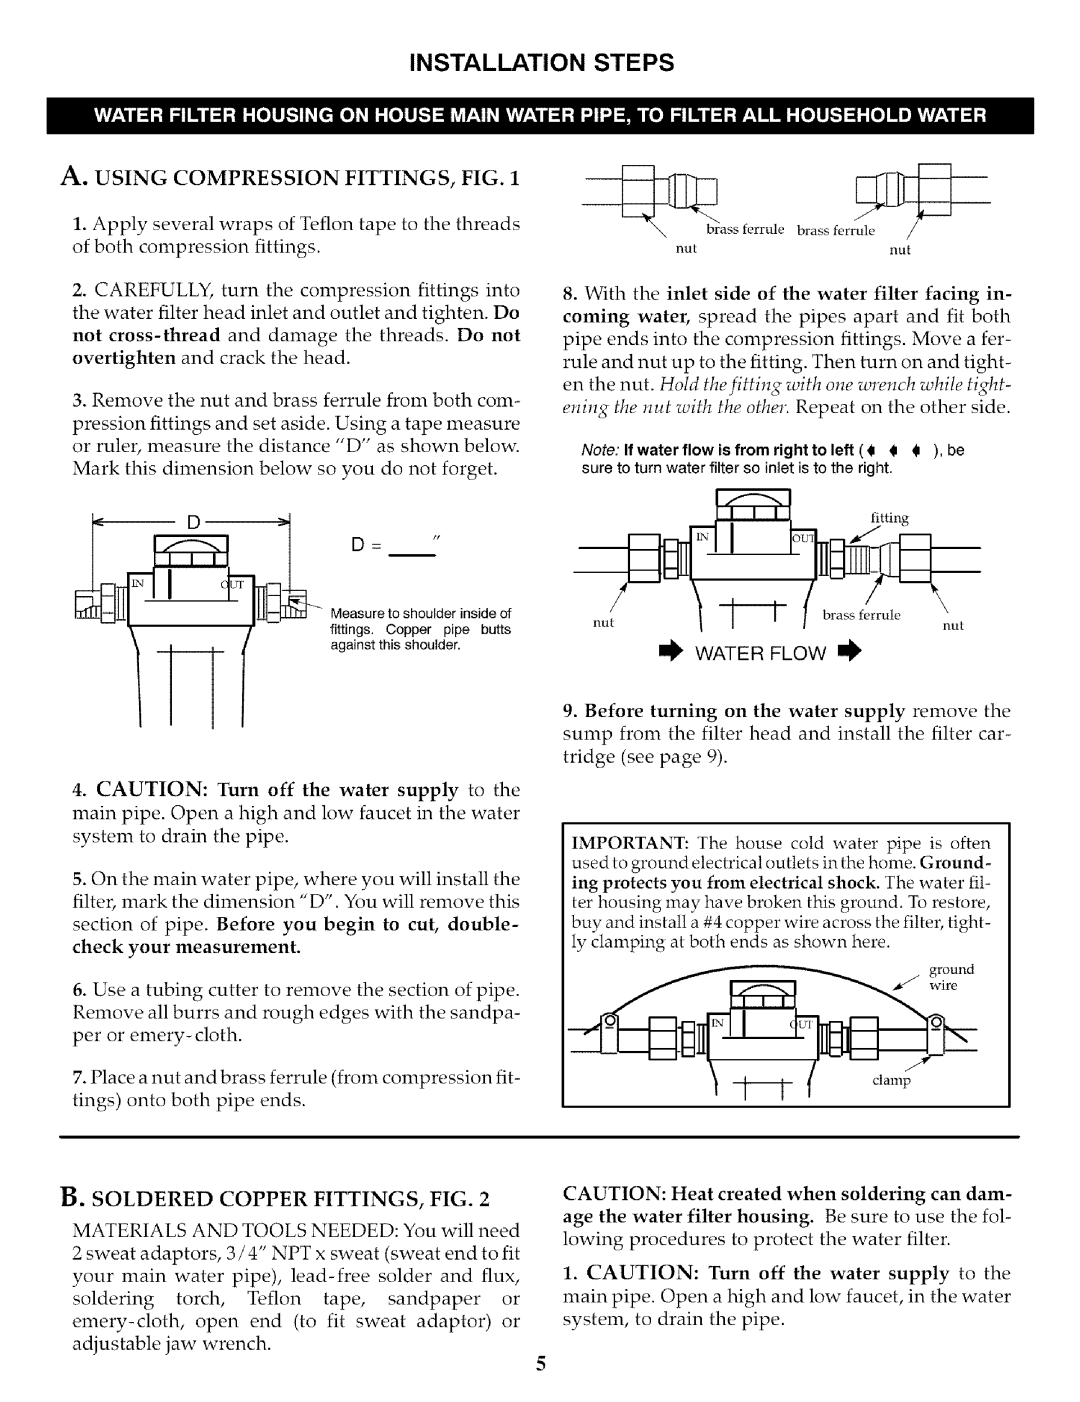
1.Apply several wraps of Teflon tape to the threads
of both compression fittings.
2.CAREFULLY, turn the compression fittings into the water filter head inlet and outlet and tighten. Do
not
overtighten and crack the head.
3.Remove the nut and brass ferrule from both com-
pression fittings and set aside. Using a tape measure
or ruler, measure the distance "D" as shown below.
Mark this dimension below so you do not forget.
ass ferrule | brass | ferrule | / |
nutnut
8.With the inlet side of the water filter facing in- coming water, spread the pipes apart and fit both
pipe ends into the compression fittings. Move a fer- rule and nut up to the fitting. Then turn on and tight- en the nut. Hold the fitting with one wrench while tight- ening the nut with the other. Repeat on the other side.
Note: If water flow is from right to left ( O O J ), be sure to turn water filter so inlet is to the right.
D _ | z! |
!
fitting
Measure to shoulder inside of fittings. Copper pipe butts against this shoulder.
4. CAUTION: Turn off the water supply to the
main pipe. Open a high and low faucet in the water system to drain the pipe.
5.On the main water pipe, where you will install the
filter, mark the dimension "D". You will remove this
section of pipe. Before you begin to cut, double- check your measurement.
nut | brass ferrule | |
nut | ||
|
I_ WATER FLOW I_
9. Before turning on the water supply remove the sump from the filter head and install the filter car- tridge (see page 9).
IMPORTANT: The house cold water pipe is often used to ground electrical outlets in the home. Ground- ing protects you from electrical shock. The water fil- ter housing may have broken this ground. To restore, buy and install a #4 copper wire across the filter, tight- ly clamping at both ends as shown here.
ground
6.Use a tubing cutter to remove the section of pipe. Remove all burrs and rough edges with the sandpa- per or
7.Place a nut and brass ferrule (from compression fit- tings) onto both pipe ends.
B.SOLDERED COPPER FITTINGS, FIG. 2
MATERIALS AND TOOLS NEEDED: You will need
2 sweat adaptors, 3 / 4" NPT x sweat (sweat end to fit
your main water pipe),
soldering torch, Teflon tape, sandpaper or
adjustable jaw wrench.
CAUTION: | Heat | created | when soldering | can dam- | |||||||
age the | water | filter housing. | Be | sure | to | use | the | fol- | |||
lowing | procedures | to | protect | the | water |
| filter. |
|
| ||
1. CAUTION: |
| Turn | off | the | water | supply | to | the | |||
main pipe. Open a high and low faucet, in the water system, to drain the pipe.