Installing Cooking Components
Important: Before cooking on your grill the first time, wash cooking grids and cooking rack with warm, soapy water. Rinse and dry thoroughly. Season with cooking oil regularly. After cooking is completed, turn grill to HIGH setting for 3 to 5 minutes to burn off excess grease or food residue.
1. Install heat diffusers above burners. Holes in rear corners of diffusers attach onto pegs in the back edge of firebox. Ensure that firebox heat shield is inserted securely into slots between adjacent burners. If grill was shipped with shield taped in place, remove tape before using grill.
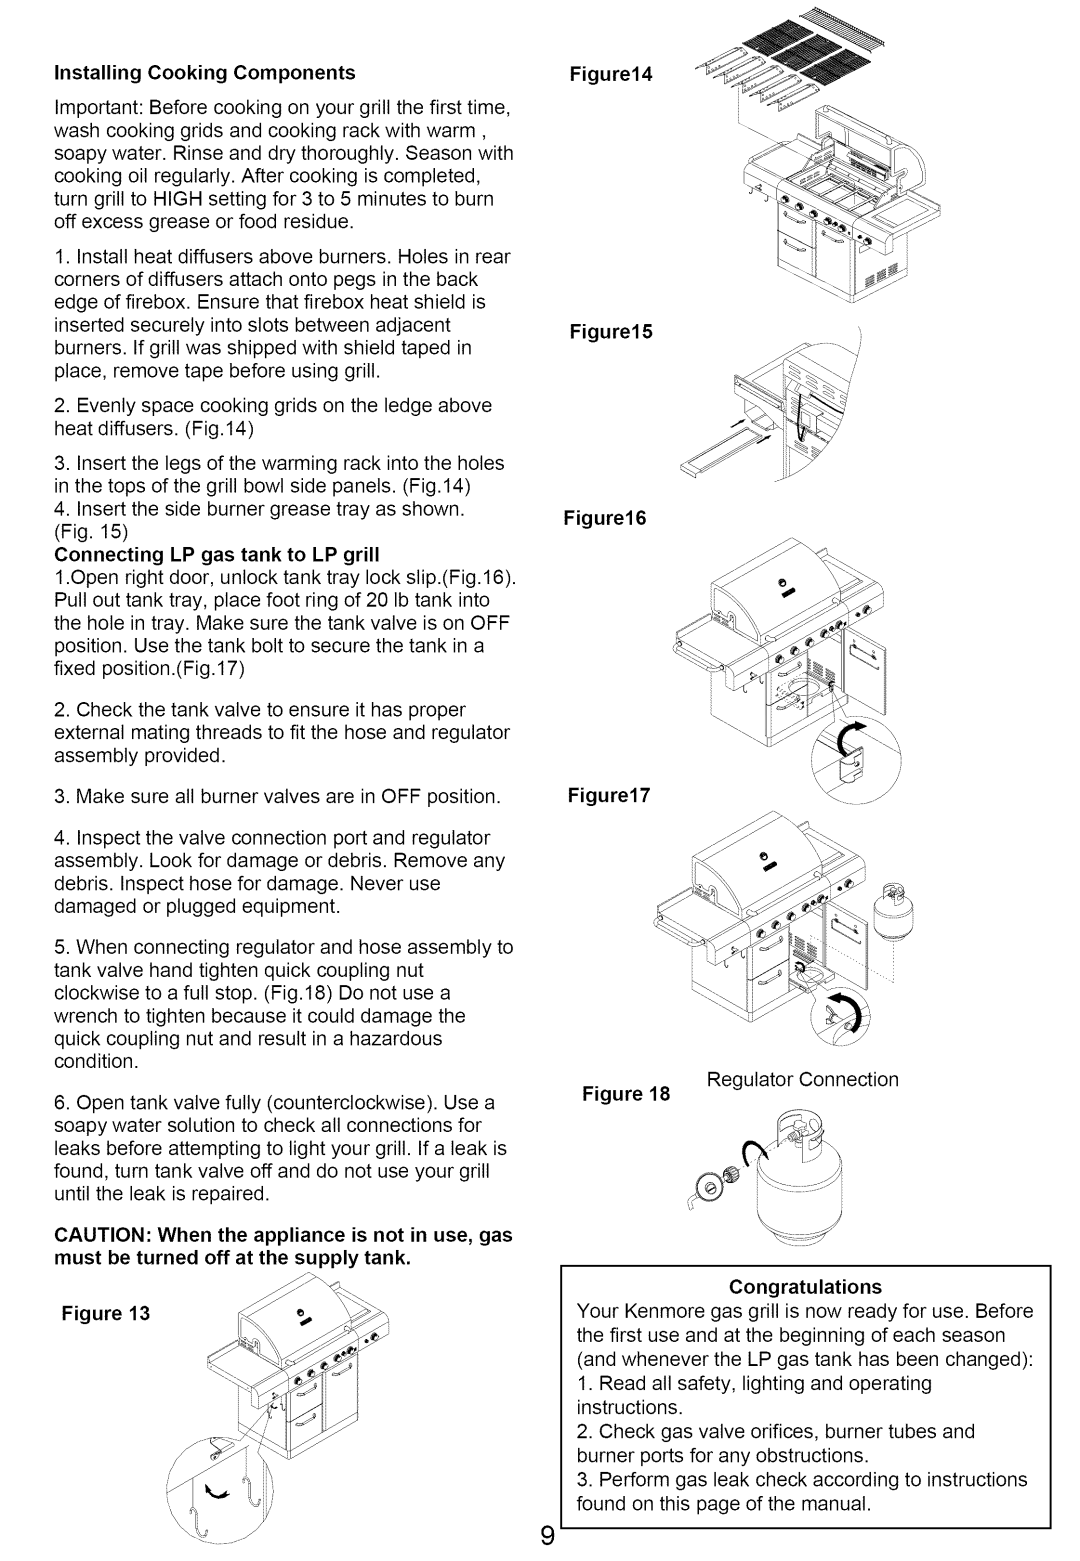
2.Evenly space cooking grids on the ledge above heat diffusers. (Fig.14)
3.Insert the legs of the warming rack into the holes in the tops of the grill bowl side panels. (Fig.14)
4.Insert the side burner grease tray as shown. (Fig. 15)
Connecting LP gas tank to LP grill
1.Open right door, unlock tank tray lock slip.(Fig. 16). Pull out tank tray, place foot ring of 20 Ib tank into the hole in tray. Make sure the tank valve is on OFF position. Use the tank bolt to secure the tank in a fixed position.(Fig. 17)
2.Check the tank valve to ensure it has proper external mating threads to fit the hose and regulator assembly provided.
3.Make sure all burner valves are in OFF position.
4.Inspect the valve connection port and regulator assembly. Look for damage or debris. Remove any debris. Inspect hose for damage. Never use damaged or plugged equipment.
5.When connecting regulator and hose assembly to tank valve hand tighten quick coupling nut clockwise to a full stop. (Fig.18) Do not use a wrench to tighten because it could damage the quick coupling nut and result in a hazardous condition.
6.Open tank valve fully (counterclockwise). Use a soapy water solution to check all connections for leaks before attempting to light your grill. If a leak is found, turn tank valve off and do not use your grill until the leak is repaired.
CAUTION: When the appliance is not in use, gas must be turned off at the supply tank.
Figure 13
Figure14
Figure15
/
Figure16
Figure17
Regulator Connection
Figure 18
Congratulations
Your Kenmore gas grill is now ready for use. Before the first use and at the beginning of each season (and whenever the LP gas tank has been changed):
1.Read all safety, lighting and operating instructions.
2.Check gas valve orifices, burner tubes and burner ports for any obstructions.
3.Perform gas leak check according to instructions found on this page of the manual.
9