General Care & Cleaning (cont'd)

Special Door Care Instructions- Most oven doors contain glass that can break. Read the following recommendations:

1.Do not close the oven door until all the oven racks are fully in place.

2.Do not hit the glass with pots, pans, or any other object.

3.Scratching, hitting, jarring or stressing the glass may weaken its structure causing an increased risk of breakage at a later time.

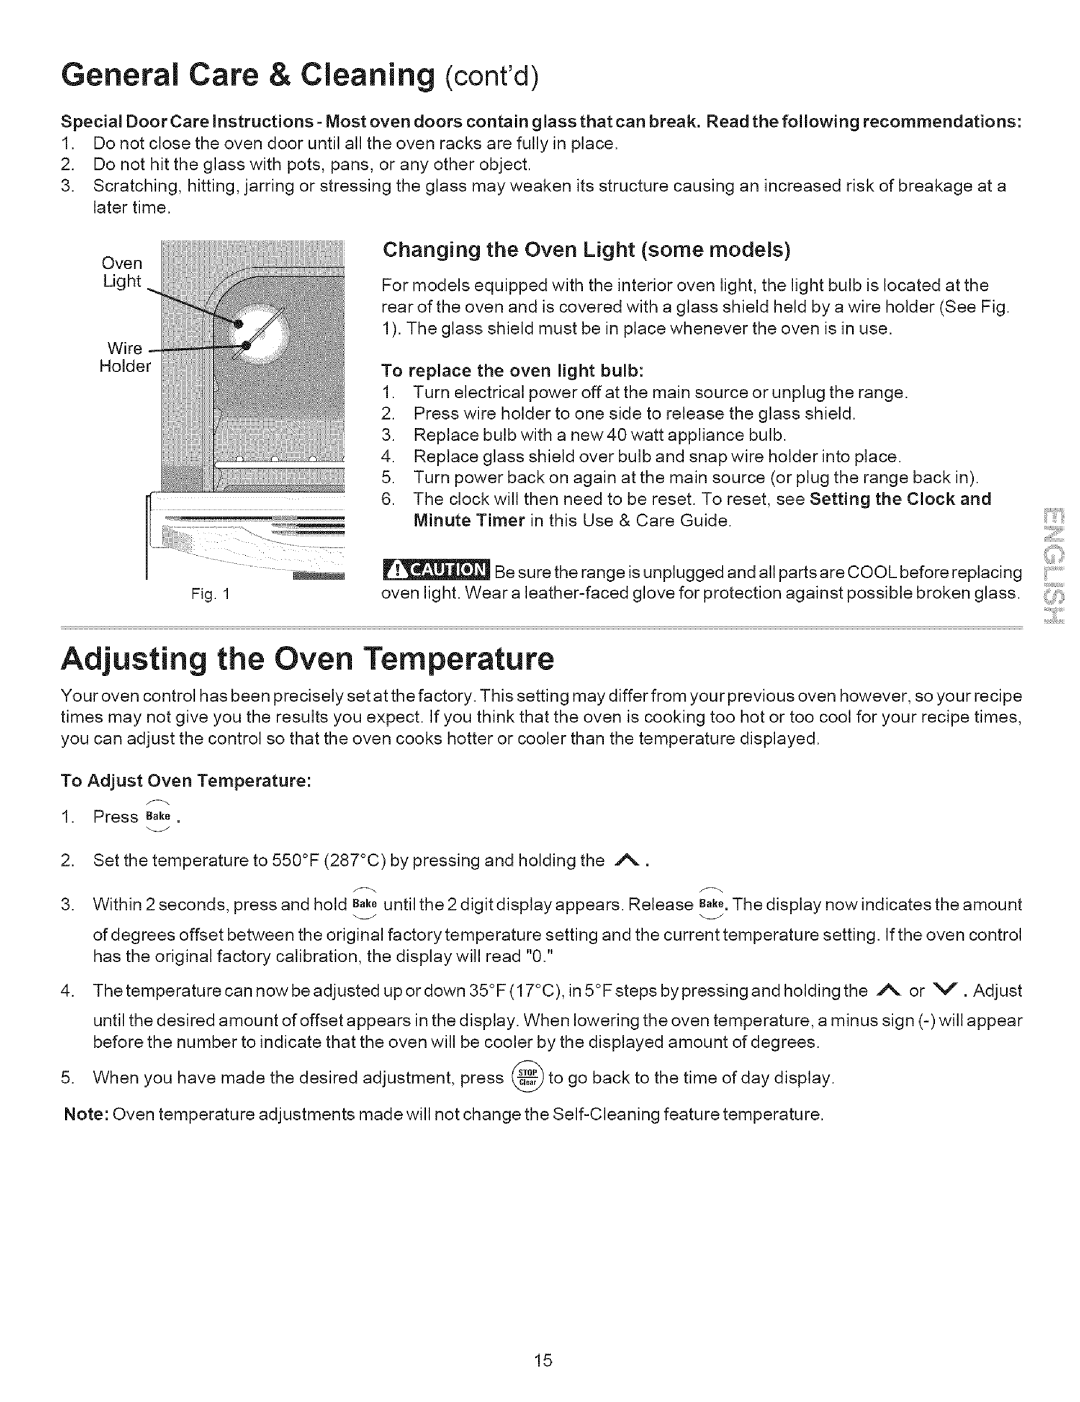
Oven Light

Wire

Holder

Changing the Oven Light (some models)

For models equipped with the interior oven light, the light bulb is located at the rear of the oven and is covered with a glass shield held by a wire holder (See Fig. 1). The glass shield must be in place whenever the oven is in use.

To replace the oven light bulb:

1.Turn electrical power off at the main source or unplug the range.

2.Press wire holder to one side to release the glass shield.

3.Replace bulb with a new40 watt appliance bulb.

4.Replace glass shield over bulb and snap wire holder into place.

5.Turn power back on again at the main source (or plug the range back in).

6.The clock will then need to be reset. To reset, see Setting the Clock and Minute Timer in this Use & Care Guide.


Besure the range is unplugged and all parts are COOL before replacing

Fig. 1

oven light, Wear a leather-faced glove for protection against possible broken glass,

Adjusting the Oven Temperature

Your oven control has been precisely set at the factory. This setting may differ from your previous oven however, so your recipe times may not give you the results you expect. If you think that the oven is cooking too hot or too cool for your recipe times, you can adjust the control so that the oven cooks hotter or cooler than the temperature displayed.

To Adjust Oven Temperature:

1.Press Bake.

2.Set the temperature to 550°F (287°C) by pressing and holding the A.

3.Within 2 seconds, press and hold _JBakeuntil the 2 digit display appears. Release _. The display now indicates the amount of degrees offset between the original factory temperature setting and the current temperature setting. If the oven control has the original factory calibration, the display will read "0."

4.Thetemperaturecann_Wbeadjustedup_rd_wn35°F(17°C),in5°Fstepsbypressingandh__dingtheA or V. Adjust

until the desired amount of offset appears in the display. When lowering the oven temperature, a minus sign (-) will appear before the number to indicate that the oven will be cooler by the displayed amount of degrees.

5.When you have made the desired adjustment, press _ to go back to the time of day display.

Note: Oven temperature adjustments made will not change the Self-Cleaning feature temperature.

15

Page 15
Image 15
Kenmore 7861*, 7852*, 7853* Adjusting the Oven Temperature, Changing the Oven Light some models, To Adjust Oven Temperature

7861*, 7858*, 7859*, 7863*, 7857* specifications

Kenmore has long been recognized for its commitment to quality and performance in the world of home appliances. The Kenmore 7852, 7853, 7862, 7857, and 7863 models are no exception, offering a range of features and technologies that cater to the needs of modern households.

One of the standout features of these models is their advanced cooling and heating capabilities, ensuring that food remains fresh for longer durations. With varying capacities, these models are designed to meet the storage requirements of any family size. Their energy-efficient performance not only helps reduce utility bills but also contributes to a more sustainable household environment.

The Kenmore 7852 and 7853 models incorporate innovative temperature management systems, featuring multi-air flow technology which helps maintain consistent cooling throughout the refrigerator while minimizing temperature fluctuations. This ensures optimal preservation of perishable food items.

For those who value convenience, models like the Kenmore 7862 and 7857 offer smart technology integration. These refrigerators can connect to Wi-Fi, allowing users to monitor and control settings via a smartphone app. This can include adjustments to temperature settings, alerts for door openings, or reminders to check expiration dates on items.

Another key characteristic of these Kenmore models is their ergonomic design. The shelves are adjustable, allowing for customizable storage options to accommodate larger items. They often come equipped with specialized compartments for different types of food, such as humidity-controlled crispers for fruits and vegetables, and dedicated deli drawers for meats and cheeses, ensuring that every item is stored under ideal conditions.

From an aesthetic standpoint, the sleek finishes of these models, including stainless steel options, enhance the look of any kitchen. They are designed not only for efficiency but also to complement modern home decor.

In terms of durability, Kenmore appliances are built with high-quality materials and have undergone rigorous testing to ensure long-lasting performance. Their quiet operation is another plus, allowing families to enjoy a peaceful home environment without the distraction of noisy appliances.

In conclusion, the Kenmore 7852, 7853, 7862, 7857, and 7863 models embody a perfect blend of innovation, efficiency, and design. They have been engineered to enhance food preservation, provide convenience, and enrich the overall kitchen experience, making them a valuable investment for any home.