General Care & Cleaning (cont'd)
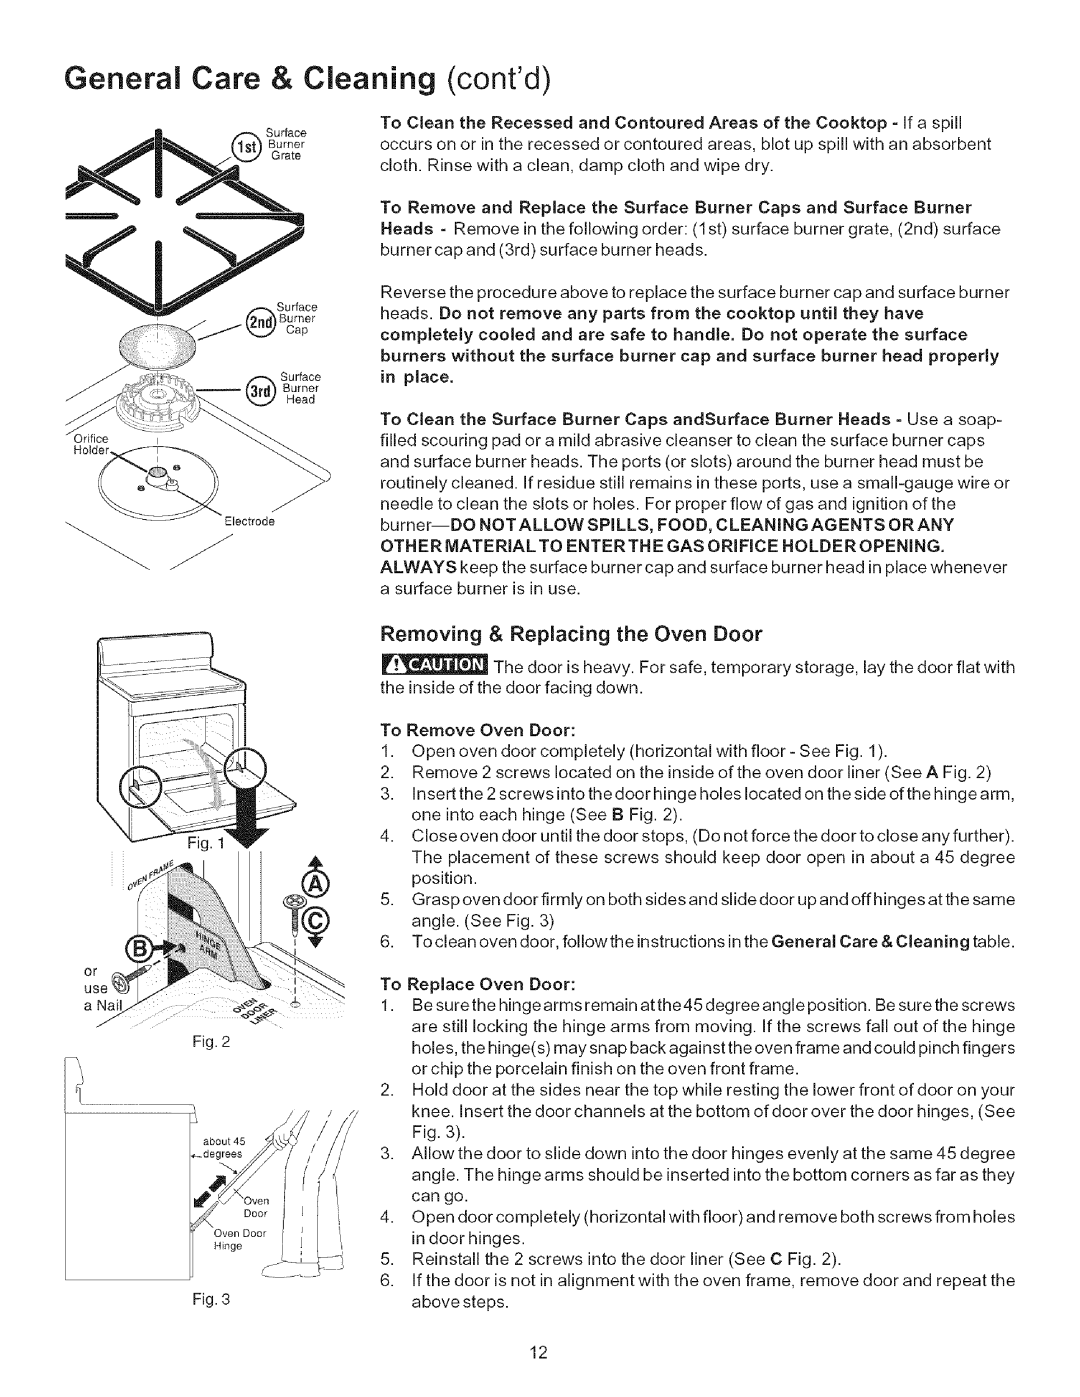
_O_rffice
Holder
Surface
Burner
Head
Electrode
To Clean the Recessed and Contoured Areas of the Cooktop - If a spill occurs on or in the recessed or contoured areas, blot up spill with an absorbent cloth. Rinse with a clean, damp cloth and wipe dry.
To Remove and Replace the Surface Burner Caps and Surface Burner Heads - Remove in the following order: (1st) surface burner grate, (2nd) surface burner cap and (3rd) surface burner heads.
Reverse the procedure above to replace the surface burner cap and surface burner heads. Do not remove any parts from the cooktop until they have completely cooled and are safe to handle. Do not operate the surface burners without the surface burner cap and surface burner head properly in place.
To Clean the Surface Burner Caps andSurface Burner Heads - Use a soap- filled scouring pad or a mild abrasive cleanser to clean the surface burner caps and surface burner heads. The ports (or slots) around the burner head must be routinely cleaned. If residue still remains in these ports, use a
or use
a Nail
Fig. 2
about45
Oven Door
Hinge
s-
Fig. 3
Removing & Replacing the Oven Door
The door is heavy. For safe, temporary storage, lay the door flat with the inside of the door facing down.
To Remove Oven Door:
1.Open oven door completely (horizontal with floor - See Fig. 1).
2.Remove 2 screws located on the inside of the oven door liner (See A Fig. 2)
3.Insert the 2 screws into the door hinge holes located on the side of the hinge arm, one into each hinge (See B Fig. 2).
4.Close oven door until the door stops, (Do not force the door to close any further). The placement of these screws should keep door open in about a 45 degree position.
5.Grasp oven door firmly on both sides and slide door up and off hinges at the same angle. (See Fig. 3)
6.To clean oven door, followthe instructionsin the General Care & Cleaning table.
To Replace Oven Door:
1. Besurethehingearmsremainatthe45degreeangleposifion. Besurethescrews are still locking the hinge arms from moving. If the screws fall out of the hinge holes, the hinge(s) may snap back against the oven frame and could pinch fingers or chip the porcelain finish on the oven front frame.
2.Hold door at the sides near the top wile resting the lower front of door on your knee. Insert the door channels at the bottom of door over the door hinges, (See Fig. 3).
3.ANow the door to sNdedown into the door hinges evenly at the same 45 degree angle. The hinge arms should be inserted into the bottom corners as far as they can go.
4.Open door completely (horizontal with floor) and remove both screws from holes in door hinges.
5.Reinstall the 2 screws into the door liner (See C Fig. 2).
6.If the door is not in alignment with the oven frame, remove door and repeat the above steps.
12