
KRC-V679R, KRC-579B, KRC-579R, KRC-679R specifications
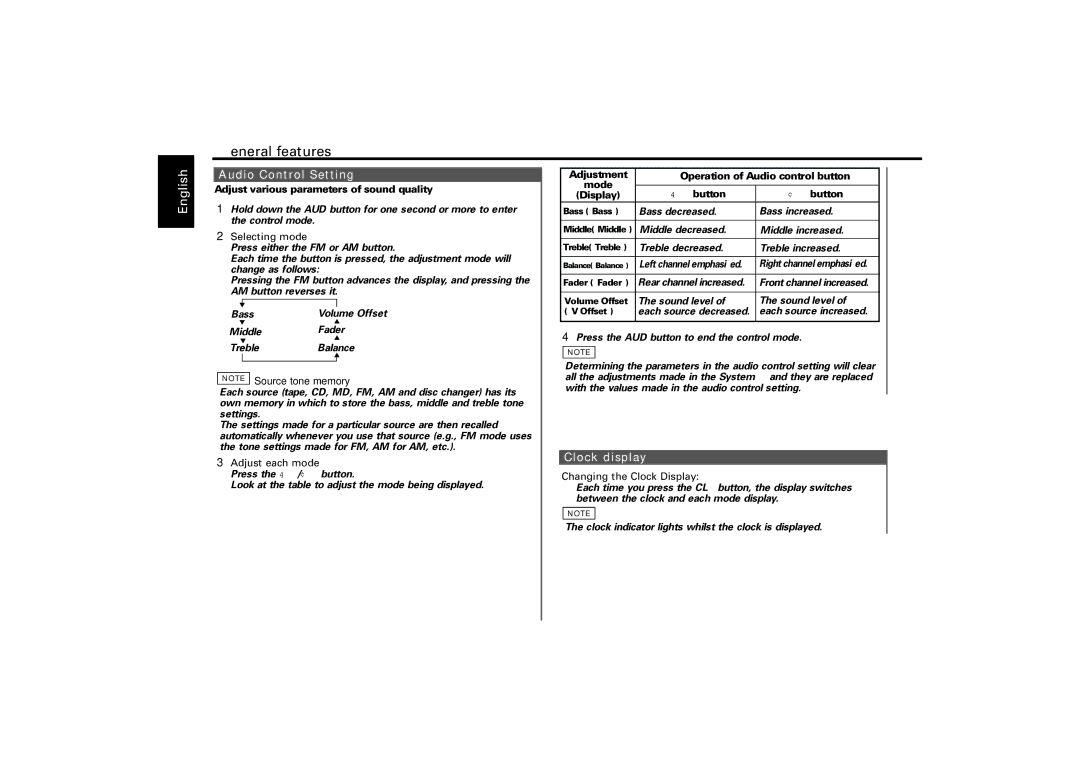
The Kenwood KRC series of car radios, which includes models KRC-679R, KRC-579R, KRC-579B, and KRC-V679R, are renowned for their quality audio performance and user-friendly features. These models exemplify Kenwood's commitment to enhancing the in-car listening experience, catering to enthusiasts who appreciate both sound quality and ease of use.One prevalent feature across the KRC series is the high-quality audio processing technology that Kenwood is known for. Each model is equipped with a built-in amplifier that delivers robust sound output, ensuring clarity and depth across various music genres. The incorporation of digital signal processing allows users to adjust equalizer settings, providing the flexibility to customize audio characteristics to personal preferences.
The KRC-679R and KRC-579R models come with a multi-color display, allowing users to choose from various color schemes for background illumination. This feature not only enhances the aesthetic of the vehicle's interior but also makes it easier to read the display in different lighting conditions. The KRC-579B model takes this a step further by offering a sleek black finish that complements modern vehicle interiors and appeals to minimalist tastes.
Connectivity is another strong feature in the KRC series. The models support auxiliary inputs, enabling users to connect external devices such as smartphones and MP3 players. This compatibility allows for the playback of a wide range of audio sources, making it easy to enjoy personal music collections on the go. While some models may lack Bluetooth, the opportunity to use wired connections continues to make these radios appealing.
For those who enjoy listening to radio, the KRC series provides excellent AM/FM radio functionality with clear reception, supported by a built-in RDS feature that displays useful information like station name and song title. This ensures that users can stay informed about what they're listening to while enjoying uninterrupted clarity.
Each model is designed with ergonomic controls that allow for easy access to key functions, minimizing distractions while driving. The intuitive layout ensures that users can seamlessly navigate through settings and playlists without needing to take their eyes off the road.
Overall, the Kenwood KRC-679R, KRC-579R, KRC-579B, and KRC-V679R models stand out for their impressive sound quality, connectivity options, and user-centric design, making them suitable choices for anyone looking to enhance their in-car audio experience.