nSetup Procedure
1)Turn ON the transceiver being used for TRP.
2)Set up its DTSS code and CTCSS frequency on the 440 MHz band, its operation frequency on the 144 MHz band, and its operation frequency on the 440 MHz band. (These settings must be the same as those in the CMD mode).
3)Turn OFF the transceiver’s power.
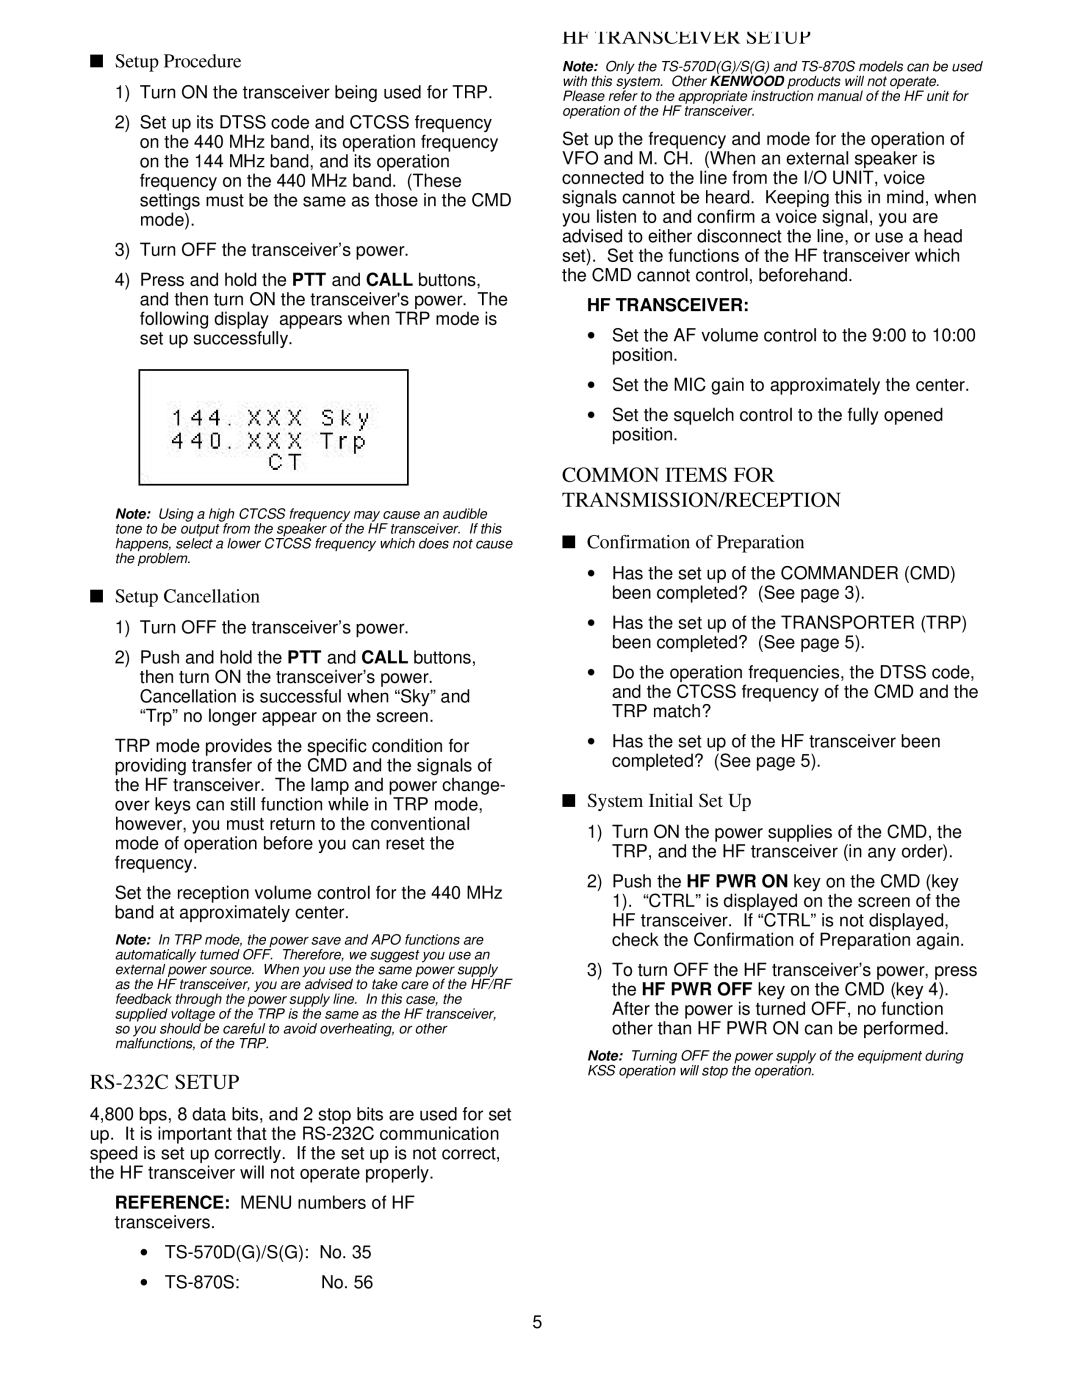
4)Press and hold the PTT and CALL buttons, and then turn ON the transceiver's power. The following display appears when TRP mode is set up successfully.
Note: Using a high CTCSS frequency may cause an audible tone to be output from the speaker of the HF transceiver. If this happens, select a lower CTCSS frequency which does not cause the problem.
nSetup Cancellation
1)Turn OFF the transceiver’s power.
2)Push and hold the PTT and CALL buttons, then turn ON the transceiver’s power. Cancellation is successful when “Sky” and “Trp” no longer appear on the screen.
TRP mode provides the specific condition for providing transfer of the CMD and the signals of the HF transceiver. The lamp and power change- over keys can still function while in TRP mode, however, you must return to the conventional mode of operation before you can reset the frequency.
Set the reception volume control for the 440 MHz band at approximately center.
Note: In TRP mode, the power save and APO functions are automatically turned OFF. Therefore, we suggest you use an external power source. When you use the same power supply as the HF transceiver, you are advised to take care of the HF/RF feedback through the power supply line. In this case, the supplied voltage of the TRP is the same as the HF transceiver, so you should be careful to avoid overheating, or other malfunctions, of the TRP.
RS-232C SETUP
4,800 bps, 8 data bits, and 2 stop bits are used for set up. It is important that the
REFERENCE: MENU numbers of HF transceivers.
∙
∙ | No. 56 |
HF TRANSCEIVER SETUP
Note: Only the
Set up the frequency and mode for the operation of VFO and M. CH. (When an external speaker is connected to the line from the I/O UNIT, voice signals cannot be heard. Keeping this in mind, when you listen to and confirm a voice signal, you are advised to either disconnect the line, or use a head set). Set the functions of the HF transceiver which the CMD cannot control, beforehand.
HF TRANSCEIVER:
∙Set the AF volume control to the 9:00 to 10:00 position.
∙Set the MIC gain to approximately the center.
∙Set the squelch control to the fully opened position.
COMMON ITEMS FOR
TRANSMISSION/RECEPTION
nConfirmation of Preparation
∙Has the set up of the COMMANDER (CMD) been completed? (See page 3).
∙Has the set up of the TRANSPORTER (TRP) been completed? (See page 5).
∙Do the operation frequencies, the DTSS code, and the CTCSS frequency of the CMD and the TRP match?
∙Has the set up of the HF transceiver been completed? (See page 5).
nSystem Initial Set Up
1) Turn ON the power supplies of the CMD, the TRP, and the HF transceiver (in any order).
2) Push the HF PWR ON key on the CMD (key 1). “CTRL” is displayed on the screen of the HF transceiver. If “CTRL” is not displayed, check the Confirmation of Preparation again.
3) To turn OFF the HF transceiver’s power, press the HF PWR OFF key on the CMD (key 4). After the power is turned OFF, no function other than HF PWR ON can be performed.
Note: Turning OFF the power supply of the equipment during KSS operation will stop the operation.
5