Set-Up & First Brew

IMPORTANT: You cannot use your Keurig brewer until it has been primed for its first use as set forth below.

NOTE: If Brewer has been exposed to tempera- tures below freezing, allow Brewer at least two hours to reach room temperature before prim- ing. A frozen or extremely cold brewer will not prime properly and can cause damage.

Priming your Brewer

1.Unwrap cord and plug the brewer into a grounded outlet.

2.Ensure Brew/Drain is set to Brew.

3.Place a cup or mug on the Drip Tray Plate.

4.Remove the Water Reservoir from Brewer by first removing Lid from Reservoir, then lifting Reservoir straight up and away from Brewer (may be tight). Rinse with fresh water.

5.Fill Water Reservoir with fresh water so that the water level reaches the line just below the top edge of the clear viewing area. (Be careful not to over fill.)

6.Place Water Reservoir base into the left side of the Brewer and be sure the Water Reservoir Lock Tabs engage

with the Brewer. Replace Lid on Water Reservoir.

7.Press Power Button found on upper right panel of the Brewer. The green light next to the Power Button will become illuminated.

8.The green brew size selector lights on the LED Control Center will flash to indicate the Brewer needs to be primed. Make sure the handle is all the way down before continuing.

Please note, a K-Cup®should not be used for the Priming Sequence.

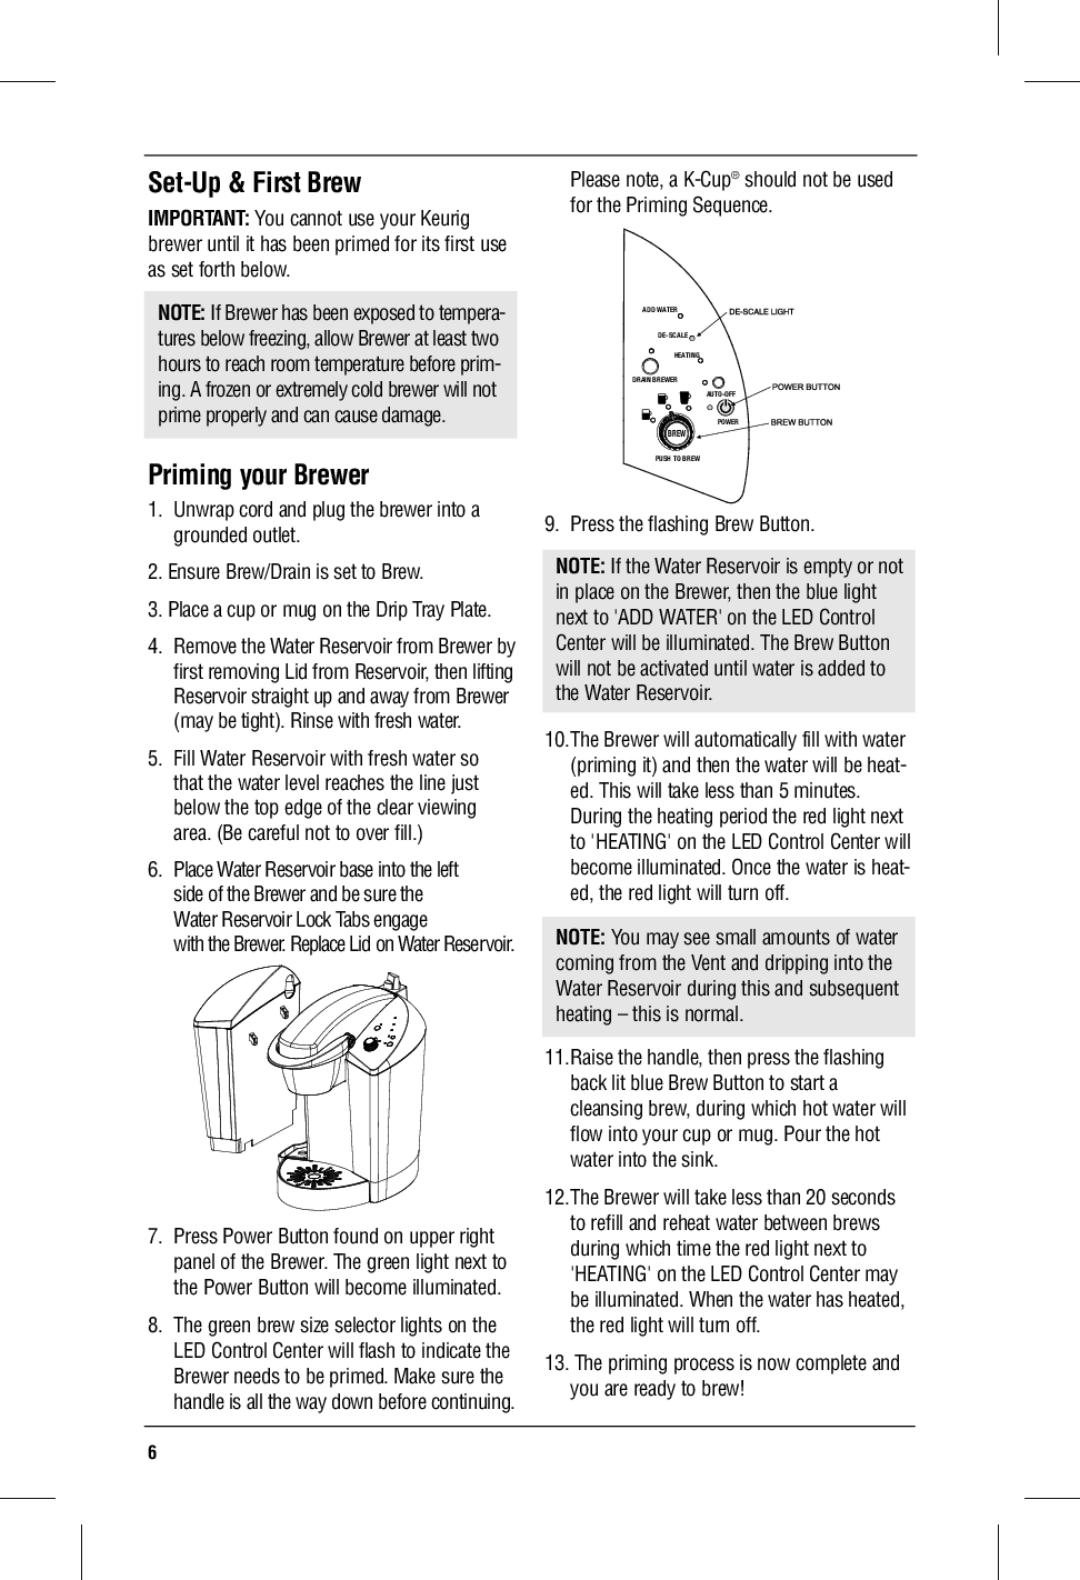
ADD WATER

DE-SCALE

HEATING

DRAIN BREWER

AUTO-OFF

POWER

BREW

PUSH TO BREW

9. Press the flashing Brew Button.

NOTE: If the Water Reservoir is empty or not in place on the Brewer, then the blue light next to 'ADD WATER' on the LED Control Center will be illuminated. The Brew Button will not be activated until water is added to the Water Reservoir.

10.The Brewer will automatically fill with water (priming it) and then the water will be heat- ed. This will take less than 5 minutes.

During the heating period the red light next to 'HEATING' on the LED Control Center will become illuminated. Once the water is heat- ed, the red light will turn off.

NOTE: You may see small amounts of water coming from the Vent and dripping into the Water Reservoir during this and subsequent heating – this is normal.

11.Raise the handle, then press the flashing back lit blue Brew Button to start a cleansing brew, during which hot water will flow into your cup or mug. Pour the hot water into the sink.

12.The Brewer will take less than 20 seconds to refill and reheat water between brews during which time the red light next to 'HEATING' on the LED Control Center may be illuminated. When the water has heated, the red light will turn off.

13.The priming process is now complete and you are ready to brew!

6

Page 6
Image 6
Keurig B140 manual Set-Up & First Brew, Priming your Brewer, Press the flashing Brew Button

B140 specifications

The Keurig B140 is a compact and powerful single-serve coffee maker designed for both home and office use. Known for its efficiency and convenience, the B140 has become a popular choice among coffee enthusiasts seeking a hassle-free brewing experience. At the heart of its design is the innovative brewing technology that allows users to enjoy a fresh cup of coffee in just under a minute.

One of the standout features of the Keurig B140 is its compatibility with the extensive range of K-Cup pods. These pods come in numerous flavors and varieties, allowing users to choose from a wide selection of coffee, tea, and hot cocoa. The versatility of K-Cup pods makes the B140 suitable for different tastes, whether you prefer a bold dark roast, a calming herbal tea, or a rich hot chocolate.

The B140 boasts an adjustable cup size feature, accommodating 6, 8, or 10 ounces of coffee. This customization ensures that users can select their preferred strength and volume of coffee, making it ideal for both those who enjoy a quick caffeine fix and those who prefer a larger serving. Its simple interface, consisting of an on/off switch and a clear water reservoir, makes it user-friendly and accessible for anyone.

In terms of design, the B140 is sleek and compact, making it an excellent addition to various kitchen countertops or office spaces without taking up too much room. It features a removable drip tray, which allows for easy cleaning and accommodates travel mugs and larger cups.

The machine is also equipped with an energy-saving mode, automatically turning itself off after 2 hours of inactivity. This feature not only promotes energy efficiency but also adds convenience for users who may forget to turn the machine off after brewing.

Overall, the Keurig B140 combines convenience, versatility, and efficiency in a stylish and compact package. With its innovative technology and user-friendly features, it is an excellent choice for anyone looking to enjoy great-tasting coffee at the push of a button, making mornings easier and coffee breaks more pleasurable. Whether for personal use or in a small office setting, the B140 delivers a quality coffee experience that fits seamlessly into busy lifestyles.