
B30 specifications
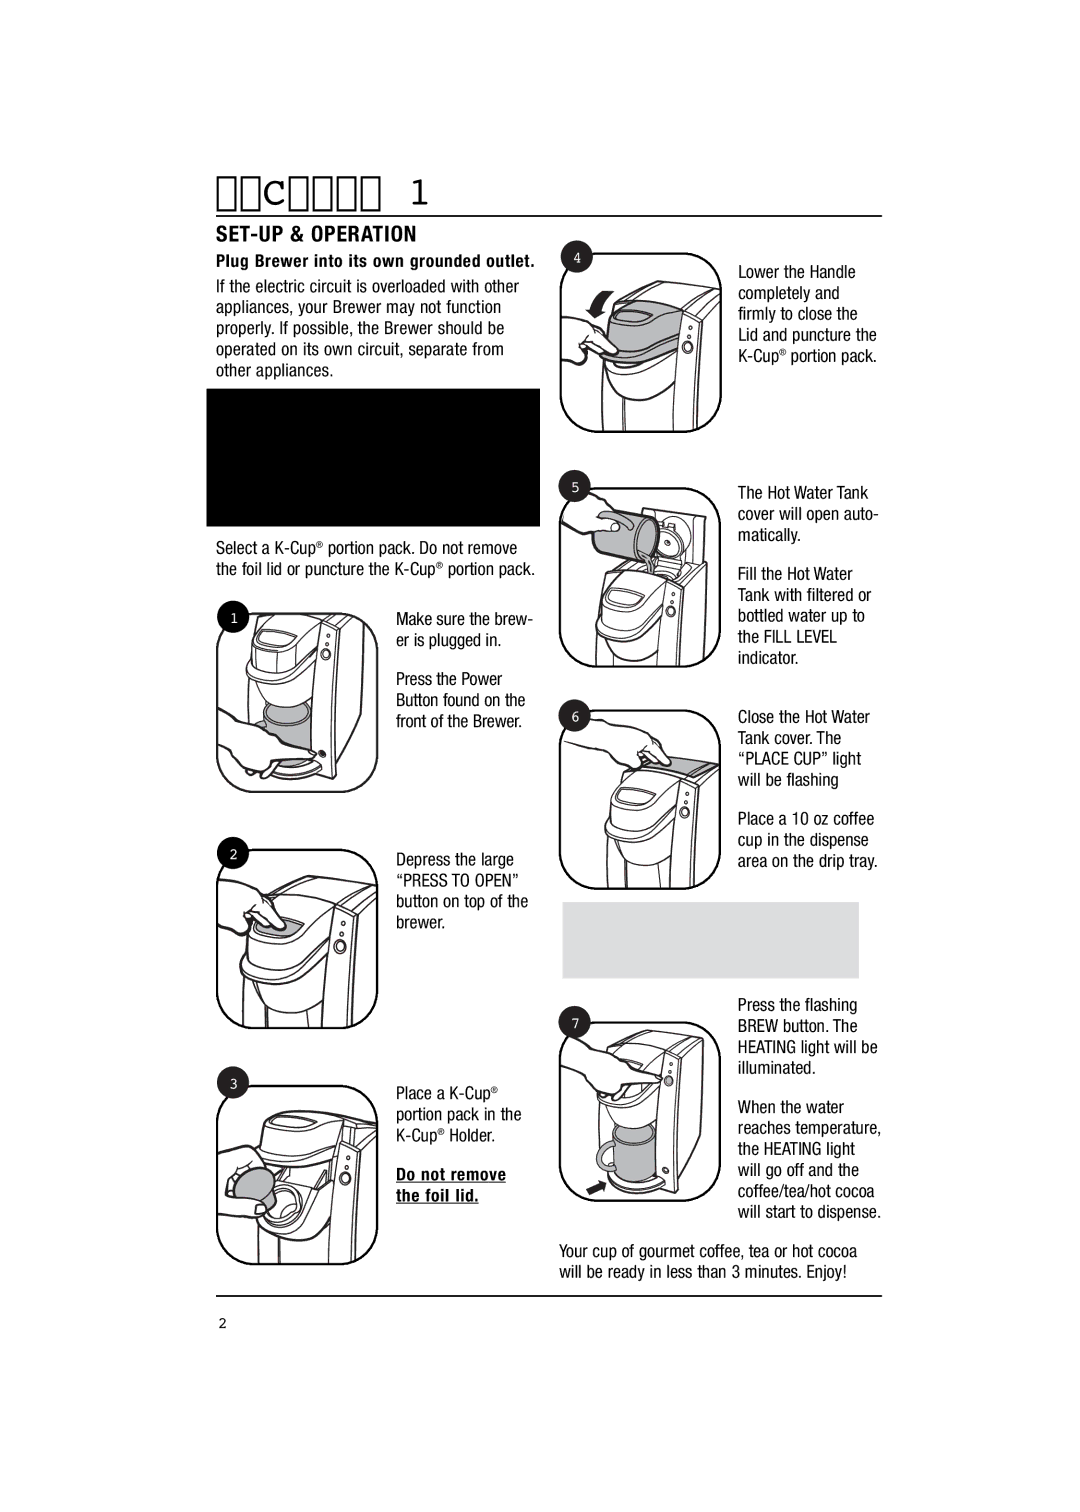
The Keurig B30 is a compact single-serve coffee maker that has gained popularity among coffee aficionados for its convenience and reliability. Designed for those who appreciate a quick and easy brewing process, this model stands out in the crowded market of single-serve machines.One of the main features of the Keurig B30 is its ability to brew a fresh cup of coffee in under a minute. With just a push of a button, users can enjoy a freshly brewed single cup, eliminating the need for a traditional carafe and the associated cleanup. The machine is particularly suitable for smaller households or those who may want to enjoy a variety of beverages throughout the day without wasting coffee.
The B30 is compatible with the extensive range of Keurig K-Cup Pods, offering coffee lovers a wide selection of blends and flavors. From rich dark roasts to lighter brews, there's a K-Cup to suit every palate. The machine's water reservoir holds enough water for several cups, and its energy-saving feature automatically powers off the brewer after a specified period of inactivity, promoting efficient energy use.
Equipped with a brewing technology that uses a patented K-Cup brewing system, the B30 ensures optimal flavor extraction from each pod. This not only produces a consistently delicious cup of coffee but also preserves the freshness of the grounds, as each pod is sealed until it's used.
Another notable characteristic of the Keurig B30 is its compact design, making it an ideal choice for small kitchens, dorm rooms, or office spaces. With its sleek profile, it can easily fit on crowded countertops and doesn’t take up too much space.
User-friendliness is a hallmark of the B30. The straightforward control panel features simple settings which make it accessible for even the most technologically challenged users. Cleaning and maintenance are equally straightforward, as the removable drip tray can accommodate travel mugs while also making cleanup hassle-free.
In summary, the Keurig B30 combines convenience, efficiency, and a broad range of beverage options in a compact footprint. It is an excellent choice for anyone looking to enjoy quality coffee quickly and easily, without the complications of traditional brewing methods.