b. Testing
•Utilise the test button to test the alarm. Do not use naked flames as this does not replicate smoke and may cause physical damage to the alarm.
Test all your alarms weekly – remember they are life saving devices, protecting the family and home.
Press and hold the test button until the alarm sounds. All interconnected alarms will also sound. (Do not stand too close to the alarm during testing – hearing may be damaged.)
c. Hush Button
This feature temporarily desensitises the alarm circuit for approximately 7 minutes. This feature is to be used only when a known alarm condition, such as fumes from cooking, activates the alarm. The alarm is desensitised by pushing the “HUSH” button on the alarm cover. If the smoke is not too dense, the alarm will silence immediately and “chirp” every
Note: Dense smoke will override the hush control feature and sound a continuous alarm.
Caution: Before using the alarm hush feature, identify the source of the smoke and be certain a safe condition exists. (On heat alarms with hush, the alarms sensor has detected a high temperature – e.g. 57°C. Check for possible causes
carefully.)
d.Nuisance Alarms
Warning: Persistent nuisance alarms indicates incorrect type and/or siting of alarm. Review with your installer or Landlord after cleaning as described in Section 7 (Maintenance).
5. Battery Checking/Changing*
Loose Battery Models
a.Low Battery Indicator (AC models with loose battery only)
If you hear the alarm chirp continuously every
b.Battery Change
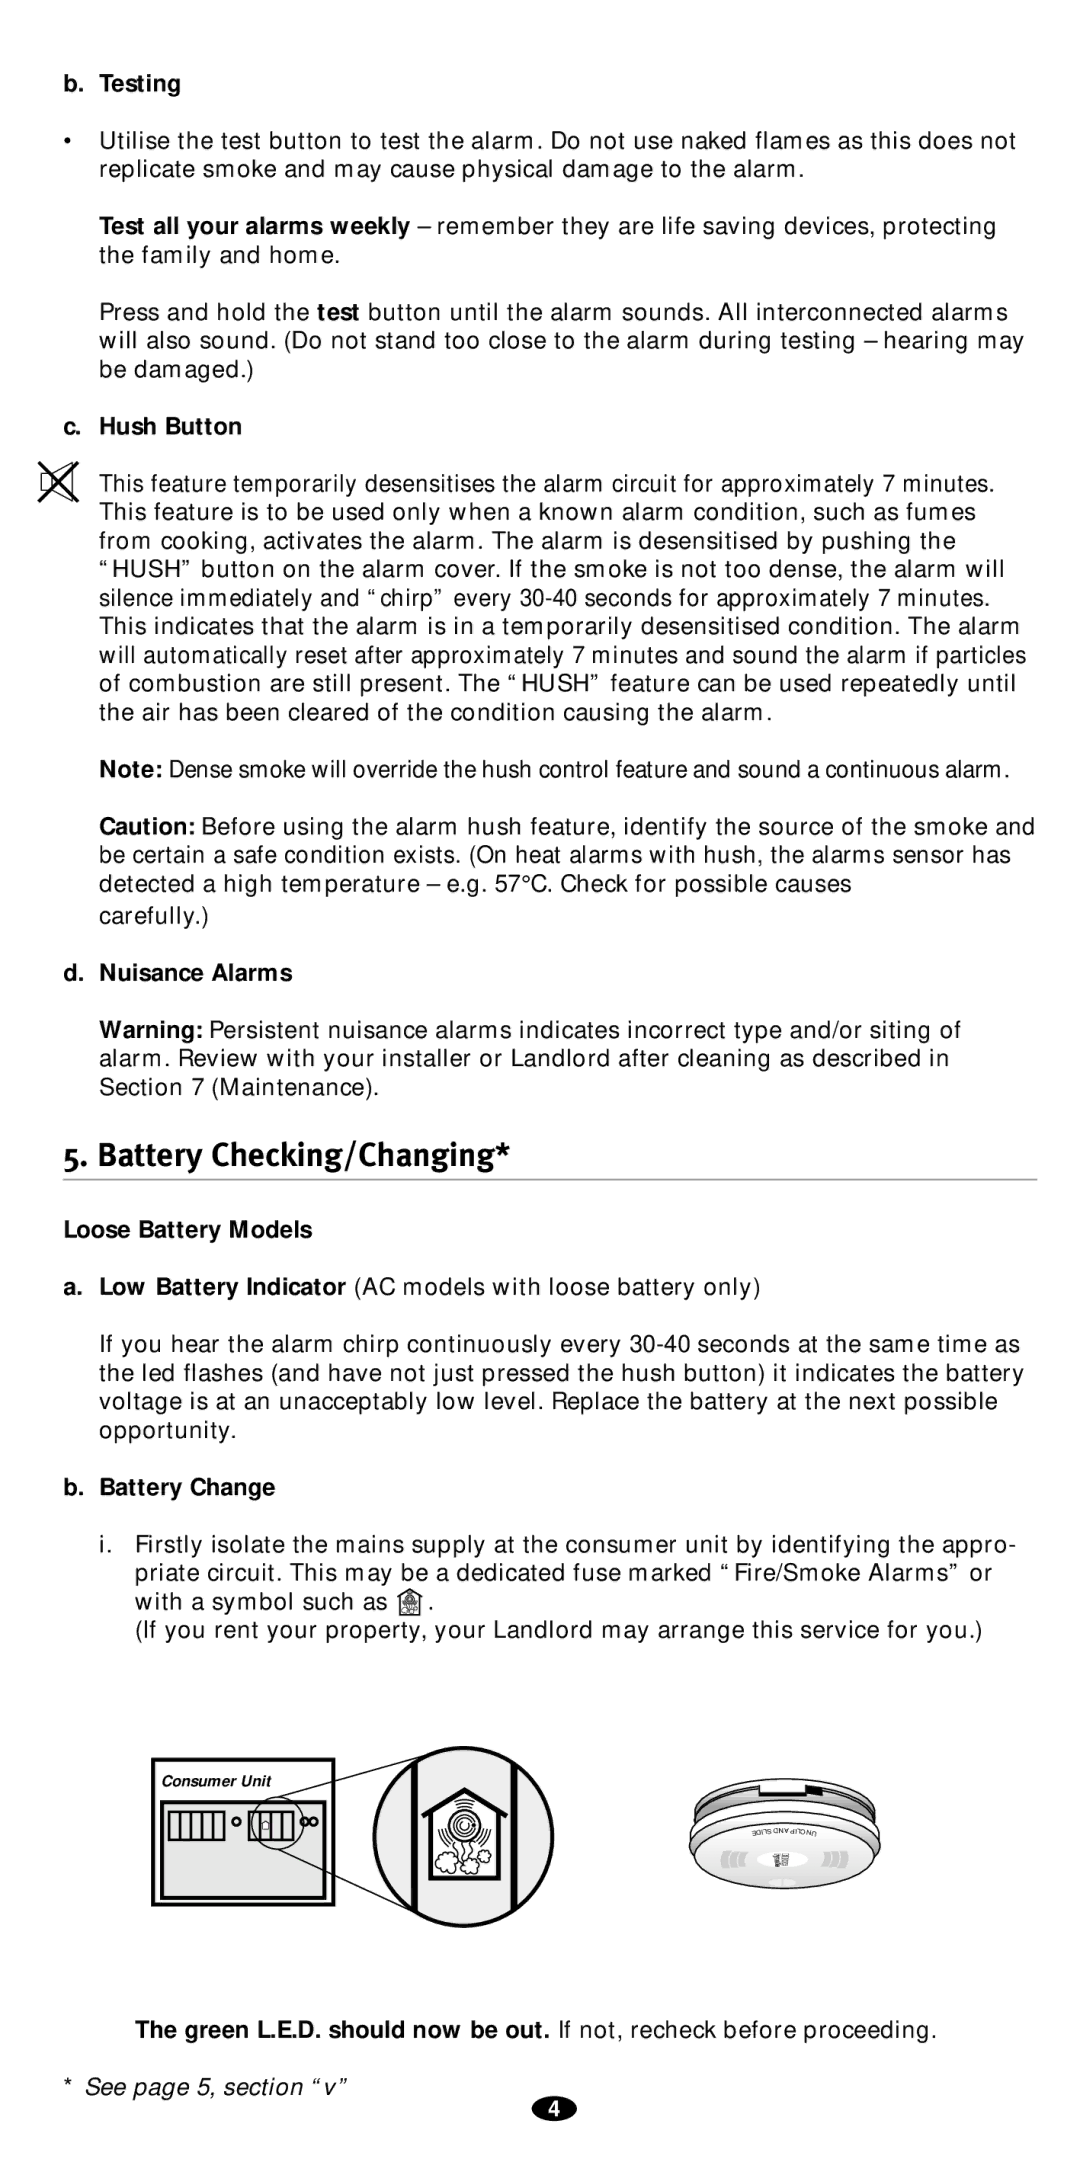
i.Firstly isolate the mains supply at the consumer unit by identifying the appro-
priate circuit. This may be a dedicated fuse marked “Fire/Smoke Alarms” or
with a symbol such as ![]() .
.
(If you rent your property, your Landlord may arrange this service for you.)
Consumer Unit
EDILS
DNA PILCNU
The green L.E.D. should now be out. If not, recheck before proceeding.
*See page 5, section “v”
4