Complete Installation

1.Turn the water supply line valve to the “Open” position.

2.Turn the refrigerator switch to the ON position. See “Power On/Off Switch” in the Use & Care Guide for instructions. Wait a few minutes. Check the water line connections for leaks.

3.Remove all boxes, parts packages and packing materials from the interior of the refrigerator. See the “Cleaning” section in the Use & Care Guide for instructions. Remove the protective film and cardboard from the grille and doors or door frame, depending on your model.

4.Install the shelves and bins in the refrigerator and freezer compartments.

5.The controls are preset at the factory to the midpoint setting. Check to be sure that the compressor is operating properly and that all the lights are working.

6.Flush the water system before use. See “Water System Preparation.”

To get the most efficient use from your new built-in refrigerator, read your Use & Care Guide. Keep Installation Instructions and Use & Care Guide near the built-in refrigerator for easy reference.

Water System Preparation

Please read before using the water system.

Immediately after installation, follow the steps below to make sure that the water system is properly cleaned.

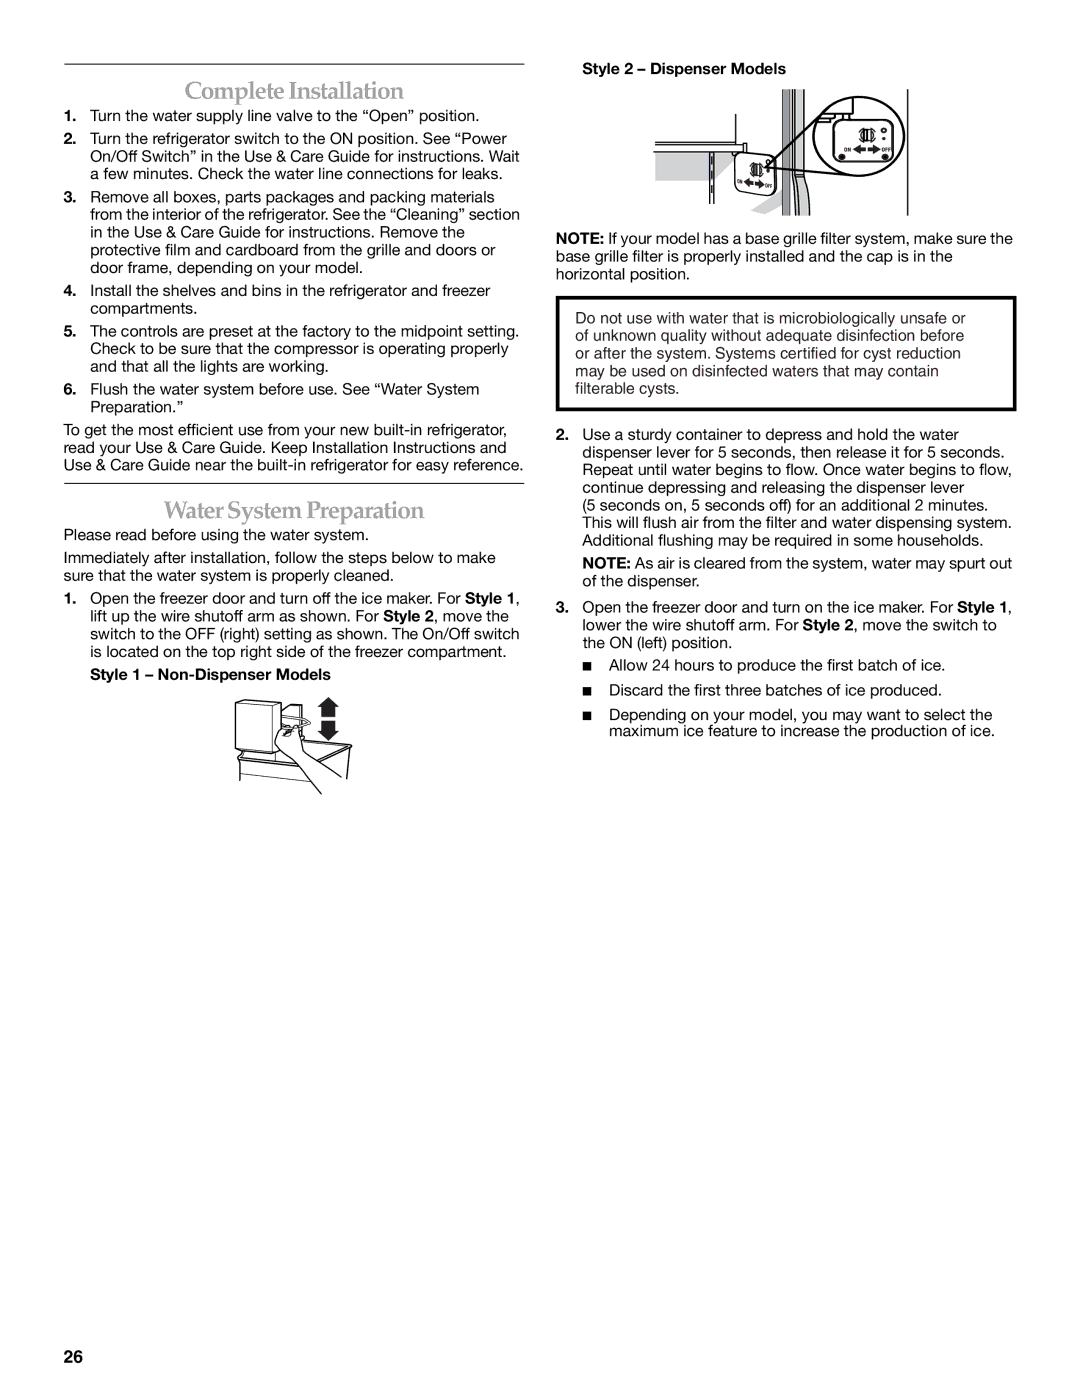
1.Open the freezer door and turn off the ice maker. For Style 1, lift up the wire shutoff arm as shown. For Style 2, move the switch to the OFF (right) setting as shown. The On/Off switch is located on the top right side of the freezer compartment.

Style 1 – Non-Dispenser Models

Style 2 – Dispenser Models

NOTE: If your model has a base grille filter system, make sure the base grille filter is properly installed and the cap is in the horizontal position.

Do not use with water that is microbiologically unsafe or of unknown quality without adequate disinfection before or after the system. Systems certified for cyst reduction may be used on disinfected waters that may contain filterable cysts.

2.Use a sturdy container to depress and hold the water dispenser lever for 5 seconds, then release it for 5 seconds. Repeat until water begins to flow. Once water begins to flow, continue depressing and releasing the dispenser lever

(5 seconds on, 5 seconds off) for an additional 2 minutes. This will flush air from the filter and water dispensing system. Additional flushing may be required in some households.

NOTE: As air is cleared from the system, water may spurt out of the dispenser.

3.Open the freezer door and turn on the ice maker. For Style 1, lower the wire shutoff arm. For Style 2, move the switch to the ON (left) position.

Allow 24 hours to produce the first batch of ice.

Discard the first three batches of ice produced.

Depending on your model, you may want to select the maximum ice feature to increase the production of ice.

26

Page 26
Image 26
KitchenAid 2316565B Complete Installation, Water System Preparation, Style 1 Non-Dispenser Models Style 2 Dispenser Models

2316565B specifications

The KitchenAid 2316565B is a versatile and powerful kitchen appliance that enhances the cooking experience for home chefs and baking enthusiasts alike. Known for its durable construction and innovative features, this stand mixer is a must-have tool in any modern kitchen.

One of the standout features of the KitchenAid 2316565B is its robust 325-watt motor. This powerful motor ensures that the mixer can handle a variety of tasks, from kneading dense bread dough to whipping egg whites into fluffy peaks. The mixer operates with a reliable planetary mixing action, which means that the bowl and the beater rotate in opposite directions, ensuring that all ingredients are mixed thoroughly and evenly.

The KitchenAid 2316565B boasts a large capacity bowl that can hold up to 5 quarts. This generous size allows for mixing large batches of dough or batter, making it ideal for large families or entertaining guests. The stainless steel bowl is not only sturdy but also comes with a comfortable handle and is dishwasher safe, making cleanup a breeze.

Another impressive feature of this stand mixer is its 10-speed screw control. This allows users to easily adjust the mixing speed for various tasks, from slow stirring to fast whipping. The precision of the speed settings ensures that users can achieve the perfect consistency for every recipe.

KitchenAid has also designed the 2316565B with a tilt-head mechanism. This thoughtful design allows for easy access to the mixing bowl and makes it simple to add ingredients while the mixer is in operation. The mixer comes with a range of accessories, including a flat beater, a dough hook, and a wire whip, catering to different mixing needs and recipes.

In addition to its functionality, the KitchenAid 2316565B is available in a variety of colors, allowing users to choose one that fits their kitchen aesthetic. The mixer's classic design and robust performance make it not only a practical kitchen tool but also a stylish addition to any countertop.

Overall, the KitchenAid 2316565B stand mixer is a reliable, efficient, and aesthetically pleasing appliance that provides an enjoyable cooking experience. Whether you're a beginner in the kitchen or a seasoned chef, this stand mixer is designed to meet all your mixing, kneading, and whipping needs, making it a valuable addition to any home.