
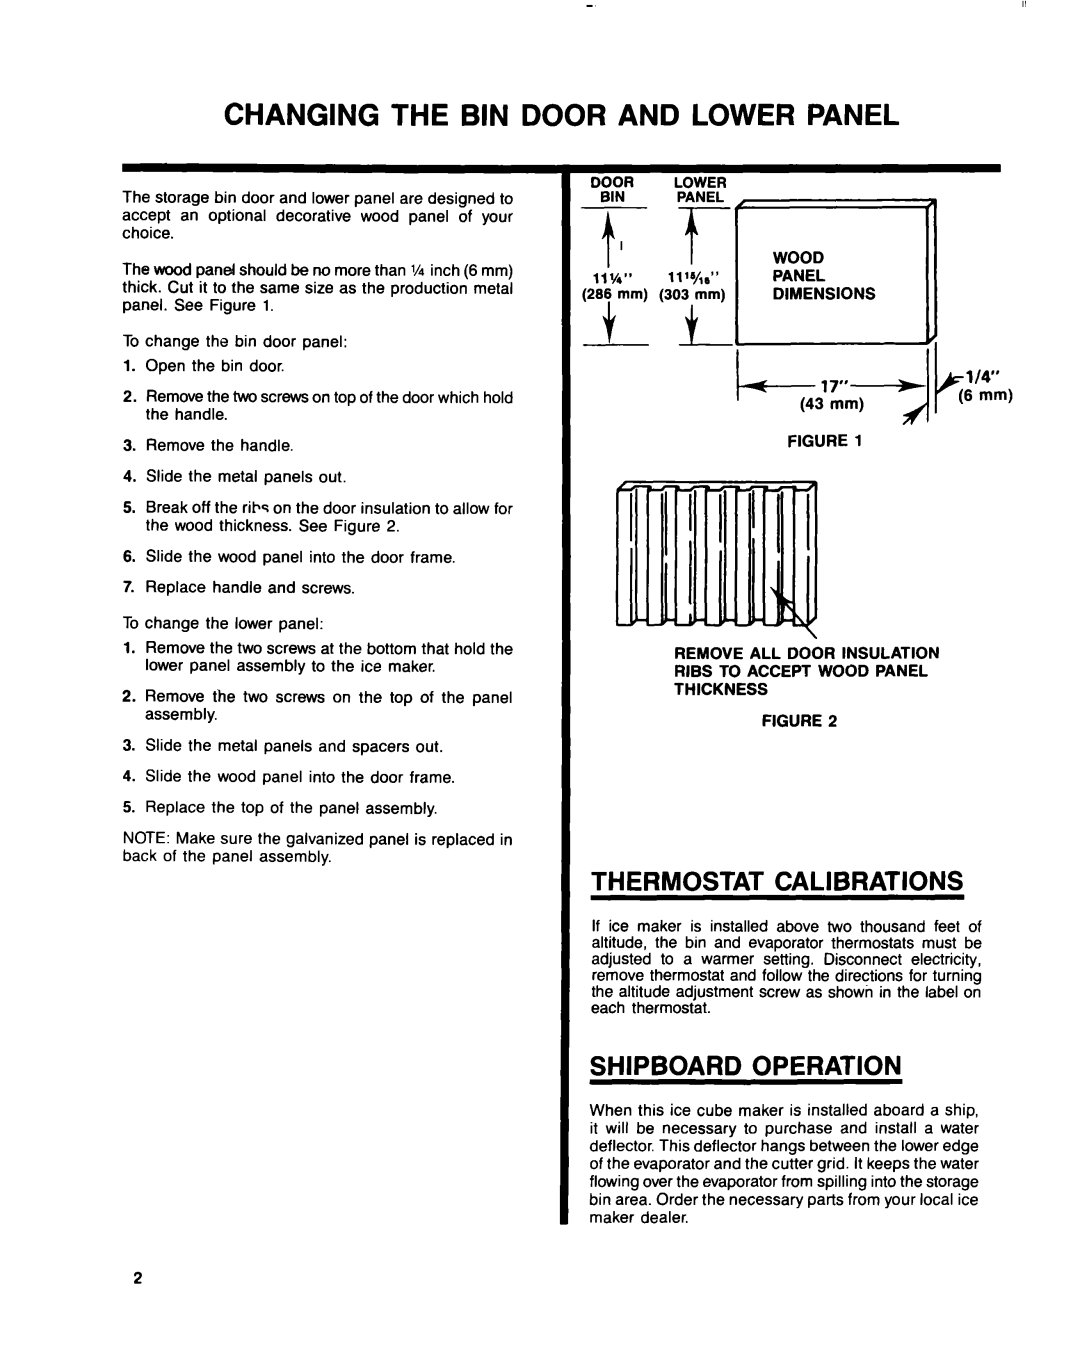
4KUIS185S specifications
The KitchenAid 4KUIS185S is an innovative kitchen appliance that has redefined the way users think about ice making and beverage cooling. As a leading product in KitchenAid's lineup, this unit combines form and function, offering both aesthetics and functionality that cater to the modern kitchen.One of the standout features of the KitchenAid 4KUIS185S is its impressive ice-making capabilities. This unit can produce up to 26 pounds of ice in a 24-hour period, ensuring you will never run out of ice during gatherings or special occasions. The clear, hard ice produced is perfect for a variety of beverages, from cocktails to soft drinks, and offers a clear and luxurious look that elevates any drink presentation.
The KitchenAid 4KUIS185S also features a self-cleaning function, which makes maintenance a breeze. With just the touch of a button, users can activate the self-cleaning cycle, ensuring that the unit remains hygienic and free of any buildup over time. This characteristic not only enhances convenience but also prolongs the lifespan of the ice maker.
Another important aspect of the KitchenAid 4KUIS185S is its compact design, which allows it to fit seamlessly into any kitchen setting. The sleek stainless steel finish not only adds a modern touch but is also highly durable and resistant to fingerprints, making it easy to keep clean. The unit can easily blend in with other kitchen appliances, serving as an attractive addition to both countertop and built-in settings.
The ice maker is equipped with smart technology that allows for easy operation and monitoring. A user-friendly control panel lets users adjust settings with ease, and an alert system notifies when the ice bin is full or when the water level is low. This ensures that users can consistently enjoy fresh ice without the hassle of manual checks.
In terms of energy efficiency, the KitchenAid 4KUIS185S is designed to consume lower amounts of energy compared to traditional ice makers, making it an environmentally friendly choice. It operates quietly, allowing for use in any setting without disrupting the ambiance.
Overall, the KitchenAid 4KUIS185S is an exceptional appliance that brings convenience, efficiency, and style to the kitchen. With its impressive ice-making capabilities, self-cleaning feature, and user-friendly operation, it is a must-have for anyone looking to enhance their culinary experience. Whether for parties, family gatherings, or everyday use, this ice maker proves to be a valuable addition to any home.