WARNING

Tip Over Hazard

A child or adult can tip the range and be killed.

Connect anti-tip bracket to wall behind range.

Reconnect the anti-tip bracket, if the range is moved.

Failure to follow these instructions can result in death or serious burns to children and adults.

INSTALLATION REQUIREMENTS

Tools and Parts

Gather the required tools and parts before starting installation. Read and follow the safety instructions provided with any tools listed here.

Tools needed

Tape measure

¹⁵⁄₁₆" combination wrench

Flat-blade screwdriver

Marker or pencil

Phillips screwdriver

Masking tape

Level

Pipe-joint compound

Hand or electric drill


resistant to LP gas

Noncorrosive leak-detection

Channel lock pliers


solution


Pipe wrench


Stud finder


Parts needed

A UL listed or CSA approved conduit connector

UL listed wire nuts

Parts supplied

Check that all parts are included.

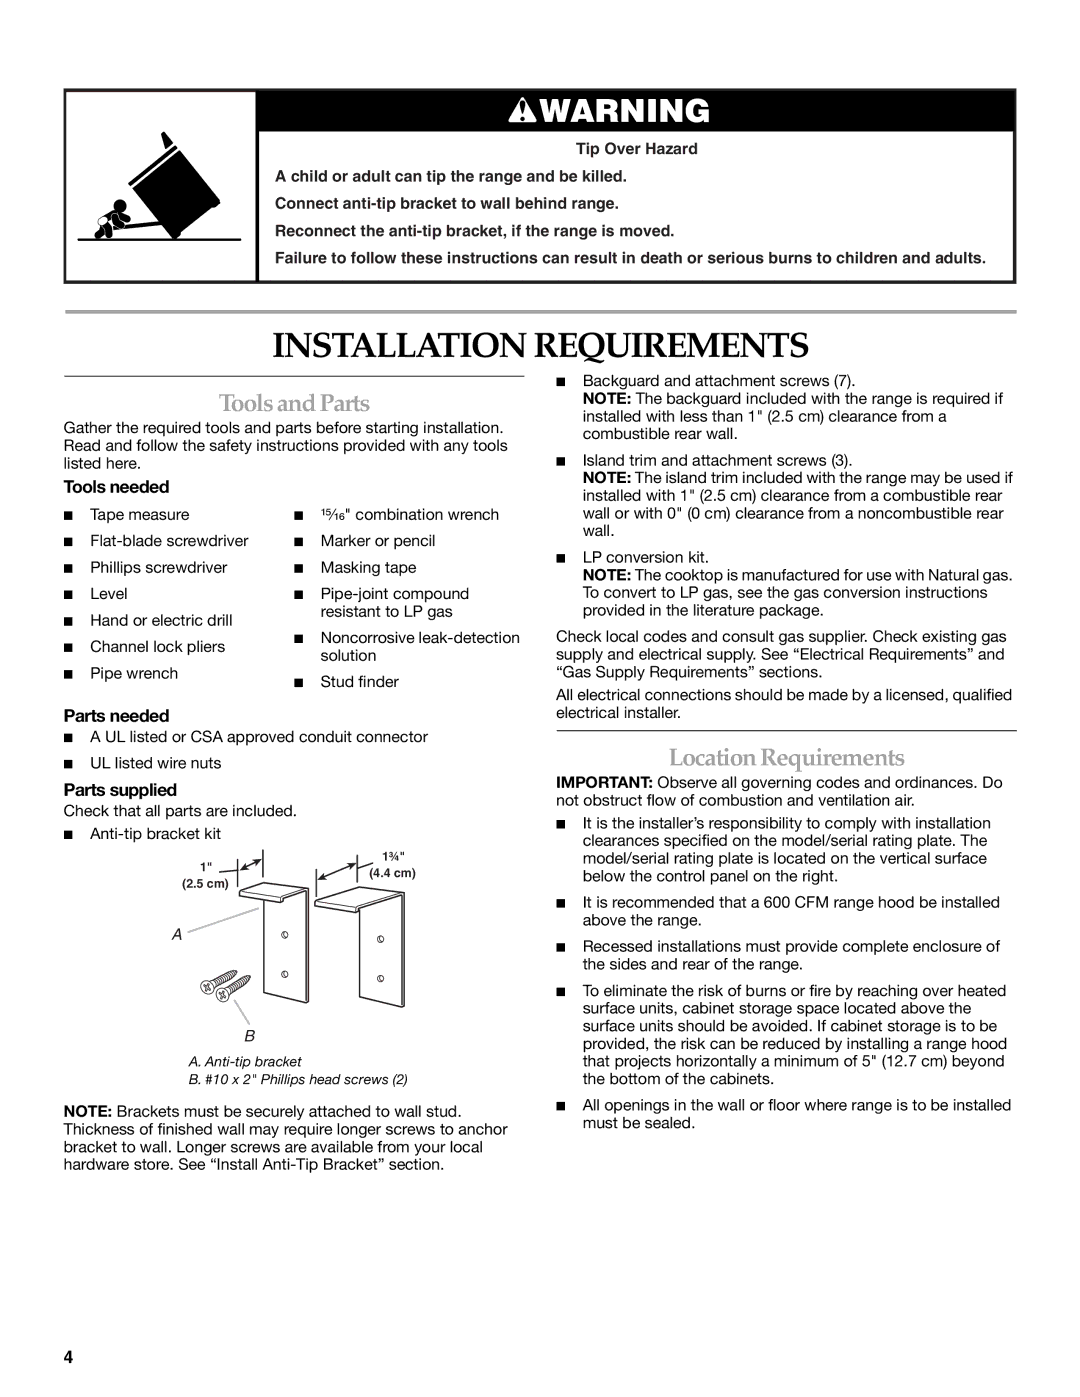
Anti-tip bracket kit

1"

1¾"

(4.4 cm)

(2.5 cm)


A

B

A.Anti-tip bracket

B.#10 x 2" Phillips head screws (2)

NOTE: Brackets must be securely attached to wall stud. Thickness of finished wall may require longer screws to anchor bracket to wall. Longer screws are available from your local hardware store. See “Install Anti-Tip Bracket” section.

Backguard and attachment screws (7).

NOTE: The backguard included with the range is required if installed with less than 1" (2.5 cm) clearance from a combustible rear wall.

Island trim and attachment screws (3).

NOTE: The island trim included with the range may be used if installed with 1" (2.5 cm) clearance from a combustible rear wall or with 0" (0 cm) clearance from a noncombustible rear wall.

LP conversion kit.

NOTE: The cooktop is manufactured for use with Natural gas. To convert to LP gas, see the gas conversion instructions provided in the literature package.

Check local codes and consult gas supplier. Check existing gas supply and electrical supply. See “Electrical Requirements” and “Gas Supply Requirements” sections.

All electrical connections should be made by a licensed, qualified electrical installer.

Location Requirements

IMPORTANT: Observe all governing codes and ordinances. Do not obstruct flow of combustion and ventilation air.

It is the installer’s responsibility to comply with installation clearances specified on the model/serial rating plate. The model/serial rating plate is located on the vertical surface below the control panel on the right.

It is recommended that a 600 CFM range hood be installed above the range.

Recessed installations must provide complete enclosure of the sides and rear of the range.

To eliminate the risk of burns or fire by reaching over heated surface units, cabinet storage space located above the surface units should be avoided. If cabinet storage is to be provided, the risk can be reduced by installing a range hood that projects horizontally a minimum of 5" (12.7 cm) beyond the bottom of the cabinets.

All openings in the wall or floor where range is to be installed must be sealed.

4

Page 4
Image 4
KitchenAid Cooktop installation instructions Installation Requirements, Tools and Parts, Location Requirements

Cooktop specifications

The KitchenAid Cooktop stands as a paragon of innovative design and advanced culinary technology, designed to elevate your cooking experience. This premium kitchen appliance combines functionality, style, and performance, catering to both amateur home cooks and seasoned culinary professionals.

One of the main features of the KitchenAid Cooktop is its versatility. Available in both gas and electric options, the cooktop accommodates a diverse range of cooking methods. The gas models boast powerful burners that provide precise temperature control, while the electric induction options offer rapid heating and quick response times that allow for seamless transitions between simmering and boiling.

The cooktop's impressive design features a sleek, minimalist aesthetic that enhances any modern kitchen. With options for both stainless steel and black finishes, it integrates harmoniously with a variety of kitchen styles. The surface is crafted from durable materials, ensuring resistance to scratches and stains while making cleaning straightforward and hassle-free.

One of the standout technologies integrated into the KitchenAid Cooktop is its advanced induction cooking system. This system uses magnetic fields to heat cookware directly, ensuring efficient energy use and a cooler cooking surface. This not only reduces the risk of burns but also allows for easier cleanup, as spills and splatters are less likely to scorch on the cool surface.

Another critical feature is the even heat distribution technology found in certain models. This ensures that food is cooked uniformly, reducing the chances of hot or cold spots that can lead to uneven cooking. Additionally, the cooktop is equipped with intuitive touch controls for precise settings and timer functions, giving users ultimate command over their culinary creations.

Safety is paramount in the design of the KitchenAid Cooktop. Features such as automatic shut-off, hot surface indicators, and child lock safety functions are designed to protect users and provide peace of mind during operation.

In summary, the KitchenAid Cooktop epitomizes the perfect blend of aesthetics, technology, and safety. From its versatile cooking options to its advanced induction technology and user-friendly design, this cooktop is a testament to KitchenAid's commitment to quality and innovation in the culinary appliance market. Whether you're sautéing vegetables or simmering sauces, the KitchenAid Cooktop delivers a reliable and efficient cooking experience that enhances any kitchen.