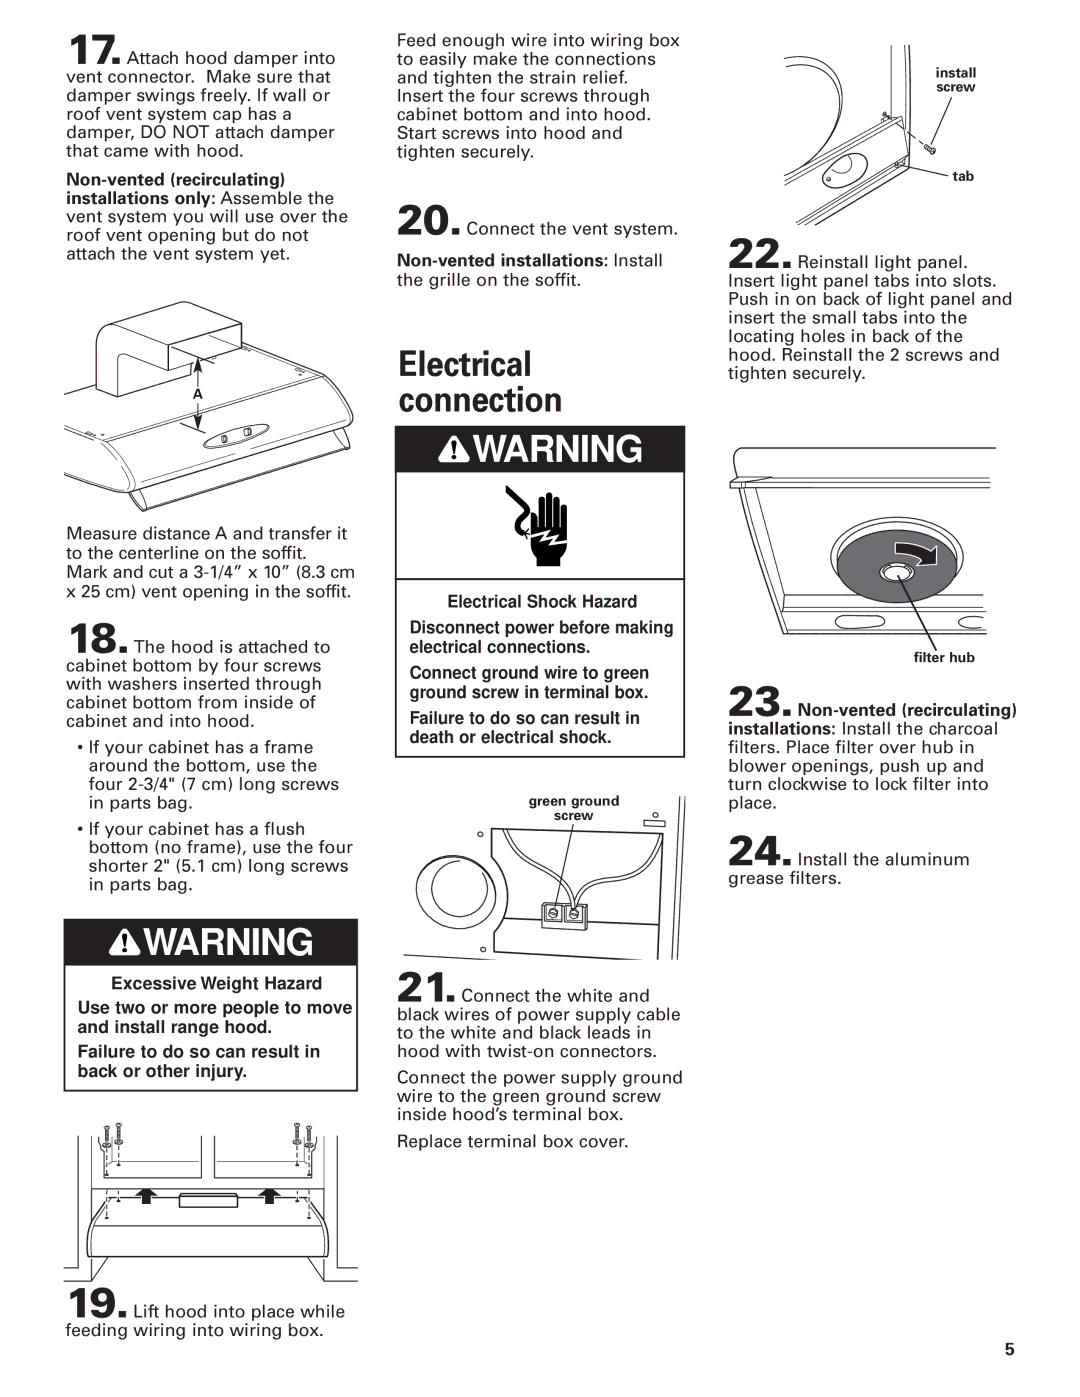
17.Attach hood damper into vent connector. Make sure that damper swings freely. If wall or roof vent system cap has a damper, DO NOT attach damper that came with hood.

Non-vented (recirculating) installations only: Assemble the vent system you will use over the roof vent opening but do not attach the vent system yet.

A

Measure distance A and transfer it to the centerline on the soffit. Mark and cut a 3-1/4” x 10” (8.3 cm x 25 cm) vent opening in the soffit.

18.The hood is attached to cabinet bottom by four screws with washers inserted through cabinet bottom from inside of cabinet and into hood.

If your cabinet has a frame around the bottom, use the four 2-3/4" (7 cm) long screws in parts bag.

If your cabinet has a flush bottom (no frame), use the four shorter 2" (5.1 cm) long screws in parts bag.

WARNING

Excessive Weight Hazard

Use two or more people to move and install range hood.

Failure to do so can result in back or other injury.

19.Lift hood into place while feeding wiring into wiring box.

Feed enough wire into wiring box to easily make the connections and tighten the strain relief. Insert the four screws through cabinet bottom and into hood. Start screws into hood and tighten securely.

20.Connect the vent system.

Non-vented installations: Install

the grille on the soffit.

Electrical connection

WARNING

Electrical Shock Hazard

Disconnect power before making electrical connections.

Connect ground wire to green ground screw in terminal box.

Failure to do so can result in death or electrical shock.

green ground

screw

21.Connect the white and black wires of power supply cable to the white and black leads in hood with twist-on connectors.

Connect the power supply ground wire to the green ground screw inside hood’s terminal box.

Replace terminal box cover.

install screw

tab

22.Reinstall light panel. Insert light panel tabs into slots. Push in on back of light panel and insert the small tabs into the locating holes in back of the hood. Reinstall the 2 screws and tighten securely.

filter hub

23.Non-vented (recirculating)

installations: Install the charcoal filters. Place filter over hub in blower openings, push up and turn clockwise to lock filter into place.

24.Install the aluminum grease filters.

5

Page 5
Image 5
KitchenAid KHTU100 Electrical connection, Non-vented installations Install, Non-vented recirculating

KHTU100 specifications

The KitchenAid KHTU100 is a powerful and versatile kitchen appliance designed to elevate your cooking experience. Known for its robust construction and user-friendly features, this unit is perfect for home chefs seeking efficiency and convenience.

One of the standout features of the KHTU100 is its powerful heating element that ensures consistent and precise temperature control. Whether you're sautéing vegetables, simmering sauces, or slow-cooking hearty stews, this appliance delivers even heat distribution for optimal results every time.

Equipped with a large capacity, the KHTU100 is designed to accommodate various dishes. Its spacious interior allows you to prepare meals for the entire family, making it an excellent choice for gatherings and special occasions. The non-stick coating ensures easy cleanup and reduces the risk of food sticking, allowing you to focus more on cooking and less on scrubbing.

The KHTU100 comes with multiple cooking modes, including steaming, slow cooking, and reheating, which cater to a wide range of cooking preferences. This multi-functionality means that you can experiment with different cooking techniques without needing multiple appliances cluttering your kitchen. The intuitive control panel makes it easy to select the desired function, temperature, and cooking time.

Another notable technology in the KHTU100 is its built-in safety features. It includes an automatic shut-off function that activates after a predetermined time, providing peace of mind when you're busy with other tasks in the kitchen. This is particularly beneficial for busy families or anyone who often multitasks while cooking.

The sleek design of the KitchenAid KHTU100 not only makes it aesthetically pleasing but also functional. The compact size allows it to fit neatly on your countertop without occupying too much space. The stylish exterior is available in several colors, ensuring that it will complement any kitchen decor.

In summary, the KitchenAid KHTU100 is a versatile and reliable kitchen appliance that combines power, efficiency, and safety. With its multiple cooking modes, easy-to-clean surfaces, and appealing design, it's an excellent addition to any kitchen. Whether you are a novice or an experienced chef, the KHTU100 is poised to enhance your culinary adventures.