TABLE OF CONTENTS
INSTALLATION REQUIREMENTS | 2 |
INSTALLATION INSTRUCTIONS | 2 |
FAUCET USE | 4 |
FAUCET CARE | 4 |
TROUBLESHOOTING | 5 |
REPLACEMENT PARTS LISTS | 6 |
WARRANTY | 8 |
INSTALLATION
REQUIREMENTS
ToolsandParts
Gather the required tools before starting installation. Remove parts from carton. Check that all parts are included.
Tools Needed:
■ | Adjustable wrench | ■ | #2 Phillips screwdriver |
■ | Basin wrench (optional) | ■ | Slip joint pliers |
INSTALLATION
INSTRUCTIONS
IMPORTANT:
■It is recommended that a qualified plumber/installer install the faucet. The faucet installation must comply with national and local plumbing codes and ordinances.
■The faucet should be examined for damage prior to installation. Do not install a damaged faucet. Instead, return the faucet to the dealer from whom you purchased it.
Parts Supplied:
All models:
■Faucet assembly
■⁵⁄₆₄" Allen wrench
■Mounting assembly
InstalltheFaucet
IMPORTANT:
■Before installing the faucet, flush water supply pipes thoroughly. Shut off water supply valves.
■Follow the installation instructions specific to your faucet model.
Models KKFV01SP and KKFV01PP
Model series KKFV01SP and KKFV01PP:
■ Weights (2) | ■ Check valve assembly |
|
LocationRequirements
IMPORTANT:
■Observe all governing codes and ordinances.
■Check location where faucet will be installed. Proper installation is your responsibility. Make sure you have everything necessary for installation. It is the responsibility of the installer to comply with installation specifications and with state and local plumbing codes.
■Keep faucet and water lines leading to faucet from freezing to avoid damage.
■The faucet requires a 1³⁄₈" (3.5 cm) diameter opening in sink or countertop. If there is no hole for mounting, it is recommended that you contact a qualified installer to drill the hole for your installation in a sink deck or countertop.
NOTE: The thickness of the sink or countertop must not exceed 1³⁄₄" (4.4 cm).
■Hot and cold water supply lines must be available. If the water lines are not available, it is recommended that you contact a qualified plumber to install the necessary piping.
■Faucet hoses are equipped with compression type seals and do not require sealing compound to keep from leaking.
■As with all metal objects, follow proper handling techniques.
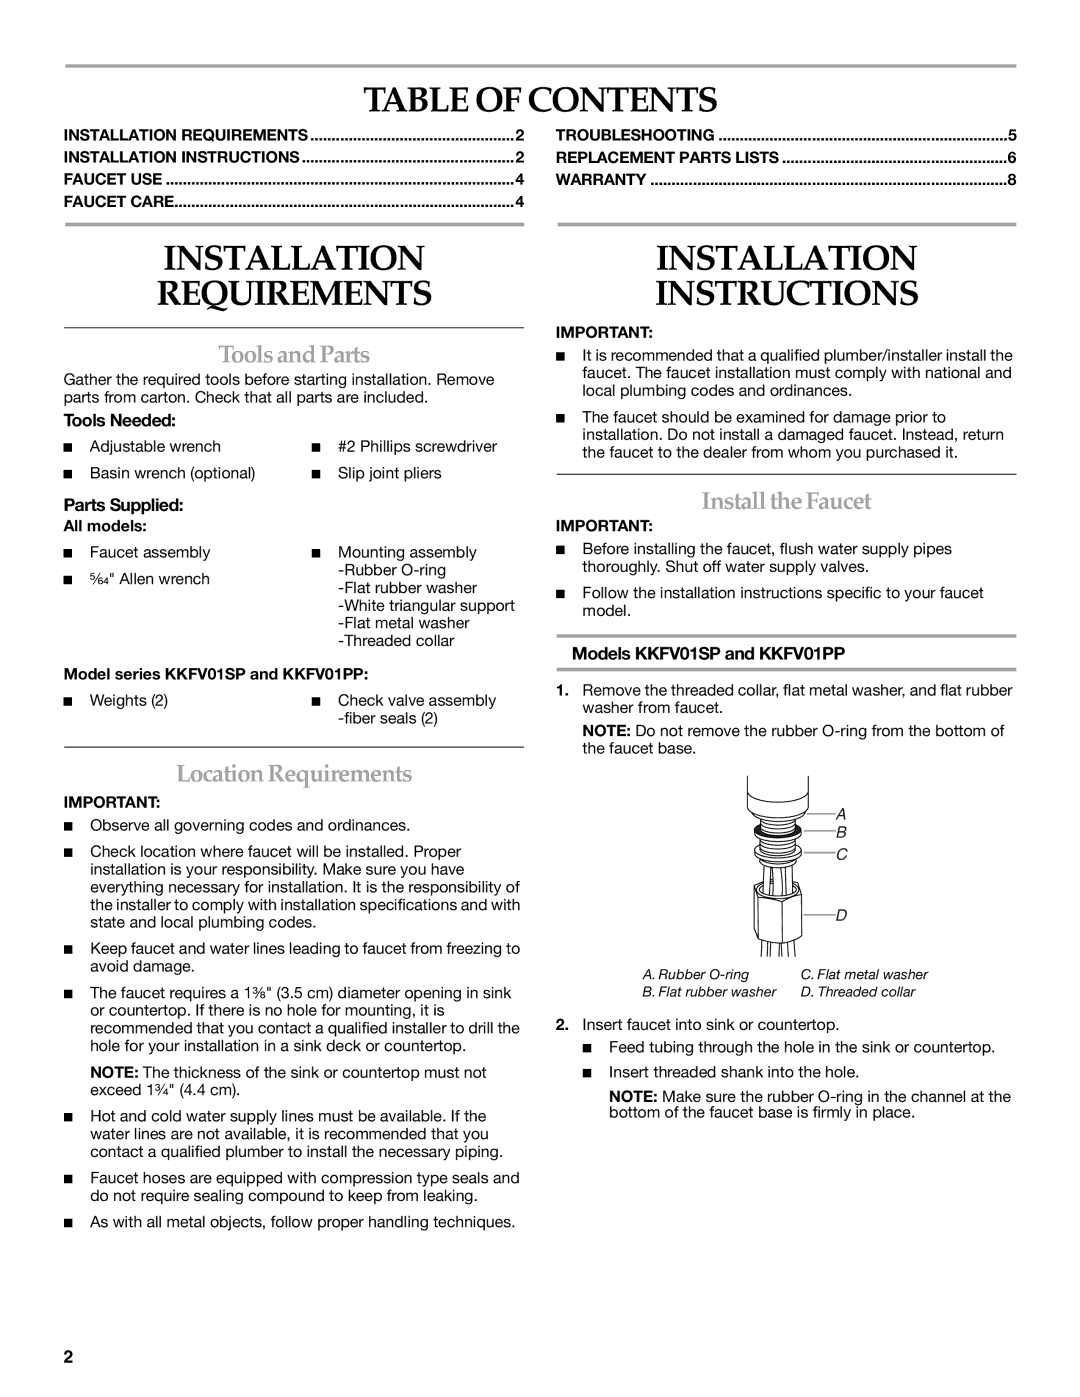
1.Remove the threaded collar, flat metal washer, and flat rubber washer from faucet.
NOTE: Do not remove the rubber
| A |
| B |
| C |
| D |
A. Rubber | C. Flat metal washer |
B. Flat rubber washer | D. Threaded collar |
2.Insert faucet into sink or countertop.
■Feed tubing through the hole in the sink or countertop.
■Insert threaded shank into the hole.
NOTE: Make sure the rubber
2