
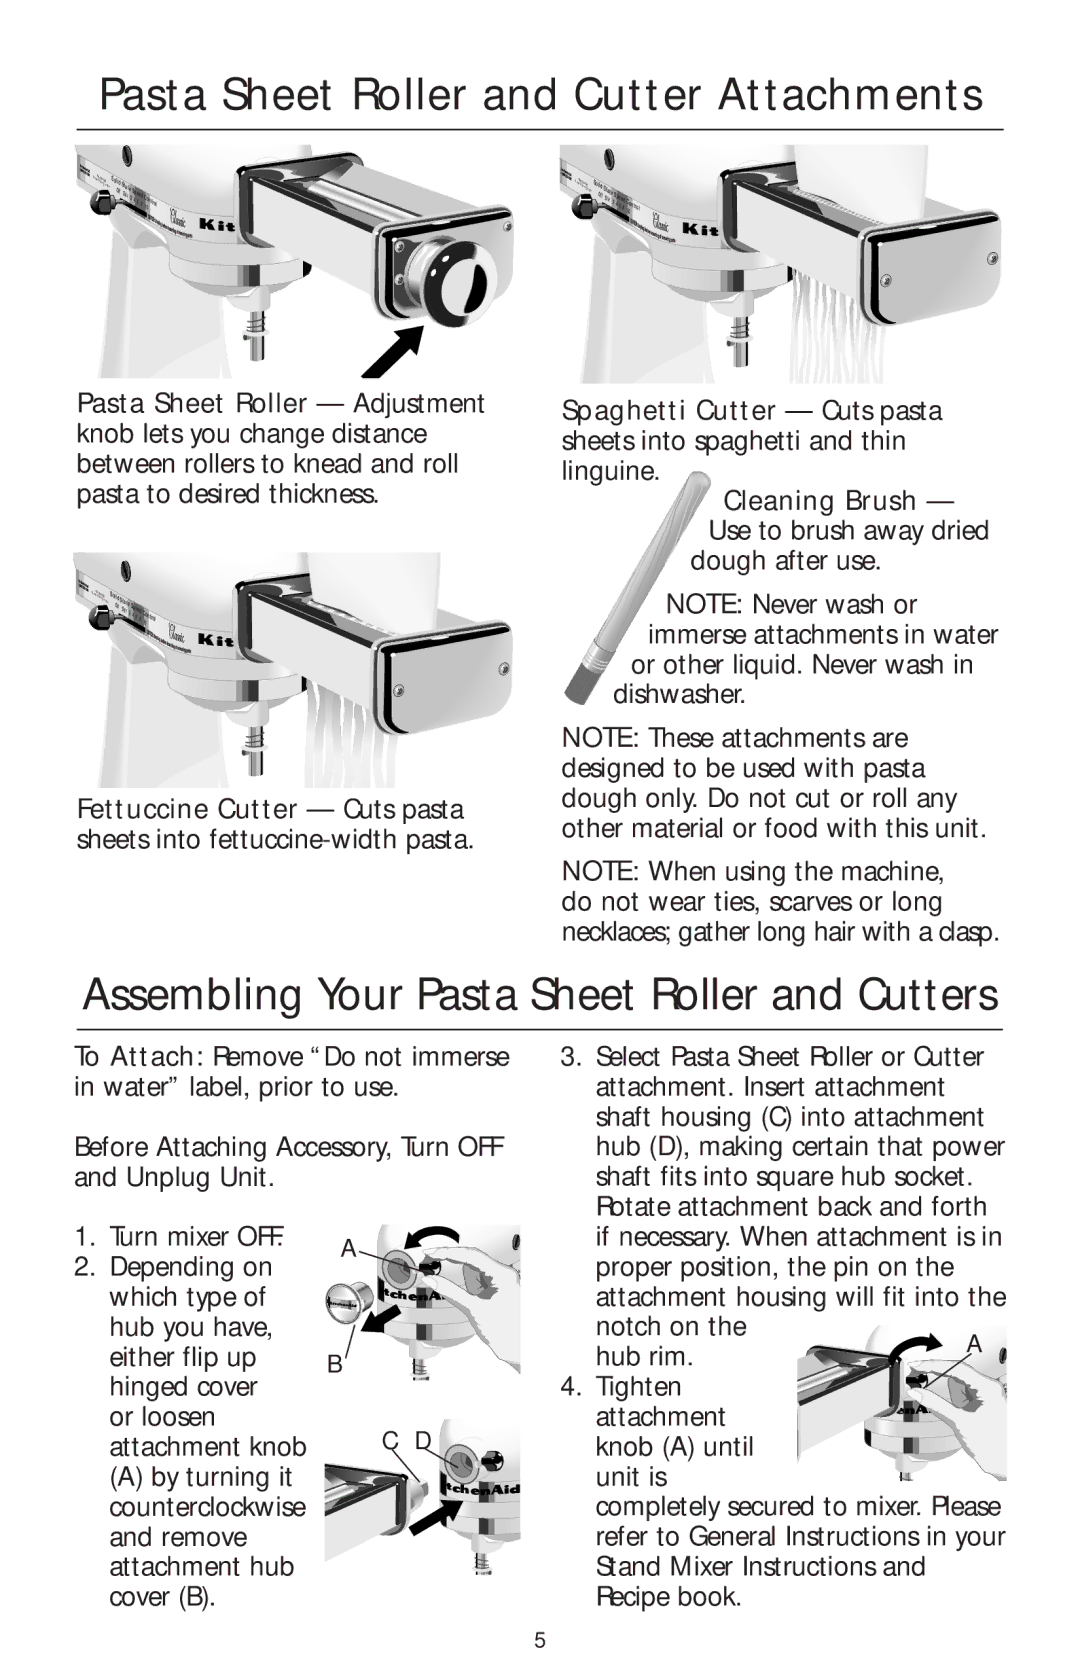
KPRA specifications
The KitchenAid KPRA, a versatile pasta roller and cutter set, is designed for home cooks who are serious about making fresh pasta from scratch. This unique attachment is specifically designed to fit KitchenAid stand mixers, leveraging their power and functionality to simplify the pasta-making process. The KPRA consists of a set of three components: a dough roller and two cutting attachments for fettuccine and spaghetti.One of the standout features of the KPRA is its adjustable roller. The roller allows users to create pasta sheets of varying thicknesses, from a delicate lasagna to a thicker noodle suitable for more robust dishes. The adjustment mechanism is straightforward, featuring a simple dial that lets you easily select the desired thickness in order to achieve perfect pasta every time.
The KPRA's design includes high-quality stainless steel construction, ensuring durability and longevity. The cutting blades are sharp and crafted to provide clean cuts, resulting in evenly shaped noodles that cook uniformly. The attachment's components are also easy to clean; the pasta roller and cutters can be wiped down or brushed off after use. However, it's recommended to avoid washing them in the dishwasher to maintain their finish and functionality.
Another technological highlight of the KPRA is its seamless connection to KitchenAid mixers. Once attached, the user benefits from the power of the stand mixer, which eliminates the strenuous effort typically required for kneading and rolling out pasta dough. This innovative attachment transforms the often time-consuming process of pasta making into a more efficient and streamlined experience, encouraging home cooks to experiment with different types of pasta and sauces.
In terms of versatility, the KPRA is suitable for a wide range of pasta styles, from traditional Italian favorites to modern twists. Users can create a variety of dishes, from ravioli to tagliatelle, making it an essential addition for any pasta lover's kitchen.
In summary, the KitchenAid KPRA is an indispensable tool for those looking to elevate their home cooking. With its adjustable roller, high-quality blade construction, and seamless integration with KitchenAid mixers, the KPRA empowers users to produce fresh, artisan-quality pasta easily and consistently. Whether you're a novice or a seasoned chef, this attachment is sure to inspire culinary creativity and passion for homemade pasta.