Timer

Fan Speed

The timer can be set from 1 to 60 minutes. The default timer setting is 10 minutes.

To use the timer:

1.Press the Timer button to enter the timer mode. After

5 seconds the default time will be automatically selected.

2.Press the Power Decrease and Power Increase buttons while the display is flashing (5 seconds) to adjust to the desired time. Pressing the timer button again or waiting 5 seconds after selecting the desired time will start the timer countdown.

Power Increase/On

This button is used to turn the fan On or increase the fan speed.

The fan will turn On if the Power Increase button is pressed and the hood was Off.

An audible tone will sound when the fan reaches its highest speed.

3.The timer can be canceled at any time by pressing the Timer button again.

NOTE: During the timer setup, the Power Decrease and Power Increase buttons are dedicated to the timer. After the timer starts, the Power Decrease and Power Increase buttons can be used for other functions.

Power Decrease/Off

This button is used to turn the fan Off or to decrease the fan speed.

Timed Fan Off

The control has a “Timed Fan Off” feature. When activated, it automatically turns the blower fan off after 10 minutes.

Press and hold the Timer button for 5 seconds to activate. The fan icon will flash and 10:00 (10 minutes) will show in the display. The time will start counting down after 3 seconds.

RANGE HOOD CARE

Cleaning

IMPORTANT: Clean the hood and grease filters frequently according to the following instructions. Replace grease filters before operating hood.

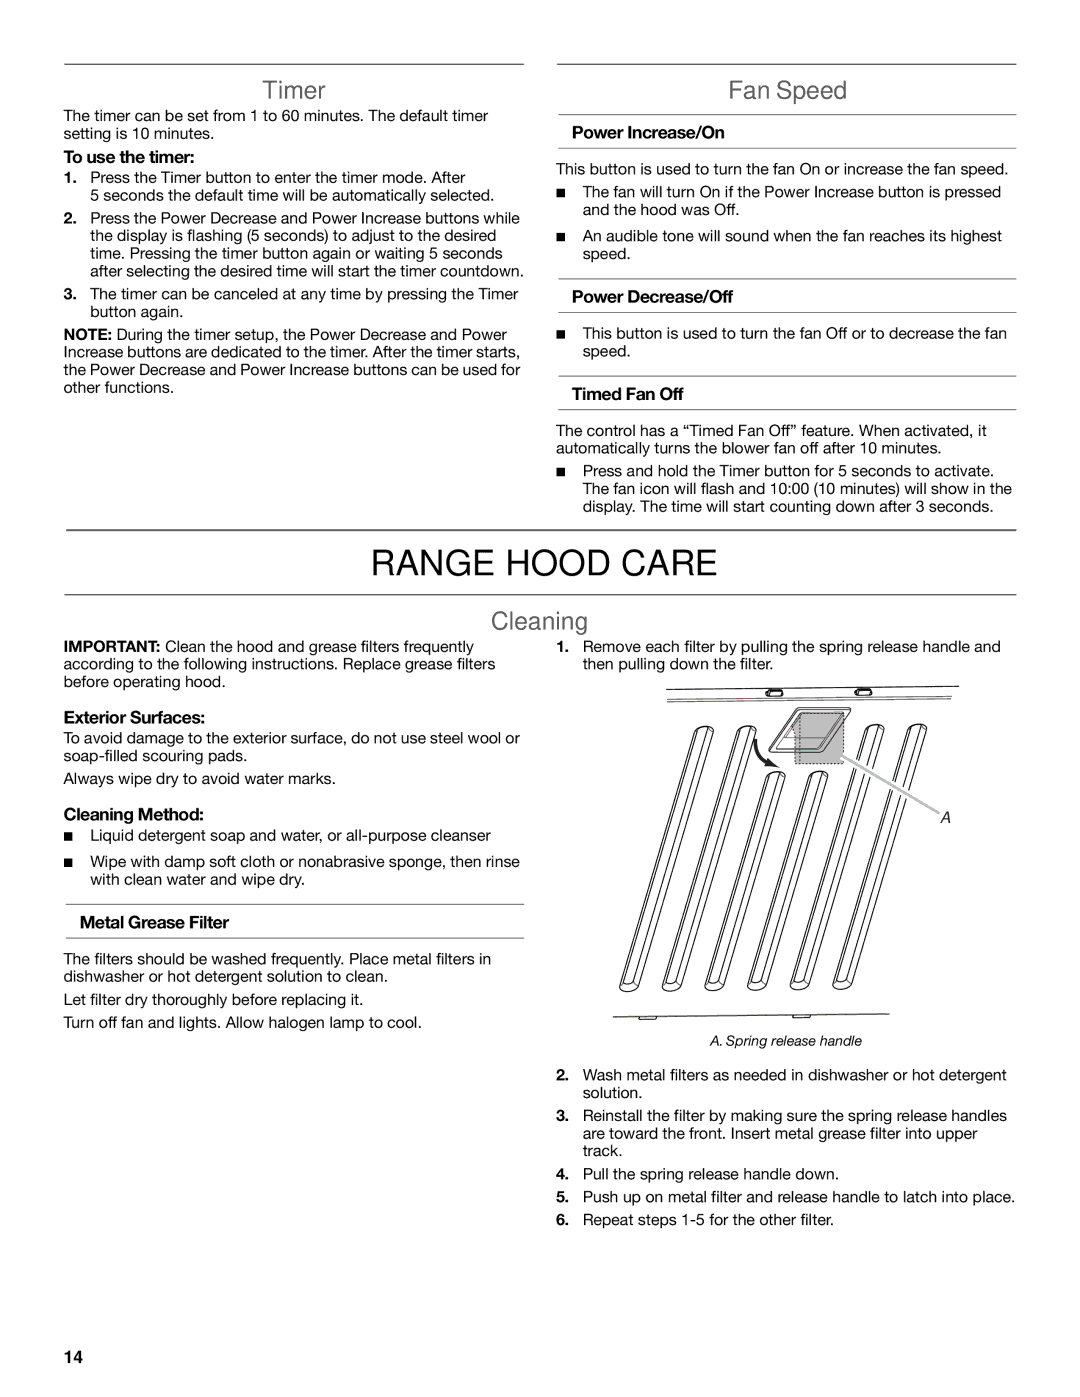
1.Remove each filter by pulling the spring release handle and then pulling down the filter.

Exterior Surfaces:

To avoid damage to the exterior surface, do not use steel wool or soap-filled scouring pads.

Always wipe dry to avoid water marks.

Cleaning Method:

Liquid detergent soap and water, or all-purpose cleanser

Wipe with damp soft cloth or nonabrasive sponge, then rinse with clean water and wipe dry.

Metal Grease Filter

The filters should be washed frequently. Place metal filters in dishwasher or hot detergent solution to clean.

Let filter dry thoroughly before replacing it.

Turn off fan and lights. Allow halogen lamp to cool.

A

A. Spring release handle

2.Wash metal filters as needed in dishwasher or hot detergent solution.

3.Reinstall the filter by making sure the spring release handles are toward the front. Insert metal grease filter into upper track.

4.Pull the spring release handle down.

5.Push up on metal filter and release handle to latch into place.

6.Repeat steps 1-5 for the other filter.

14

Page 14
Image 14
KitchenAid LI3ZGC/W10320581E installation instructions Range Hood Care, Timer, Cleaning

LI3ZGC/W10320581E specifications

The KitchenAid LI3ZGC/W10320581E is a versatile and efficient appliance that enhances the culinary experience for home chefs. With its sleek design and powerful capabilities, this kitchen tool stands out in any kitchen setting. One of the main features is its powerful motor, designed to handle a range of mixing tasks with ease. Whether you are kneading bread dough or whipping cream, the LI3ZGC combines efficiency with performance, ensuring consistent results every time.

One of the key technologies integrated into the KitchenAid LI3ZGC is its advanced planetary mixing action. This innovative system allows the mixing attachment to rotate around the bowl, while also spinning on its own axis. This unique motion ensures that all ingredients are thoroughly mixed, eliminating the need to scrape down the bowl frequently. This feature not only saves time but also enhances the quality of the final product.

Another standout characteristic of the LI3ZGC is its robust construction, designed for durability and longevity. Made from high-quality materials, this appliance can withstand heavy usage, making it ideal for both everyday cooking and special occasions. The sturdy design provides stability during operation, preventing any unwanted movement or slipping.

Additionally, the KitchenAid LI3ZGC/W10320581E comes with various attachments that expand its functionality. These attachments are tailored for specific tasks, such as mixing, whipping, and kneading, allowing users to tackle a wide array of recipes. The ease of switching attachments makes it simple to transition from one culinary task to another, making the cooking process streamlined and enjoyable.

The appliance is also designed with user-friendliness in mind. Intuitive controls and a clear design make it accessible for cooks of all skill levels. The LI3ZGC is not only powerful but also easy to clean, with many components being dishwasher-safe, which contributes to its overall convenience.

In summary, the KitchenAid LI3ZGC/W10320581E is a remarkable kitchen appliance that combines power, efficiency, and durability. With its advanced mixing technology, versatile attachments, and user-friendly design, it is an excellent addition to any kitchen, helping both novice and experienced cooks elevate their culinary creations.